Often the shape or structure of the nails deteriorates, causing us to constrain and making our appearance untidy. The basic coating will allow you to hide visual imperfections, while strengthening the nail plate. A transparent design will be appropriate to look at any event and with any outfit. Just for starters, you need to understand in more detail how to properly align the nail plate with the base.
When is it necessary to level the surface of the nail?
Often, nails can have a damaged structure or an initially deformed shape. They suffer greatly from unprofessional manicure, in particular from its incorrect removal. Sometimes the nail plate begins to delaminate due to insufficient amounts of calcium in the body. Brittle nails will not allow you to make an elegant manicure, preserving the natural length, as they break all the time.
Nails can be damaged due to physical impact. If it is incorrectly filed or trimmed, the form can become deformed and become simply ugly. But any physical imperfections are pretty easy to fix. There are several ways, for example, you can align the nail plate with the base. However, base coverage is not necessary to use solely to correct imperfections. Beautiful nails with the correct shape strengthen the base, making them visually more groomed and neat.
Description of gel polish and base
Gel polish quickly hardens, becoming very durable when exposed to special ultraviolet or LED lamps for drying. It acquires a solid structure that does not deteriorate over time. Gel polish lasts for two or more weeks, while not rubbing or cracking. Typically, the base coat is applied immediately before the color gel polish so that the final color is better laid. The color is even and the nail is perfectly smooth. Therefore, pre-aligning the nail plate with the base is very important for a good result.
The transparent base has the ability to smooth out imperfections, such as recesses on the nail plate. However, it is important to understand how to properly align the nail plate with a gel base.
An incorrectly applied coating will have an undesirable effect: it will give the form an excessive bulge.
The base can be not only transparent, but also camouflage: milk, pink, peach. An optimal coating will be of medium density or very thick, since liquid is not suitable for the formation of a flat surface. It spreads very much, with its help it will be difficult to make the necessary shape.
Benefits of basic coverage
Many people wonder how to align the nail plate with the base, so that it does not look like a solution to the problem with the nails, but like a regular manicure. The main advantage of the basic coating is precisely in its versatility. It can be applied not only as a preparatory layer for colored varnish. Transparent, evenly applied coating looks elegant and very attractive regardless of the shape of the nails. Moreover, the lack of a bright manicure will allow you to hide minor imperfections in the shape of a nail. And errors in the coating are not so noticeable on a transparent varnish, although they are best avoided.
Transparent natural manicure is suitable for women of any status and age. It will be appropriate to look both at a young girl and at a respectable lady. The base coat according to the dress code is combined with a strict office style, everyday or evening, it does not look defiant and very stylish.
Nail treatment before coating
Before you align the nail plate with a gel base, you should prepare the surface. So the coating will last longer, and the nail will look neater. First of all, you need to remove the cuticle. First, it must be softened using a special tool. Doing baths before performing manicure using gel materials is impossible, otherwise the effect will last very shortly. It is better to use a special remover.
The cuticle will become soft, supple, then it is shifted with an orange stick and trimmed with nail scissors.
Next, the nails are treated with a buff with an abrasive coating, which removes the glossy film from the nail. It will also allow to remove the layering without damaging the structure, so it is important not to press too hard. This method of processing, in other words, improves the adhesion of the nail to the varnish. Due to which it does not go off for so long and does not lose its properties. Additionally, a polishing file can be walked over the surface of the nail to smooth out the effect of buff treatment. Before aligning the nail plate with the base, it is important not to forget another important step - the primer. The nail is covered with a degreasing agent, and then with a primer, which serves as the final stage of processing. This will remove moisture, dust and residues of other products from the nail plate.
Application Technique
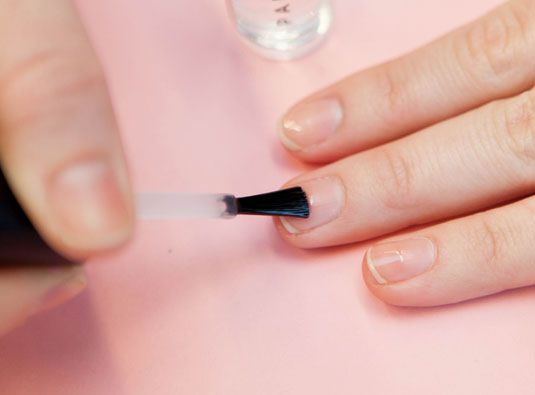
A base coat can be applied over the primer. After applying each layer of the base, the hand is placed in the lamp for drying. It is recommended to dry for two minutes. To create a better manicure, each nail should be worked out separately. That is, apply a coating on one finger, dry it, then proceed with the other. The base should be applied in at least two layers, otherwise the effect will be practically not noticeable. With a brush, the varnish is applied with a sufficiently thin layer, in the direction from the center. The first layer is done in the most usual way.
To figure out how to align the nail plate with a rubber base is quite simple. The rubber base has a thicker structure and holds better on the nails. To create the most beautiful natural form, you will need to resort to a simple technique. In the middle, at the so-called apex point, a drop of the base is applied a little higher (closer to the cuticle), only slightly stretched to the edges. It will turn out to make the nail convex, forming a longitudinal arch. For the best effect, it is recommended that after applying the base, turn the hand with the palm up so that a drop forms. The more liquid the base is applied, the thinner the layer should be (more can be made in quantity) and the farther you should retreat from the cuticle.
If necessary, use a thin brush: smooth the drop so that it spreads evenly. Turn your hand over and immediately send it to the lamp so that the base polymerizes.
Implementation Tips
The shape is selected and created before the nail is processed, so as not to spoil the lacquer coating or create excess dust from sawing. The file should be selected medium hardness (abrasion). After the edge should be treated with a polishing file.
After applying the base, you can check how even the coating turned out by examining the nail from different angles. An ordinary table lamp will also help. The hand will just need to be turned and held at various angles to make sure the varnish is evenly applied.
After the alignment of the nail plate with the base is completed, if desired, you can apply a color coating on top or create a design with rhinestones and stickers. For applying the base and the main color, a wide flat brush is used; for thin patterns, thinner, graceful brushes should be chosen.
The base is needed to form a flat surface, this material is not very resistant to mechanical stress. Therefore, at the end, cover the nails with the top and dry it.