House craftsmen just need a workbench for various types of work. You can buy it, but this option can be expensive, it is better to do it yourself. And now we will discuss in detail how to make a bench with your own hands. After all, if you tailor its design to your needs, it will be much better and more convenient than the factory analog.
Workbench - what is it?
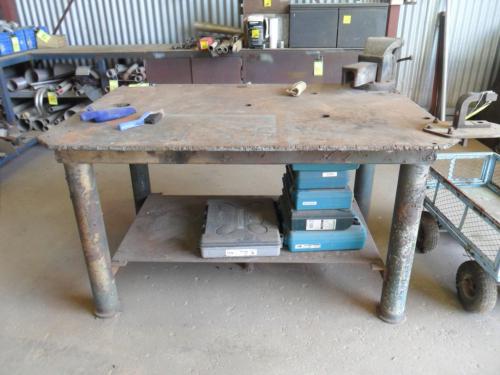
For convenient work with wood, metal or other materials use a workbench. It is a table that is massive enough to withstand a huge mechanical load due to manual processing of the subject. A workbench can be carpentry, metalwork and carpentry.
Materials for workbenches
Workbenches can be made of wood or metal. For the joiner, the first option is ideal, and for the mechanic, the second. Often, both metal and wooden workbenches are collapsible, this greatly simplifies their transportation.
For what types of work are workbenches used?
DIY assembled workbenches can be excellent assistants in installation, adjustment, straightening, debugging, as well as in any locksmith work. Such equipment is used everywhere: from garages and utility rooms, to maintenance services and industrial enterprises. The design of any workbench can be equipped with the necessary additional elements, such as a vice and lighting units. In addition to them, masters often install other additional devices necessary for work.
Equipment such as do-it-yourself bench workbenches can significantly increase work efficiency, while taking up very little space in the room. Often they are designed taking into account the individual work that will be carried out, and even the area of the room for production or repair is taken into account. If there is not enough space, then you can make a workbench of smaller sizes, for example, with one stand.
Structural elements of a bench
Workbench bench, assembled with your own hands, for convenient handling of items should have a fastening element. To store tools, there must be boxes in it where you can put everything. In addition, for the convenient work of the wizard, the design must be adjustable in height.
The frame of the workbench, which is called the pedestal, as well as the countertop, are its main elements. The first part is made of pine, and the second uses hardwoods such as ash, oak and beech. The thickness of the countertops should be between 60-80 mm. Width can be up to 500 mm, it all depends on the work that will be performed on this workbench.
Before you make a bench with your own hands, you need to decide whether it should be collapsible or stationary. If you plan to design, for example, for a garage, then you can make it monolithic. In the case when you need to create a workbench, which is planned to be taken to the cottage in the summer, and then brought back, then it will be more convenient to make it collapsible. In general, everything is worth thinking ahead.
Often they make a bench with their own hands on a metal frame, welding it from pipes. Then, on this basis, boards are fixed, which are the countertop. For convenience, they need to be upholstered with linoleum, sheet aluminum or ordinary plywood. This is done so that small parts, such as screws or nuts, cannot get between the boards, from where it will be difficult to get them. In addition, you should cover the lid with sides so that parts do not roll off it.
To store tools or other necessary items under the countertop, drawers are installed. Each master selects their sizes individually, based on items that will be created or repaired on this workbench.
In order to install mechanical devices on a workbench made by yourself, you need to bring an electric line to it. If the room is large, it is worth making its frame on rollers, with the help of which the whole structure can be moved where necessary.
DIY metal workbench
The design of such a workbench should have a rigid frame welded from metal corners or pipes. It is better to take them not round, but square. It is also worth choosing the material for the cover, it should be massive. Indeed, only good materials will give the necessary structural rigidity to withstand heavy loads during operation. For the countertop, a wooden flooring upholstered with sheet steel, textolite, or linoleum is also suitable. If it will be necessary to carry out work on the workbench associated with blows with a hammer or sledgehammer, then the countertop is made of sheet metal with a thickness of about 5 mm. On such a powerful design, you can install the same vice that will hold firmly on this countertop.
When designing a workbench with metal construction, it is worthwhile to strengthen the structure with numerous stiffening ribs. They will withstand blows to the countertop and frame. In addition, the workbench will be heavier, which is also good when bending metal, because it will be very difficult to move if it is not fixed. Naturally, such a model is not made collapsible, because it is too heavy for transportation. This method is often done by a do-it-yourself bench for a garage, because it is able to withstand any work.
Under the countertop, boxes are made for spare parts, as well as tools. In addition, on its three sides they often create a barrier of metal mesh or ordinary sheet steel. It will not allow pieces of metal to fly apart (when cutting).
Make a workbench
First you need to decide how the workbench will be used. If steel objects will be manufactured or repaired on it, you need to make a metal frame for it. When you have to work only with wood, you can make a carpentry workbench.
Workbench location
To tinker in comfortable conditions, you need to carefully choose a place in the room. It is desirable that the outlet is close, and the lighting can be installed from several sides. All these nuances should be especially carefully considered if the DIY workbench made by yourself is installed in the garage or in any other small room.
Making a bench
To implement the planned, we need:
- corners;
- metal profile;
- dried and impregnated boards;
- apparatus for welding.
In addition, you need to acquire sheets of stainless steel or galvanization. If necessary, protective sides will be created from them, so that when cutting or chopping metal, its pieces do not fly apart. In addition, such sheets can be upholstered in the countertop so that its surface is perfectly smooth.
It is necessary to cut the metal parts of the frame in size, and then weld them, strictly maintaining all angles. It is necessary that the DIY bench, the drawings of which are presented here, be stable. That is, by creating a frame, as presented above, you can then add how many boxes, boards and everything that a particular master needs for his specific work. After all, it is impossible to imagine a design that would be universal, but a single base will make it easy to add various individual design delights of any professional or amateur.
If additional shelves are not needed, then you can strengthen the frame with stiffening ribs. Their most advantageous place is ten centimeters from the floor, and just below the countertop or workbench cover. It should also be strengthened so that it does not deform under heavy loads from blows of a sledgehammer or hammer. In order to be able to attach the workbench to the floor, to secure it, you need to weld special plates to the ends of the legs. They are part of a square pipe measuring 5 x 5 or 10 x 10 cm, depending on the material found and the thickness of the legs themselves. Holes are made in them in the part that will be in contact with the floor. Then they are welded to the legs of the finished product and a workbench is fixed through them. So he will hold on firmly and will not move during work.
When the main frame is ready, make the design of the countertop. To make it, you need corners from which you need to assemble a lid, whose length will be 10-15 cm longer (on the sides) of the main frame. This is necessary in order to fix the vise at any necessary point on the workbench. Screens can be easily welded here to prevent the pieces of metal from flying out during the cutting process.
If you create a bench with your own hands, the dimensions indicated on the drawing will suit most craftsmen. However, depending on the room where the structure is planned to be installed, they may vary. Therefore, it is worth repeating the image exactly only if there is sufficient space to install such a workbench.
In the fixed countertop, holes are drilled to fix the boards. They should first be coated with a composition from rotting or painted. After this, the boards are sheathed with sheet metal, which will give a flat surface without cracks. It is fixed with self-tapping screws.
In order for the workbench to live long and not rust, it is painted. To do this, it is better to use resistant paint, which is used in the automotive industry. After all, this coating must withstand enormous loads.
Bench vise
To make it convenient to work on a part or object, they need to be well fixed on a workbench. To do this, use a vise that is installed on a DIY bench workbench (photos are presented in the article). There are several types: manual, chair or those that have parallel lips. When developing a project, you should immediately decide on the type of vice, under which to purposefully prepare a place on the surface.
Vice chair
So they are called because the surface to which they are attached resembles a chair. Over time, they began to be installed on workbenches. Such a vice is used for heavy work when cutting or riveting metal.
Vise with parallel jaws
There are three types of them, in which the front sponge can move freely, as well as those that can turn and not. In order for them to serve longer, additional pads with a corrugated surface are installed on the clamping points. They are fixed with screws, and the sizes of such false jaws can be from 80 to 140 mm.
A fixed vise has a monolithic sponge, as well as a base in which there are holes for bolts. Thanks to them, the entire structure can be tightly attached to the surface. It is always worth choosing models with removable jaws only. After all, when they wear out, during the operation they will need to be replaced. The sponges must be made of tool steel, and also have notches, thanks to which the part is firmly fixed. If their surface is smooth, then the object can pop up, which can damage it, moreover, it is inconvenient.
The vice is universal
Their purpose is to fix small objects. They are fixed on a workbench or other surface with bolts. Their advantage is that they can not only be rotated, but also tilted in any plane. Their disadvantage is that the design is weak for impacts due to the many moving parts. Therefore, it is undesirable to use them where dead fixation is necessary, because they will not be able to fully provide it. However, they are ideal where you will need to rotate the workpiece at different angles during operation. They are often used on carpentry workbenches.
The vise sponges themselves are made of hard steel to ensure reliable fixation of the subject. However, so that during operation the surface of the part is not damaged, special bumpers are installed. Their metal is softer, which allows not to damage the part when exposed to it.