Perhaps now you can’t find a person who does not know what French manicure is. He is called a french jacket or white strip, and he has become a classic throughout the world. Even schoolgirls want to learn how to learn how to do French manicure.
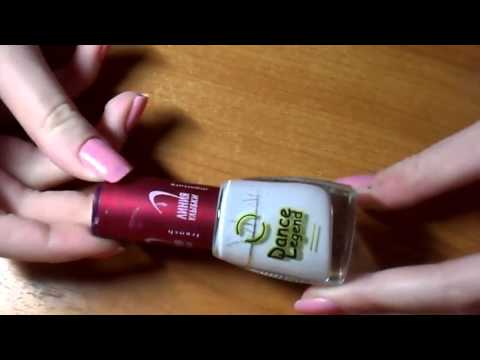
Each company that produces cosmetics for nails has a line of classic French manicure:
- pink transparent varnish called haze;
- white dense varnish with which to paint a smile.
For the convenience of applying a white strip, auxiliary stencils of various shapes are produced. They are round, corner or arc. In round stencils, you can remove the middle and use to draw holes in the lunar manicure - one of the varieties of the jacket. And there are a lot of such varieties.
The origins of french manicure
French manicure conquered the fair sex, only appeared. Jeff Pink, the founder of Orly, invented this design so that in the frame of the Hollywood actress they would not repaint their nails, changing clothes. Later, his company became recognized in the manufacture of cosmetics for performing French manicure, which at the beginning of its existence represented all kinds of shades of white and flesh-pink.
But time passed, the nail industry took great strides, mastering high-tech chemical production. There was a nail extension - first acrylic, which came from dental offices. Following is the gel. The white tip has become a classic in these techniques. Now, nail schools must learn how to do French manicure.
Jeff Pink for a long time resisted the introduction of gel polishes into his product range, being sure that they spoil the nails. After all, "Orly" positions its company as aimed at maintaining the health of nails. But, when the safety of high-quality components of this coating was proved, he still added to the product catalog with a line of gel varnishes.
French lacquer
How to make French manicure with varnish? In a nutshell, this design consists of a haze and a smile, for applying which use stencils. But is it easy to cover without prior training? Many make mistakes in the process of applying a smile:
- do not wait for the complete drying of the haze;
- instead of haze, highly pigmented (camouflage) varnish is used;
- do not immediately remove the stencil from the nail;
- trying to adjust the smile line.
There are some subtleties in how to do a French manicure. If you do not wait for the varnish to dry, then the stencil will adhere tightly and will be removed with part of the coating. We'll have to redo everything. If you use dense varnish instead of transparent haze, you will have to dry it for a sufficiently long time - highly pigmented varnishes, which include camouflage and nudes, require long-term drying. In addition, applying them in a single layer is very difficult - they strip. And two or three layers dry for a very long time, and too much thickness forms on the free edge.
After gluing the stencil, apply a white strip and quickly remove it until the varnish is dry. Then it evens out the smile line and only then dries up. If you wait for it to dry, and after trying to remove the stencils, the varnish that gets on the paper will pull the entire coating along with it, an ugly ragged edge is formed. By the way, it will turn out, even if you just give the top layer of white varnish to form a film. So you need to remove the stencil very quickly.
Do not try to correct the ragged edge of the smile!
How to avoid mistakes
Consider in detail all the errors in order to know how to do French manicure with stripes. First of all, to apply the coating, the nail must be degreased. A thin layer located on its surface, the so-called nail effusion, prevents the nail from adhering to the keratin of the nail. In order to remove this barrier, the nail is treated with a dehydrator. This is a special alcohol-based fluid.
After applying the base. This is a special varnish-based compound that reliably protects natural nails from external influences, pigmentation, filling all the irregularities of the nail. Usually the base coat dries in seconds. It does not need to be applied in a thick layer, it still will not give the desired effect. If you want to have transparent nails - you can cover them with a top. But you must use the base. After the base, apply haze and dry it. It will take about ten minutes, if the varnish is slightly thickened - twenty. Strongly thickened varnish is better not to use or dilute it with a special liquid.
In the matter of how to do French manicure, much comes down to applying a white strip. It is necessary to try to apply it in one motion, without tearing off the brush from the nail. Otherwise, the border will be visible. Where the brush is on the varnish, the coating will be denser. For this reason, do not make a strip in two stages: first from one side of the nail to the middle, then from the other and the combination of lines. With this method, a white spot will be in the center of the free edge.
How to make French manicure with gel polish
With the advent of gel polishes, the process of completing the jacket becomes much simpler. Now you don’t have to wait long for the coating to dry, it is easy to repaint it if something is not pleasant and, most importantly, it is possible to use camouflage! These are dense colors imitating a natural nail bed. If there are problems with the roughness of the nail plate, white dots, onycholysis and other problems, camouflage will reliably mask them.
After applying and drying the camouflage, the dispersion layer is removed, the stencils are installed and a white strip is made. Stencils are immediately removed and the coating is dried. If you want to have an elegant smile, the tips of the white strip are lifted up with an orange wand before sending your hand into the lamp. If the smile line is a little damaged after removing the stencils, it can be corrected with a brush dipped in alcohol or dehydrator.
Do it yourself French manicure
The best way to complete the jacket is gel polish. Now it is not difficult to acquire everything you need to do it yourself. In addition to conventional manicure tools, you will need the following tools and materials:
- lamp for the polymerization of gel polish;
- orange sticks;
- buff 240 grit;
- dehydrator;
- acid free primer;
- rubber base for gel polish;
- color gel polish for haze;
- white or color gel polish for a smile;
- hard top for gel polish.
The photo clearly shows which steps make up the gel polish procedure.
French gel polish: 5 steps
How to do French manicure: a photo of the basic operations with a description.
- Application of the base and drying in the lamp for 30 seconds.
- Applying haze and drying for 30 seconds.
- Setting stencils.
- Application and drying of the white tip. Here, the stencils were not removed immediately after application. If they stick to the nails, they can be removed with alcohol. It is best to paint a smile not with gel polish, but with gel paint.
- Application and drying of the top coating.
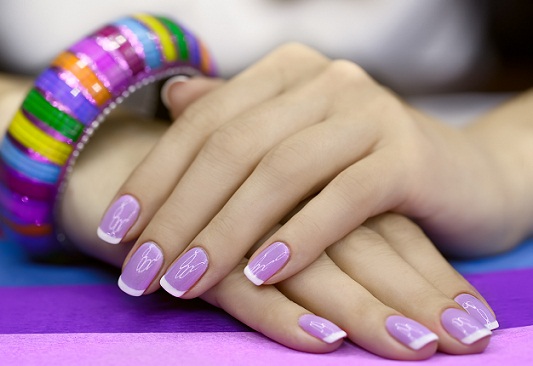
Smile may be colored.
Fashion trends also affect the color of the jacket. It can be traditional pink nails with red, blue, turquoise or silver smiles. You can make a smile with gel polish "cat's eye", then the first layer is made black. Kamifubuki is in fashion now, and a smile can be very fun.
Stained glass gels, mirror or pearl rubbing, stamping are interesting - all this can form the free edge of the nail. To comply with the border, apply stencils. Some can draw a smile evenly and by hand, but when you need to use colored dust, broths or other loose designs, you can not do without them. There is only one technology, so there are so many French designs.
Some French designs
Now there are interesting sprinkles on the dispersion layer. These are various mirror powders. They very successfully imitate the surface of the mirror. You can choose not only the classic silver coating, but also bronze, copper, as well as completely exotic colors: purple, raspberry and green. The effect of a manicure such as glued foil. But, unlike the cheap option with foil, this is a robust design that will not bring surprises in the form of detachments.
Another smile option, especially relevant in the year of the Dog, is the velvet tips of the nails. Sprinkling in the form of finely chopped wool takes on the color of the tip of the nail. To the touch and in appearance - pieces of animal skin. Even Greenpeace will like it, because all the materials are synthetic.
The so-called “reverse jacket”, a smile in the cuticle area, also looks interesting.
Still making contrasting matte and shiny smiles, ombre horizontal and vertical, broken glass. Haze in 2018 is made in nude and white. For a white haze, gold, black, chocolate smiles with imitation of precious stones, metals, chains are offered.
Conclusion
French is a brilliant invention. It quickly became a classic, because it was copying nature itself. Yes, healthy natural nails have just such a look - shiny pale pink nails, long, with parallel side ridges. The free edge is really white, not ivory. Nail keratin itself is like that. Such nails are difficult to shorten: they are very thick and durable, therefore they are cut off. Using a knipser can cause a crack. Unfortunately, due to the environment, units have such nails.
But there are materials and instructions on how to do a French manicure with a stencil. Therefore, visually artificial nails will not differ from natural ones. You haven’t made your jacket yet? Try it and you will succeed.