Free columns are very common among lovers of a strong drink. If you decide to make such a design yourself, then you need to familiarize yourself with the technology of the work and find out what features the device should have.
Preparatory work
The best brew column should have a certain height. You can choose this parameter yourself, but ideally it should be 50 diameters. According to experts, this is not so important, the owner of the equipment must decide for himself what strength the product will have, and also decide how good the separation will be. However, there is a certain objective criterion that determines the lowest height of the manufactured columns. You must eliminate the possibility of splashing. On this basis, beer columns are not made below 30 centimeters. Otherwise, the work will be inappropriate.
Technology of work
In the manufacture of the described design, it must be equipped with a controlled reflux condenser. Design features of this item may vary depending on your preference. An element can be created on the basis of a shirts or dimrot. The main condition is the fact that the reflux condenser must be able to extinguish the power that it is planned to bring. This element can be installed not in one quantity, but in the amount of 2 or 3. In this case, the element will be primary or secondary. Such a structure allows for more stable functioning of the column. You must understand that such additions are possible only on high designs.
Methodology
Defective columns should be able to adjust the cooling of the reflux condenser; this component should be sufficiently thin. To do this, stock up on a tap that will allow the most accurate flow of liquid. Experts recommend the use of a needle variety, but the use of a ball valve should be discarded, since it does not fit at all. If we consider the available household solutions, then the best option for carrying out these works on the installation of adjustment will be a radiator valve, which is used when installing the heating system.
You can prepare the drawing of the beer column yourself. The column must be provided with space for the installation of a thermometer, which is mounted before entering the condenser. This statement is true for designs that will work according to the steam selection scheme. If a liquid withdrawal reflux condenser is used on the film column, the location of the thermometer will be determined by the specific design of the system. Defective columns are equipped with a condenser refrigerator, which will be responsible for condensing and cooling the supplied steam. If the design will have liquid selection, then you need a refrigerator, which will lower the temperature of the finished product.
Wizard Recommendations
It is important to take into account during manufacture that the liquid must be supplied separately to each reflux condenser or to each of them, as well as to the refrigerator. The tubes that will be used to exit the refrigerator and the reflux condenser must be used exclusively on the basis of silicone. This statement is true for hot water products. If we are talking about cold water, then you can use tubes based on polyvinyl chloride. A copper scrap column should be manufactured taking into account the above technical requirements, for which various design solutions are suitable. However, you can not limit yourself and come up with your own modification. In this case, the main condition is that in the end it will be possible to get into your drinks, which will have different qualities and organoleptic characteristics. However, in the end it will not be possible to obtain pure alcohol. The final product will not smell like moonshine, but it will not be pharmaceutical alcohol. But for the preparation of vodka, such a design is quite suitable, the master will be able to make the basis for high-quality distillates.
Description of the manufacture of columns with a shirt reflux condenser
Continuous mash column can be made on the basis of a shirt-type reflux condenser. For the work you will need copper tubes, the length of which should be 500, 2000, 1000 and 300 millimeters. Each of them should have dimensions of 28 x 1.22 x 1.1 x 1.8 x 1 millimeters, respectively. Among other things, you will need a two-socket adapter sleeve in the amount of 2 pieces, another adapter sleeve must have slightly different parameters, equal to 22 x 15 millimeters, these elements will need 3. The master must prepare a one-bell angle, the dimensions of which are 22 millimeters. It will not be possible to perform work without a tee, the dimensions of which are 15 x 15 x 15 millimeters. Be sure to take care of the 1/2 ”male thread adapter. A 3/4 inch female thread adapter is required. The element will be necessary for joining the cube, however, in each case there may be other sizes. If you make a continuous brew column using the above elements, you will be able to get a product in the end, the degree of which will be a maximum of 92.
Features of manufacturing an air-cooled apparatus
A piece of copper pipe will go for the manufacture of a coil. A coil of aluminum-based wire will be used without insulation. You can use a computer cooler, superglue and a 500-watt boiler in the course of work. Power may be less impressive.
First you need to take a copper tube, bending it to connect to the device. The part of this workpiece that goes down must be included in the spiral. The aluminum wire should be wound on top of the tube, and a certain distance must be left between the turns. In order to reduce thermal resistance, the turns should be as dense as possible. This will increase the heat transfer area and the efficiency of the coil.
When a dummy column is made with its own hands, the next step is to use any cone-shaped object, the diameter of which should be compared with the dimensions of the selected fan. On this item you need to wind a coil for moonshine. In this example, an ordinary beer bottle with a capacity of 0.5 liters will be considered. The coil must be bent so that it evenly overlaps the fan section. The element must be tried on the selected case and make sure that everything is in order. This is where the work with the coil is finished.
Now it’s time to move on to the lid of the device. To do this, you can use the usual cover based on polyethylene. The brass coupling must be heated for half an inch, and then you can fuse it into the plastic cover. The design must cool down, it can be cooled in water. After the coupling is removed, it should be cleaned of adhered polyethylene, the resulting burrs should be carefully cut. A fluoroplastic tape must be wound on the coupling, without which the manufacture of a moonshine still cannot do. This way you can get something like a gasket. When a brew column is made with your own hands, the next step is to install the coupling in the hole made in the cover in advance. The fluoroplastic should be between the sleeve and the cap. From the inside, tighten the nut without applying excessive force.
Professional Recommendations
At the next stage, you can do the heating element of the entire apparatus. To do this, you can use a conventional boiler. Having retreated some distance from the end of the wire so that it is enough to the device, you need to cut off a part, you will have to screw everything back after. The ends of the cord from the boiler must be threaded so that with the lid closed, the element is inside the case. After stripping the wires, they need to be connected back. It is important to take care of quality insulation.
The boiler should not touch the bottom, it is desirable that it is completely covered with liquid during operation. In the same hole through which the boiler cable passes, you need to insert the long end of the coil for the apparatus. The remaining gaps between the tube and the cord must be hammered with pieces of cotton wool, making it tight enough. It is important to achieve the best sealing.
The resulting design from cotton wool needs to be poured with superglue, which is made on a cyanoacrylate basis. This will allow to obtain the most tight connection using composite materials. After the glue has hardened, you will be able to get a sealed, durable joint. It remains to do something like a casing for a fan so that the air bathes the fins of a heat exchanger represented by a coil.
To carry out the casing, you can use the tetra-pack packaging. If you will make a moonshine still, then you can use the technology presented in the article. From the package you need to cut a rectangle, the width of which will correspond to the dimensions of the fan. These elements will go to gluing the fan on 3 sides. On the fourth side, you need to bring the end of the coil in order to carry out the removal of moonshine. In the remaining side wall, you need to make a hole for this part of the tube and glue with the previously applied superglue. The walls can be glued together with tape. When a moonshine is manufactured , maximum safety must be ensured; it should be covered with a transparent protective screen.
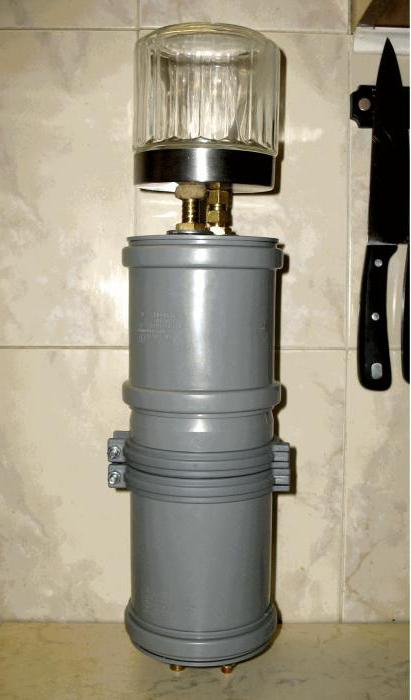
On this we can assume that the brewer column is ready. As a power source for the fan, you can use a computer power supply. To turn it on without using the motherboard, you need to close the black wire with green. Specialists use more compact 12 volt sources that you can find yourself.
Deviation from the above requirements
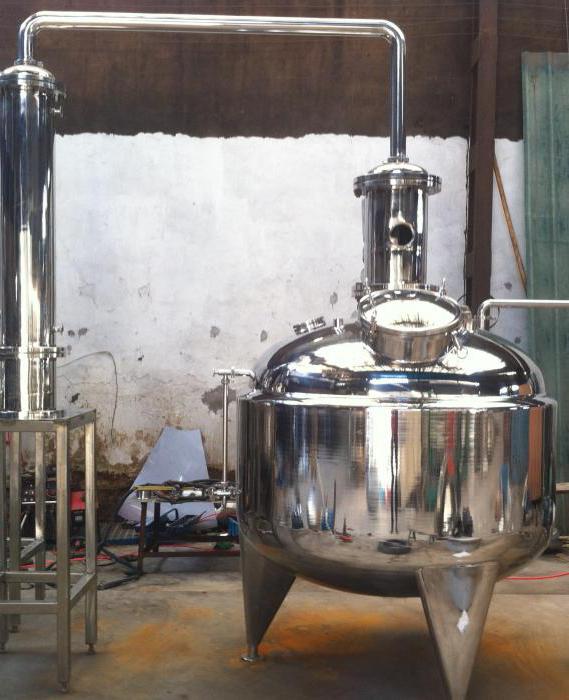
If you will be doing your own column with your own hands, the drawings of which you must complete in advance, then it is important to think about deviations from the above requirements. The main of them is an uncontrolled reflux condenser. If we are talking about the column "Baby", then uncontrollability is sacrificed for compactness. For this, the condenser and the reflux condenser are located in a single tank with running water. If you decide to use this scheme, you will not be able to regulate the process by means of a reflux condenser, therefore, separation cannot be achieved. If you are going to do a drafting column with your own hands, you can borrow drawings of this design from the article. It should also be remembered that the reflux condenser has a low utilization capacity. You may encounter the problem of low column heights. Some craftsmen cannot refuse to place the structure on a gas stove under the hood. At the same time, separation will be difficult to achieve, which is especially true for tall columns.
Additional recommendations for work
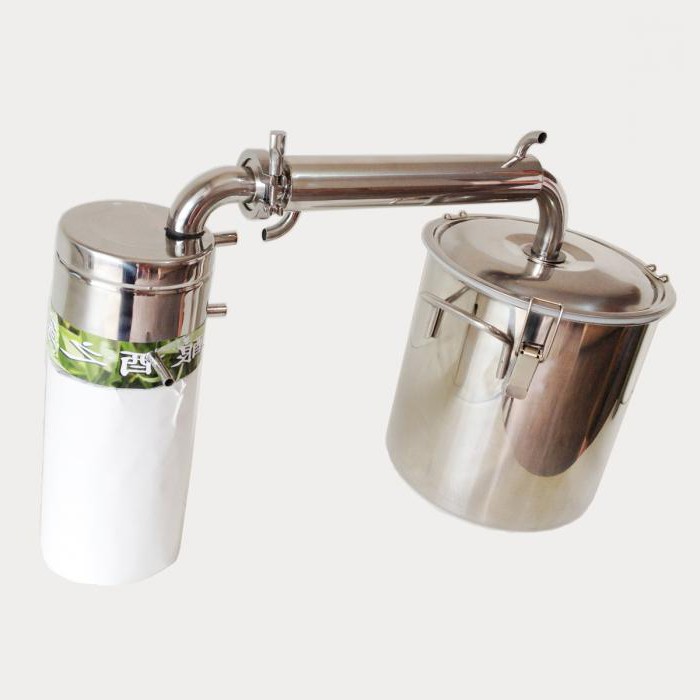
The rectifying column “Rectifay” has established itself among lovers of a strong drink. However, if you decide to independently engage in the manufacture of such a structure, it is best to use stainless steel based parts. Futorki must be welded to the pipe, while internal threads are installed on both sides of the pipe, to which the neck of the kegs are fixed. Using fluoroplastic, you can grind the sleeve sleeve, which will be equipped with a gasket for the clamp. All this will be a single whole. The dummy column "Baby" must be supplied with insulation material, which is first cut in length, then put on a pipe on which it is glued. A reflux club should be put on the top cover and all should be secured with a clamp. The liquid will be supplied into the tube through which the phlegm returns. A piece of silicone hose should be put on it , which will prevent splashing to the level of the upper plate.
Conclusion
If you can’t decide what you will be producing - a brew column or a good moonshine still , then you can make the first one. It is easier to manufacture, and will also allow you to immediately start preparing a strong drink. As an alternative, you can try to purchase this unit. Home craftsmen today sell them in completely different trim levels and at different prices. From the available assortment you will pick up something for yourself.