In the manufacture of the bath, it is necessary to take into account a lot of different factors, one of which is water drainage. Mistakes during construction in this area can lead to the fact that the construction simply cannot be used. Therefore, novice masters very often ask the question of how to properly organize the drain in the bath with their own hands. We provide a step-by-step guide to this process.
Project creation
First of all, you need to understand that there are just a huge number of options for arranging water outlets in such buildings. Therefore, it is first necessary to decide which type should be used in a particular case. When creating a device for draining baths, it is necessary to take into account the features of the building, its foundation and the costs that the builder is ready to go.
The project should reflect the basic elements of the system at the stage of foundation production, since it will be necessary to do the removal and construction of floors with the indication of the laying of drains, if their installation is planned. Therefore, if you make a drain in the bath with your own hands, a step-by-step guide recommends that you begin designing this element together with the entire building, starting from the very foundation.
In our case, we will consider one of the most interesting options, which requires certain costs, but the quality of the design allows you to never return to this issue. That is why such projects are very popular with modern masters.
Instruments
To create a water drain in the bath, the following tools may be required:
- shovels;
- saw on wood;
- hammer;
- roulette;
- level;
- paint roller or brush;
- buckets;
- hammer drill;
- pencil.
Materials
In order to organize the discharge of water in the bath, you need to buy the following materials:
- cement;
- sand;
- water;
- sheets of roofing material;
- bituminous waterproofing;
- stainless steel metal corners for fixing floor boards around the perimeter;
- antibacterial primer;
- wooden boards;
- self-tapping screws and impact dowels;
- metal fittings or wire;
- a drain pipe;
- film;
- drainage and other fittings;
- damping tape.
Foundation work
Proceed to the creation of a drain is necessary at the stage of manufacturing the foundation. The fact is that you should install a sewer pipe through which the liquid will be drained. When you create a drain in the bath with your own hands, the step-by-step guide recommends installing the pipe for the drain directly into the base. It is fixed using a damping tape in a concrete foundation or mounted on special clamps when mounted on a pile base.
If the pipe is adjacent to the central sewer system, then it is laid underground. Moreover, it should be located at a depth below the level of freezing of the soil with additional mineral wool insulation.
Concrete works
- First of all, a rough floor is created through which the drain pipe will pass.
- It is stuffed from boards, which are fixed around the perimeter of the room.
- A film is laid on their surface so that when concrete work is performed, liquid from the solution does not leak.
- At the next stage, a damper tape is installed along the perimeter of the walls, at the level where the concrete will be located. It is necessary so that when the screed expands, the surface does not crack and deformation does not occur. Also, the pipe section, which will be in concrete, should also be wrapped with a damping tape.
- Next, metal fittings are laid, which also should be fixed on the walls.
- Then, a bath draining system is made by pouring the first layer of concrete, 5-10 cm thick. This will be the basis on which the level guide liquid is formed.
- After the concrete has hardened, it is necessary to make another pouring with a thickness of 5 cm. However, in this case, the thickness is indicated conditionally. The fact is that you need to get not a flat surface, but to create a certain slope for the drain to the pipe.
- Many masters at such filling prefer to make a peculiar cone where the funnel of discharge of a pipe will be located in the center.
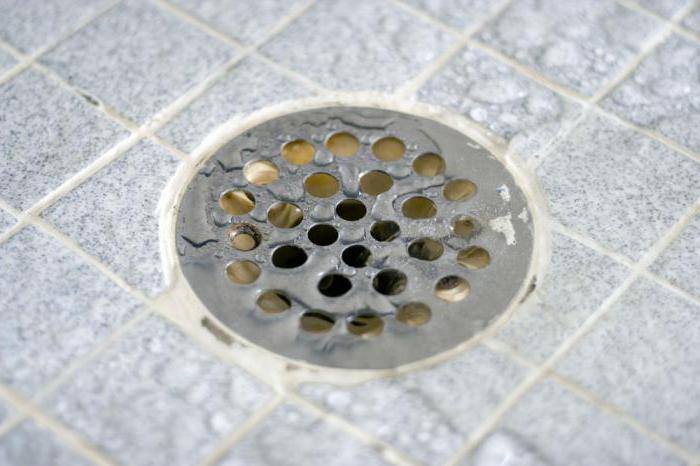
- At the end, a drain grate is installed and it is adjusted to the surface level.
Waterproofing
When creating a similar drain under the floor of the bath, it is very important to protect all elements from moisture. Therefore, the walls and concrete base should be treated with an antibacterial primer.
Next, sheets of roofing material are laid on the floor, leading them to the walls, and the surface is treated with bitumen. It is very important not to forget to cut a hole in the sheets for the drain itself, so as not to close the grate.
As a result, water falling on such a surface will drain to the pipe and be discharged through it from the building. Then you just need to create a final version of the floor, which will be located on a certain hill from the drain.
Floor installation
Many beginning masters, wondering how to make a floor in a bath with a sink, want to use wood, and they want to get rid of concrete surfaces. However, this design will allow you to get a very high-quality wooden coating with a concrete base to increase strength and durability.
- Even at the stage of manufacturing the walls, you need to install lags. They are usually fastened by joining a “dovetail” in wooden structures or muyut in concrete or masonry.
- If this was not done during the construction of the walls, then the lags are installed on metal corners, which are fixed around the perimeter. However, it is necessary to create additional supports in the middle of the length of the boards.
- Lags must be treated with an antibacterial primer to protect against moisture and mold fungus.
- In the next step, a floorboard is installed. It is also pre-treated with a primer.
- A gap of at least 1 cm must be made between the floorboard. It is through it that water will leave, falling onto a concrete base and draining into the drain.
- The board is fixed with screws.
- After the floor is installed, experts recommend making special pallets that can be used as a finishing coat. This design allows the drying of the bath after its use.
Drainage
Very often, the question of how to make the floor in a bath with a drain, involves the installation of a drainage system. The fact is that the bath is not limited to a shower and steam room, and it is uneconomical to organize a separate withdrawal from all rooms.
Therefore, to the room where the central drain is created, a drainage system is created, created from small grooves, which are located near the nearest wall along its entire length. This design is done at the stage of manufacturing the screed, mounting it on the same level with the floor. Also, it should be borne in mind that the inclination of the surface should be in the direction of installing the drainage channel so that the liquid flows into it independently.
Typically, such systems are created open, because they need less materials and work costs. However, with a thorough approach, pipes can be installed in the floor, which are discharged into the central drain, and in order for water to get into them, special grilles are installed in a level with a screed.
extra work
Experts say that draining the floor is only a small part of the design of the bath, which ensures its proper functioning. It is equally important to properly install the ventilation and heating of the room, so that even with the correct drainage of water in the room it would not be damp.
Processing with an antibacterial primer is considered mandatory in our time and requires a special approach to the choice of material. The fact is that it should not emit harmful substances when heated and contain toxic components. It is best to use special products that are designed specifically for the bath. They are completely safe and will help to permanently get rid of mold and mildew in the room, protecting wooden and concrete surfaces from moisture.
If there is no separate sewer system, then creating a drain, you will need to make a cesspool. Specialists in such cases are usually advised to make a small septic tank, which is located near the building. Such a design will quite cope with a small volume of water and will be quite economical and practical. However, such work will require additional investment.
Recommendations of specialists
- Given the complexity of the design during installation in a building with several rooms, the design stage must be taken very responsibly. It is important to consider the angle of inclination, drainage length and even the area of the room itself.
- When water is removed from the bathhouse in a building made of timber or logs, it is recommended that all work be done only after the house shrinks. Otherwise, you can get surfaces with the wrong slope or different levels of surfaces.
- If a foundation based on piles is used to create the building, then the drain pipe will need to be additionally insulated. It is best to use mineral wool or foam for these purposes. However, recently in the markets you can buy a liquid insulation, which has a low cost, and in terms of its technical characteristics is not inferior to other materials of this purpose.
- Some craftsmen, when pouring the main concrete floor, recommend using expanded clay to insulate the base. It is mixed with the solution and a regular screed is made. As a result, not only the necessary foundation is obtained, but also a kind of insulation, which is very important in houses with a pile foundation.
- Quite often, instead of bitumen and roofing material, masters use special mastic to create waterproofing. However, before using it, you should make sure that with a little heat it will not emit substances harmful to human health.
- In the construction materials markets, ready-made sewage and water drainage systems can be purchased. They are practical, reliable and very easy to install. Therefore, it is sometimes worthwhile to develop a floor design taking into account their features.
Conclusion
Explaining in detail how to make a drain in the bath with your own hands, a step-by-step guide gives the basics of this process, which describe the general principle of a particular design. Some projects may have their own characteristics that are not displayed here.