Open summer shoes expose the foot, demonstrates the beauty of miniature toes. In order for the leg to look aesthetically pleasing, it is necessary to take care of a neat pedicure. Since in the summer, the coating on the nails is exposed to external factors, therefore, ordinary varnish has to be applied several times a week. In this case, it is much more convenient to do shellac pedicure.
What is this technology
This innovation in the field of beauty has already established itself in the market of services, and the fair sex managed to appreciate all the advantages of this coating. The tool is universal, since it has the properties of both a gel and ordinary varnish. Application does not require any special skills, you only need a UV lamp.
Benefits
Manicure, pedicure shellac has several advantages. It perfectly strengthens natural nails, protecting them from brittleness and damage. In the summer, as well as during the holidays, it is simply indispensable. The coating does not lose its luster and attractiveness for two weeks. The absence of damage, as when using a regular varnish, makes it simply the perfect option for manicure and pedicure.
Nails will not lose their appearance, no matter what they do with them. Shellac pedicure has the main advantage among other types of coatings - it is absolutely hypoallergenic. It contains no toxic substances harmful to health, such as formaldehydes, toluene, and others.
Preparation and pedicure shellac: photo and description
The procedure is painless and does not cause any discomfort. Before applying the coating, the nail plate is carefully processed. First, you should soften and remove the cuticle, grind or trim the coarsened areas of the skin. Then proceed directly to the nails. By leveling them, the surface is gently polished.
What you need for a pedicure
In order to make shellac pedicure yourself at home, you will need: an ultraviolet lamp, a wooden cuticle stick, degreasing liquid for nails, synthetic napkins without lint, to cover - base, basic tone, top or fixative, as well as a gel to remove the sticky layer . When everything you need is at hand, you can get to work.
Doing a pedicure
To begin with, the nail plate is treated with a napkin soaked in degreasing fluid. After that, you can apply the base coat. The thinner the base layer, the better. After application, the nails should be dried in a UV lamp. If the device has a built-in timer, then after a beep, the leg can be removed. In the absence of this function, you will have to time yourself. The average exposure period is 60 seconds. The exact time depends on the lamp power and, as a rule, is indicated in the instructions.
Then the main coating is applied, preferably also in the thinnest layer. And again, the nails are dried using a lamp. The main layer will first come out translucent - it's not scary. After all, such repetitions must be done 1 or 2. Several layers give the coating resistance. After each application, do not forget to dry the nails in the lamp. The final coating is the final layer. Top will give nails shine and provide durability for at least 2 weeks. When applying a base coat and subsequent ones, one useful tip should be considered.
If the end face or cut of the nail is finely treated with a coating, then moisture will not be able to penetrate the plate, and, therefore, the pedicure will last a very long time. Finally, using a special gel, it is necessary to remove the sticky layer of the top coating. This consistency is formed as a result of the polymerization of shellac constituents; it should be washed in any case. At this stage, shellac pedicure is ready.
How to shoot
Many are interested in the procedure for removing the coating, because you can’t do this with an ordinary liquid. For these purposes, a special tool for removing shellac has been created. However, experienced masters of manicure and pedicure argue that with careful processing of the nail with a copious amount of liquid containing acetone, as well as heat exposure, the layer is quite easily removed. For the procedure you will need cotton pads, foil, a nail file for grinding, oil or cuticle cream.
Pedicure shellac is removed as follows. The cotton pad is soaked in a remover and pressed firmly against the nail plate. Next, the finger is wrapped with foil. Having done the procedure with all the nails, it should be detected for 20 minutes, and then removed. In this case, the cotton pad should be pressed as much as possible to the nail plate, since the coating will come off in one layer almost immediately. Remains of shellac can be removed with a wooden nail stick. Next, polish the nails with a special nail file with several coatings. At the end of the procedure, the cuticle must be treated with care oil, and the nails with cream.
Ideas
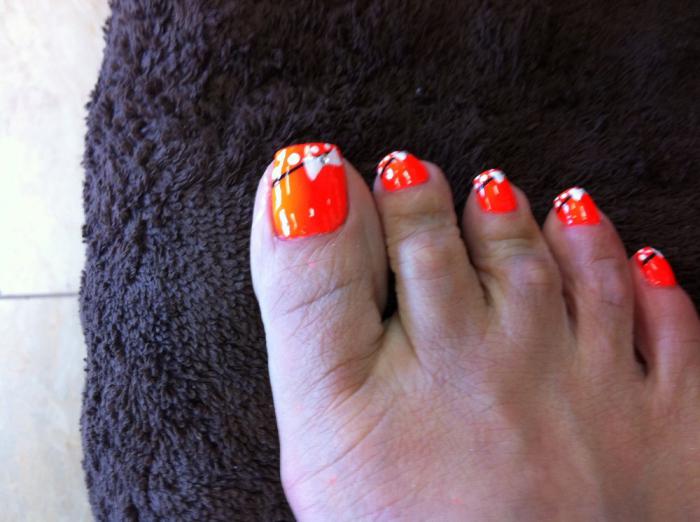
Shellac pedicure ideas are truly diverse. For the summer, of course, the best option is a bright coating with an interesting design. For example, geometric or floral patterns are suitable. You can combine several options in one pedicure. On four nails, a monotonous saturated coating is performed, and on the fifth - a contrasting pattern.
The color scheme can be selected for accessories or jewelry, since the wardrobe in the summer is very unstable. A bright and extravagant nail design is more suitable for a vacation, while a stylish jacket is the best option for a work environment. It can be performed in different versions, deviating from the classics in the direction of modernity.
Lunar
Very common and stylish is the lunar pedicure shellac. Design makes it similar to the heavenly luminary. To cover it is better to choose two contrasting shades, one of which should be silver or gilded. Although there are a lot of color variations on this topic. The jacket, complemented by various decorative elements, looks very original and neat on the legs. For example, a lace pattern is beautifully based on it.
Other ideas
The decoration in the form of a small pebble fixed at the nail growth line also looks stylish. Another option for the location of the rhinestone is under a white strip. Nails look even more elegant when a similar decor is not present at all at once, but on several plates. A lifesaver for pedicure masters and those who want to diversify the design is a special print. This device helps to transfer the drawing to the nail plate. To do this, you must also stock up on stencils. Among them, you can find theses patterns and images that I would like to see on my own nails.
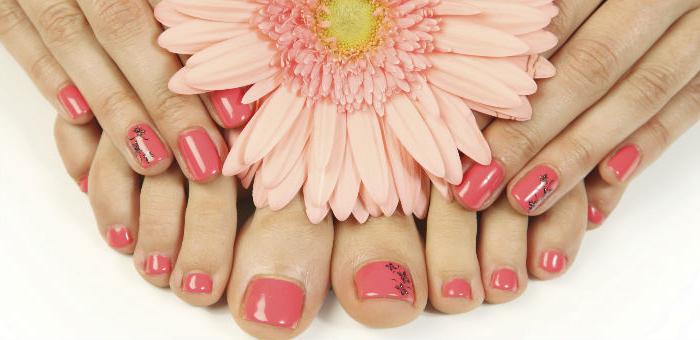
Shellac pedicure can be done in pastel colors. In this color scheme, the nails, especially on the feet, always look neat and attractive. Today, the trendy colors are smoky gray, pink, vanilla, milk, coffee, egg, cream and lime, wine and others. It should be noted that the shades can be mixed together to obtain new options. For example, adding to saturated chocolate white, you can get light coffee or even milk as a result. It helps when you want to create a multi-color design, and buying several shellac options immediately comes out unprofitable. The set should have up to 5 shades, 2 of them will be basic, with the rest you can make new tones.
Shellac pedicure looks great when a pattern is drawn on the nails. Silvery and golden shades are well applied to the base in pastel colors with the help of a print and a stencil. It is best to carry out a pattern on a large nail. For the rest, you will have to find a smaller stencil. The decor is as follows. Using a brush, shellac is applied to the area of the stencil, which is supposed to be transferred to the nails. Then, an imprint is applied to the same area, which is gaining ink. After that, it should be applied very quickly to the nail and carefully removed so as not to smear the image. It should be remembered that the application of the pattern is considered equivalent to the layer and requires drying in the lamp. And from above the decor should be fixed with a top.
Conclusion
Now you know what shellac pedicure is. Photos of this design of nails for clarity are presented in the article. Subject to all recommendations for the implementation of pedicures with shellac, the nails will delight their hostess for at least 2 weeks, or even more. It all depends on the growth rate of the plate.