As you know, the manifestation of femininity is based on trifles. And with the onset of the summer season, absolutely every nail salon turns into the so-called Mecca. After all, each of us wants to have well-groomed not only arms, but also legs. Therefore, it is unlikely that you will find a girl who denies herself a summer pedicure. A lot of options for this procedure have already been created, but most of us like the classic white pedicure, which you can do on your own at home.
Stages of home pedicure
At first it seems that it is impossible to get a salon result, but this is a profound error. To implement the plan, it is enough to have at hand a minimal set of tools and follow simple rules.
- Any manicure and pedicure begins with a bath. To do this, you can take an ordinary basin or a special electric foot bath. Fill the tank with warm water and add a small amount of your favorite soap, shower gel or sea salt. Bath time - no more than 15 minutes. By the way, to achieve the best result, you can use the proven method: add 2 tbsp. l dried lavender, 1 tbsp. l dry or fresh mint and 5 drops of lavender oil.
- Foot Care To get the perfect pedicure, you must follow each step, so go on to exfoliating procedures. Using pumice, treat all corns and corns (if any). Unfortunately, the skin on the foot and between the fingers always gives the woman's age, in this case, you must additionally use a scrub.
- After completing the previously described points, we proceed to a 10-minute foot massage. To do this, you can use cream or oil. Massage is necessary to relieve tension from the foot and improve blood circulation.
- Processing begins with the cuticle. Move it with an orange stick. Then, using manicure scissors, cut off the burrs. If you want to get a high-quality pedicure, do not skimp on the purchase of a good nail file. Give preference to glass or ceramic.
- After all the procedures done, degrease the surface of the nail plate and start painting the nails. First apply a base that protects against colored pigment varnish. For convenience, use special finger dividers. Then apply any shade of varnish and fix the result with a protective coating. Home pedicure is ready!
White pedicure design options
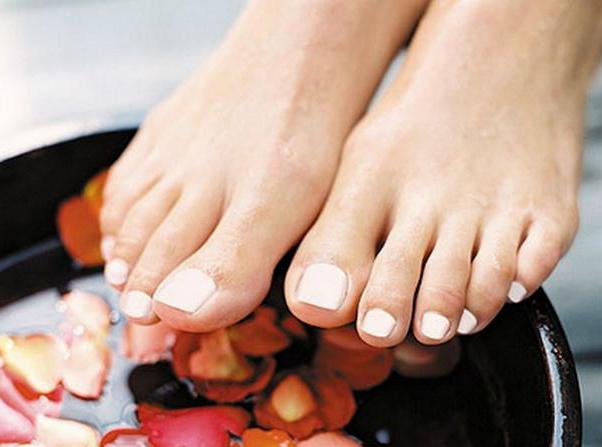
Very often in the summer, girls prefer a white pedicure, which looks especially impressive on tanned skin. True, it is not suitable for everyone. The problem is that this coating visually shortens the plate of already short nails.
As an alternative, many girls prefer to use nude shades with white, decorate the pedicure with an additional set of decorative elements. More radical girls replace natural shades with brighter ones.
For those who prefer the classics, the best option for a pedicure will be a jacket. But some people think that only a professional can do it, but this is not so. To draw a strip, it is enough to have a thin brush or use special stencils. If the latter were not at hand, then a good alternative is a regular adhesive tape or patch.
Always trendy french pedicure
In order to do a pedicure "White French", you must:
- the foundation;
- light pink (beige) and white varnish;
- fixer;
- white pencil;
- wooden stick, nail polish remover, cotton swab.
Apply a base on the nail plate under the varnish and wait for it to dry completely. Next, draw a thin strip along the edge of the nail with white varnish. Errors after application can be removed with a cotton swab dipped in a special solution. After drying, light pink varnish and a protective coating are applied. At the end of the procedure, whiten the subungual space with a white pencil.
Gel polish pedicure
Of course, not a single pedicure with white lacquer in a French style can do without a traditional smile. But many do not know that you can move away from the usual classics a bit and make the free edge more diverse:
- zigzag
- triangular;
- wavy;
- beveled;
- in the form of hearts.
So, to create a French manicure using gel polish you need:
- a special tool for degreasing the nail;
- base;
- top
- 2 gel polish: shade of nude and white;
- Ultraviolet lamp.
Step-by-step process:
- The procedure must begin with a hygienic pedicure - remove the burrs, move the cuticle, degrease the nail plate.
- Apply the base and send the nails to the UV lamp for polymerization.
- Apply basic gel polish. In our case, the shade is nude - and again in the UV lamp.
- To paint a smile on the free edge of the nail and dry in a UV lamp.
- Apply the top and send the nails for the last time to the UV lamp.
- The final step will be the removal of the sticky layer. To do this, lubricate the nails with a degreasing agent, which was applied at the first stage.
The best examples of white pedicure
A good solution would be the design of a white pedicure with an African motif. But in order not to overdo it with the number of ornaments, it is enough to decorate only a few nails.
White striped pedicure is considered a simplified option for those who do not yet own the painting of ornaments and patterns. And the most popular, of course, is the marine theme.
Another option for relaxing on the sea is a pedicure with white varnish, decorated with sequins. The advantage is "longevity." Believe me, only nail extensions can be more durable than such a pedicure.
Well, and the last sample: floral theme. What could be nicer and more feminine than delicate flowers on a white background?
White pedicure with rhinestones
A great way to add some refinement to the appearance of the legs. A white pedicure (photo below) with rhinestones looks very gentle and elegant. This option is suitable for absolutely any outfit.
A pedicure with white varnish decorated with floral painting also looks spectacular.
How to glue rhinestones
To glue small stones, you need to slightly moisten a toothpick and touch the face of the rhinestone, then simply transfer to the nail and carefully press down. The smallest usually stick to a transparent varnish. But at the same time, you need to remember that you need to paint each nail individually, and not all at once, and glue the rhinestones very quickly until the varnish is dry.
Large stones are glued to a special glue, as it is more reliable. More thoughtful girls replace it with glue "Moment", which is sold in miniature packages. When working, usually use a toothpick. If you squeeze the contents of the tube onto a nail or stone, then the pedicure will turn out to be inaccurate.
To fix the rhinestone at the end of the procedure, a fixative is applied.