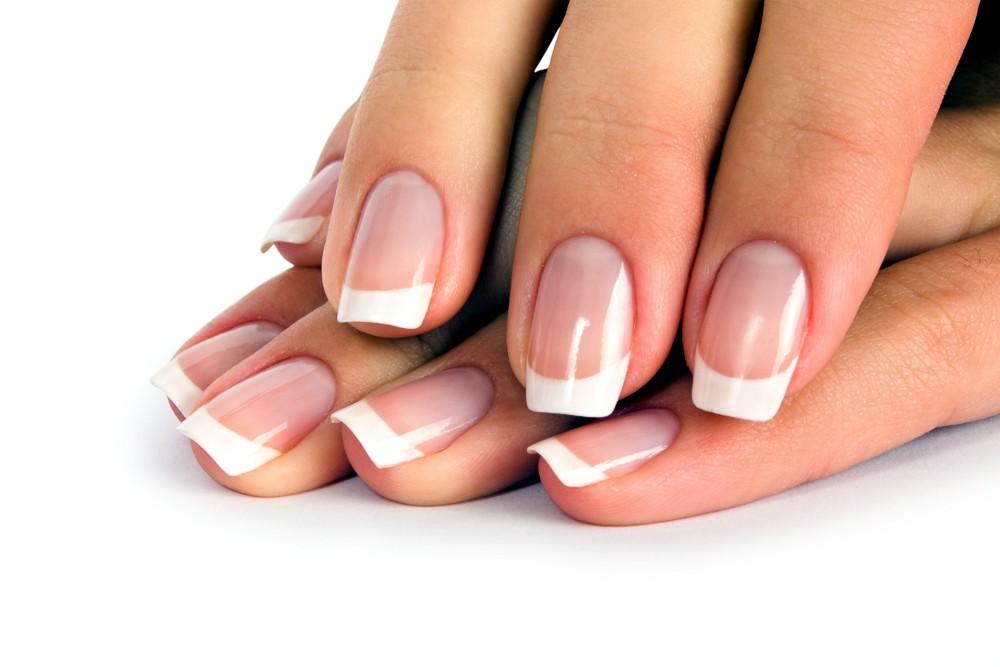
Every girl wants her hands to look beautiful and well-groomed. Long nails are a very good addition to beautiful hands, and if you are an office worker, they are always in sight, and a manicure should correspond to this. If the nails cannot be grown due to excessive brittleness or due to the fact that the nail plate is weak by itself, then nail extension with biogel comes to the rescue.
Differences between gel and biogel
They have not as many differences as it might seem at first glance. The biogel contains slightly less polymers, which do not affect the nails themselves very well. But building it with it can not be classified as harmless. Just like in any extension, the nail plate is covered with a layer of various gels, which blocks access to oxygen. And precisely because of this, the protective layer weakens at the nail. It is these qualities that can damage the plate, make it weaker, it can be deformed. In view of this, girls with very weak nails are not recommended to do any kind of extension, no matter what gel is used.
If we talk about operation, then there are also no special differences. These nails are strong, and they must withstand any damage. Biogel remains bright until removal, no scratches are visible on it, nor does it change color. If it comes to correction, then with biogel it is much easier to deal with than with acrylic. It is very easy to execute any design drawing on it.
Biogel is not only intended for nail extension, they also cover the nail plate so that the nails grow and do not break, that is, it serves as a kind of hardener. But this refers to the strengthening of the free edge of the nail, due to the thickness of the gel. Precisely because it becomes thicker and more resistant to any damage, it becomes more difficult to break it.
Nail strengthening
The strengthening procedure should begin with a hygienic manicure. At the very first stage, it is necessary to remove the top layer of the nail, then apply a degreaser, and then a primer on it. Once it dries, you need to apply a basic biogel. This layer must be dried in an ultraviolet lamp. Then apply biogel, which is intended for leveling, after the lamp this layer will be perfectly smooth. The last step is to apply a finishing bio-gel, which will give the nails shine and protect against any damage. After the strengthening procedure itself, if you wish, you can begin to create any design. Various drawings with color biogel will look beautiful.
Building biogel at home
If you decide to grow your nails yourself using a biogel, then you will need to spend some money on the purchase of materials for this. The gel for nail extension and for strengthening their tips have differences, if you decide to strengthen the free edge of the nail, then you need a composition for this. Among other things, in order to build nails with biogel at home, you need some more items:
- Nail file.
- Grinding for cutting off the top layer of the nail plate.
- Brush to remove dust after you file your nails.
- Orange sticks.
- Primer or primer.
- Degreaser.
- Forms for nail extension or nail tips.
- S-biogel for building one color.
- Biogel for creating drawings, if they are planned.
- Tassels and dots for design.
- Topogel bio gel (top).
- Polisher for trimming extended nails.
- Ultraviolet lamp.
Some people think that biogel nail extension is not very long, that there is a peeling of the gel itself. But if all stages of the process are completed correctly, then with a finished manicure you can safely go through about a month, until the next correction.
The process of nail extension with biogel
A few days before the procedure, it is advisable to remove the cuticles. It is not recommended to do this before the build-up itself, since the material can peel off from the nail. You need to cut your nails very briefly, you can use nippers to speed up the process. You will also need to grind the nail to give it a beautiful shape. Remove the top layer on the nail plate, but do not need to grind much, it is desirable to achieve a simply smooth surface. After all of the above, you need to degrease the nail. But it is important to slowly apply the degreaser so that it completely covers the surface. The next step is to apply the primer, however, before further actions, you need to wait until it turns white, it is literally a few seconds. After that, you need to glue the tips. It is important to consider this point: after applying all the previous layers, it is impossible to touch the nail, if this cannot be avoided, then you first need to glue the tips, and then degrease and apply a primer.
Now you need to apply gel S in two layers to form a beautiful nail plate. Then place the nails under the lamp for three minutes. Give the nails a shape, grind to the desired one. After that, apply the finishing biogel, and if you have a drawing in the project, then you need to perform it at this stage, and then dry it under the lamp. If you do a French, then for building you can use a white biogel, and the rest of the procedure is carried out with an ordinary gel.
Nail extension with biogel at home is quite simple to perform. The main thing is to follow all the requirements so that the nails last longer in life.
How to take off?
Building with biogel is a fairly simple process, it is not too difficult to remove it from the surface of the nail, you just need a special liquid for this. First you need to break the finish layer with a rough file, then apply liquid to the fleece, put it on the nail and wrap it with foil. In about ten minutes the biogel will get wet, and after that it will simply be removed with an orange stick. Then you still need to polish the surface of the nail with a buff. The nail plate after these procedures is not injured, so you can again apply materials. The procedure for removing nails does not take very long, about twenty minutes.
Correction
Many girls ask themselves: “Is it possible to make a correction, or is it necessary to remove all the material and apply it again?” Some experts recommend to remove and do it again, since those layers remain, and as a result layering is obtained. Others recommend a correction after three weeks. According to their advice, you need to cut off the top layer of the biogel, and then apply it to the overgrown part. But after several corrections, it is still recommended to completely remove and build up again.
Reviews
Reviews about building up biogel are mostly good. Many girls are satisfied that the nails are protected, at the same time they are strengthened, and after removal they do not spoil at all. Much, of course, depends on the quality of the gel itself and on the master who carries out the biogel extension procedure. If he has a lot of experience in this matter and he knows how to conduct all the processes well, then the nails will not break and be damaged for a long time. And if biogel is removed incorrectly, then the removal liquid can harm the health of the nails, after which the healing process may be delayed. Biogel is not able to make long nails, since it is considered a soft material, only dense materials, such as acrylic and other types of gel, can handle this.