Today, many are building baths on their sites. It is clear that it should be as warm as possible. If the owners do not want to get the wrong design, then thinking about every moment is at the planning level. But when you create a full bath, you can save a lot on firewood.
What is worth thinking about? Insulation of the ceiling of the bath is an important stage in construction. There are enough material offers on the market. Before starting the construction, it is worth considering any action. After all, each material has its own characteristics and fastening technology.
When can not do without insulation?
According to experts, to do the insulation of the ceiling in the bath with their own hands is required not in every case. There is a law of physics, which should not be forgotten: warm air rises. The ceiling limits the movement of heat, and there it accumulates, without any benefit. In this situation, it is important what level of thermal conductivity of the ceiling. In the absence of an insulating structure, about 30 percent goes to the street.
Season dependent
Some note that for a bathtub flooded in the summer, there is nothing wrong with the lack of insulation. If this building is used year-round, then you will have to think about insulation.
In addition, if a person does not want to heat the whole day, it is also worth completely eliminating heat loss. You can do this without the involvement of specialists. Since the insulation of the ceiling of the bath is a simple process, it remains only to take full-fledged instructions for arming.
Several ways to choose
As already noted, there are enough ways, you just need to choose your own and implement the project. How is the choice built? This is influenced by what is above the ceiling:
- Uninsulated attic.
- Residential attic.
- Flat roof with little space.
Despite this, there is a limitation in work. Experts identify several main areas:
As a result, each procedure gives the main result - warming the ceiling of the bath. With your own hands, this operation can be performed in a couple of days. Before you start, it’s worth understanding the effectiveness of each action, preparing the material and tools required in the process. Having understood the nuances, you can proceed to installation.
Floor ceiling
In the process, you will need several constituent materials - expanded clay, clay and sawdust. When there is a cold attic, and there is no desire to warm it, then it is worth considering some points. The flat version is the most suitable for such a design.
This is a simplified construction - since loads are not affected by the ceiling, beam reinforcement is not required. The rough design will lie directly on the harness. By the name of such a method it is clear that a mound will be produced. Therefore, it is worth laying a chopping block at least 4 centimeters thick so that collapse does not occur.
What should be the layer?
The materials used are any available to the owner of the building. But the principle is the same. This is a “pie” in several layers. The bottom-up overlay is as follows:
- Finish ceiling.
- A layer of vapor barrier material.
- Boards.
- Wax paper.
- Insulation layer.
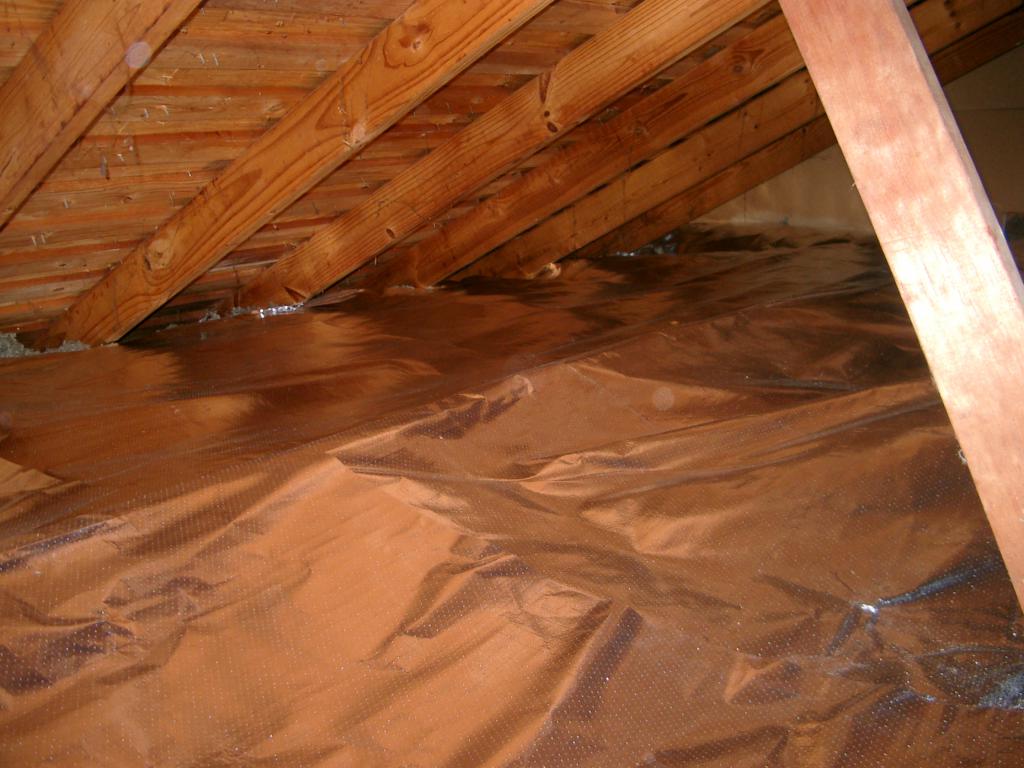
Vapor barrier
It must be said about the vapor barrier material. Its functions are not only protection against steam, but also the ability to withstand high temperatures. On the market such a product does not have a large assortment, so it will be easy to choose. Many believe that foil is becoming the best option.
The warming layer is made of expanded clay, clay with straw. If this is a modern flooring, so that there is no spillage through the cracks of the constituent elements, paper (necessarily waxed) is used. The coating thickness reaches 30 centimeters. This is enough to ensure maximum protection, and the heat does not go outside. Expanded clay of various fractions is on sale. It is important to stack so that voids do not form. The only way this is done with your own hands is the ceiling insulation in the expanded clay bath.
Some masters additionally fill boards of small thickness on the surface (for separation.) But there is no great need for this.
Clay and other options
The next type is the use of clay. It is initially soaked, and then mixed with straw or sawdust. The insulation of the ceiling in the bath is done when a homogeneous composition is achieved. After the resulting mass is distributed around the perimeter of the insulation zone. There is another option: you can dilute the clay, place over the entire area, let dry for four days. After the cracks appear, close up with the same solution. On the surface pour sawdust or oak leaves, up to 9 centimeters. The final layer is dry clay of 5 centimeters.
From the side of the bath (to the draft ceiling) a vapor barrier material is mounted. The joints are sealed with construction tape. After the crate is made, and the ceiling is already installed on it. It can be forcing or just chopping block. The choice will depend on the financial capabilities of the owner.
If you compare both of these options, then there is one common minus. This is a lot of weight. So, the ceiling should lie down from thick boards. The advantage of this method is inexpensive starting materials. Doing it yourself is a good option to warm the ceilings in the bath with mineral wool. Expanded polystyrene is also often used. But such materials will not be cheap.
What should be prepared?
In the process, it is worthwhile to prepare the necessary starting materials and tools. It:
- Construction stapler.
- Saw.
- Hammer.
- Boards.
- Foil and wax paper.
- Metallic tape.
- Nails
- Expanded clay or clay.
Before acquiring insulation material, it is worth making a calculation so as not to waste too much and perform maximum protection.
False ceiling
To create such a ceiling insulation in a bath with a cold roof is not so simple. This is required for those who want to create a room after the construction. If there will be a living room on the second floor, then it is worth making the floors reliable and complete. After the hemming is already done. Before starting work, prepare:
- Construction stapler and tape measure.
- Hammer and saw.
- Sharp knife.
- The mallet.
- Beams.
- Foil.
- Metallic tape.
- Nails with a protective layer.
- Reiki for the crate.
- Lining or other material for decoration.
- Insulation.
- Edged board.
- Film for vapor barrier.
Before buying, it is worth calculating the amount of insulation for the ceiling of the bath. If the bulk method is chosen, then the calculation is made from the height and area of the ceiling. Do not forget about the climatic indicators in the region. How warming will look from the bottom up:
- Finish ceiling finish.
- Creating a ventilation gap (rails are used for this).
- Overlay of vapor barrier material.
- Insulation between the beams.
- Waterproofing.
- Edged boards.
- Finishing on the ceiling of the attic.
After preparing the necessary materials and the required tools, the process of completing the work begins:
- First you need to put the floor beams.
- After which the vapor barrier is fixed to them from below. For this, foil is purchased. To completely eliminate the passage of air, it is worthwhile to seal with metal tape. It’s good to do such work with a stapler.
- So that the steam is probably not collected, the rails are fixed, a gap of 3 centimeters is made.
- For the finish it is better to use the lining. But such material is not cheap, so you can replace it with something if you wish.
- Next is to climb into the attic. Between the beams laid insulation material and steam protection. But what to choose? It is good to warm the ceiling of the bath with basalt wool.
- After it is worth laying a layer of waterproofing. If we are talking about the bath, it is better to give preference to the membrane.
- Then edged boards are used, everything is hidden under them. Since this part will become the floor for the second floor, do not use concrete. He is heavy.
- Flooring is carried out as a finishing material.
The process is not complicated and everyone can cope with it. Do not skip any of the steps, otherwise the design is unreliable and will not create additional heat.
How to insulate a panel ceiling?
Masters say this design is rare in the bath, because it is difficult to work with. The fact is that you need to mount a pallet into which the main materials will be immersed. In the work you will need to apply:
- Hammer.
- Saw.
- Construction stapler.
- Sharp knife.
- Nails
- Foil.
- Mineral wool.
- Whetstones.
- Boards.
To insulate the ceiling of the bath with mineral wool, it is worth taking a thickness of up to 10 centimeters. It is easy to work with the material, since it is cut with a knife, inserted and, if necessary, pushed. You need to mount the pallet depending on the room itself, but the width can reach up to half a meter.
Knowing the length and width of the ceiling, you can calculate in advance how much it costs to purchase. There is no need to take extra. Sometimes mineral wool has a high density. In such a situation, you won’t be able to compress it - just cut it off. But these pieces can be used in some recesses. If the size of the ceiling of the bath is 3.5 by 3.5 meters, then 22 standard mats will be enough.
It is clear that in the bath the temperature rises strongly, so it will not work to use any insulation. Particular attention is paid to the place where a person will bathe. Material must be:
- Incombustible. In case of fire do not create smoke.
- Able to not respond to temperatures up to 100 degrees.
- Do not take fluid.
- Do not release chemicals into the air.
Finding a completely high-quality and suitable material is not so simple, because each has its own pros and cons. Therefore, to build your choice is based on these data. How the work goes:
- The first is a new design. For this, bars or boards are needed, the length of which can reach up to half a meter.
- The bars are fixed at a distance of half a meter, and the boards are fixed perpendicular to the fasteners. An indent of 4 centimeters is made from the edge.
- According to external data, this is a box. The vapor barrier deepens into it. Then it is fixed. Such a shield must be raised up. It is better to strengthen it so that it does not fall apart.
- Created shields are placed close together on the roof.
- The supports for this design will be the walls. It follows that their length should be identical. Insulation of the insulation occurs in existing pockets. Then the overlay of the flooring boards is made and after - the final floor.
The panel ceiling is used in baths in two floors. It is compared with the binder. As a result, everyone decides whether to save on construction or not. When working with the installation of a panel ceiling, do not use plastic in the decoration. He is very afraid of high temperatures. So, a few hours after using the bath, this entire structure can simply be deformed, ruining the entire interior of the room.
Conclusion
So, we figured out how to insulate the bathhouse on our own. Before making the final choice of material, it is worth familiarizing yourself with the characteristics of each insulation. Only in this way will it become clear which is better. Some have increased flammability, which is definitely unacceptable. Builders believe that the insulation of the ceiling should be planned at the level of construction of the bath. And everyone can do this with their own hands, without the involvement of specialists.