Like square nails? This is not surprising. Today they are in trend. Manicure looks great on both long and short nails. There are many designs that can complement the everyday look or become an accent in an evening look. Look for manicure ideas below.
Simple option
If there is no time to make a complex design, you can paint your nails in beige or pink. The manicure will look neat, and your hands - well-groomed. So that square nails do not look too simple, you can stick broths on one of them. How to make a simple manicure? First you need to properly prepare the nail plate. We file the nails with a buff, and then degrease them. Now you should align the surface using the base. She, in turn, will help make the hitch between the varnish and the nail stronger. Now apply color. If the varnish is translucent, then we paint the nails in two layers, if it is thick and pigmented, then one layer is quite enough. Now you need to dry the design. Then we cover the varnish with the top and paste broths on one of the nails. They can sprinkle a nail, and then with a brush to distribute small beads on the surface. We dry the work, and then once again cover the design with a finish layer.
Geometric manicure
This design looks stylish and modern. How to make this manicure on square nails? First prepare the surface. We file the nails with a buff, and then cover them with a base. Now apply color. The little finger is painted with yellow varnish, the ring finger is not painted over yet, and all the rest are tinted in white. We are drying. If your varnish is too liquid, then you need to repeat the operation again. Now move on to the design. With brilliant varnish we draw a triangle at the base of the ring and middle fingers. Now take a thin brush and white gel paint. On the ring finger you need to draw two thick stripes that form an angle. Indent and duplicate the strips with yellow varnish. The free edges of the nail should be painted white. We cover the design with the finish and dry the result.
Rub + powder
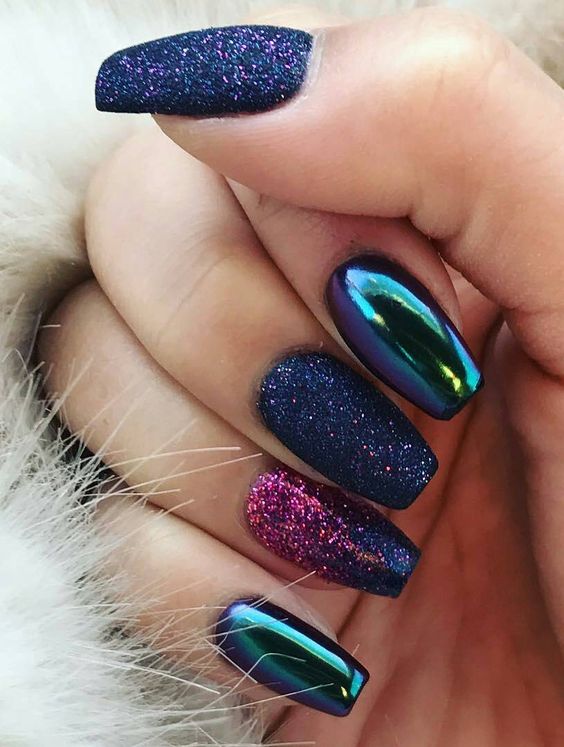
This unusual manicure will look good on both short and long square nails. How to repeat it? First, according to the standard scheme, we prepare the nails. We gash them with a buff and degrease. Now apply the base. Then you need to cover all the nails with blue varnish. This will be the basis of the design. Now we cover the nails with the top without a sticky layer and dry them. There are many ways to apply it. The easiest and most effective way is to distribute it with your finger. On the nail of the little finger, and then the index finger, pour the mirror rub and rub it into the top with intense movements. Now you should cover the result already with a top with a sticky layer. On it we will apply powder. Dry the nails. Now you should take the powder and sprinkle her nails without design. A brush will help to accurately distribute it. If you want to make a gradient, then it is better to apply powder immediately with a brush. At the end of the work, you need to tap your nails on the table to remove excess dust.
Cat's eye
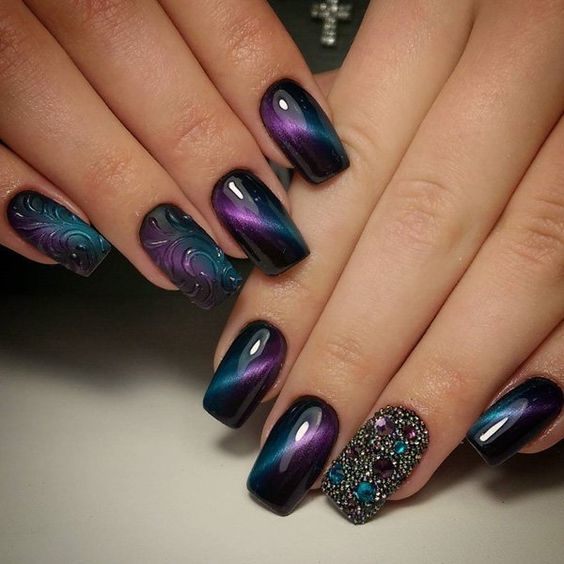
Such a manicure will be interesting to look at the expense of the difference in texture. The square shape of the nails perfectly suits this design. Let's get to work. Prepare the nails. We saw them, degrease and apply the base. Now you should apply a special varnish "cat's eye". We cover them with all the nails, and then we take a magnet. It is usually sold complete with varnish. We hold a magnet over each nail, lingering no more than 5-10 seconds. Dry the result. Now you should cover your nails with a finish. The design on two hands will be different. Rhinestones should be glued on one, and a convex image should be drawn on the other. Let's start with the strass. Glue them to a dry finish. First, you should fill the space of the nail with large pebbles, and then add small rhinestones or broths at the intervals. Dry the nail, and then strengthen the decor with another layer of the top. Now move on to the other hand. Two nails should be coated with a matte finish and the result should be dried. Now you should take a gel for modeling nails. We spread it with a thin brush into the drawing and dry it. We cover the convex pattern with a finish layer and dry again.
Rhinestone Manicure
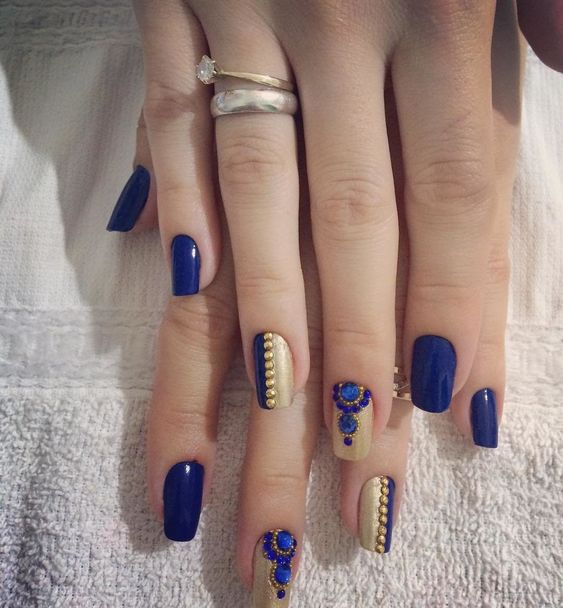
You can see photos of square nails with such a design above. Even a beginner can make this manicure. The most difficult thing here is to firmly adhere rhinestones. Where to start work? Well, of course, with nail training. It should be washed and then degreased the nail plate. Now you need to decide on the design. In blue we cover the little finger, index finger and thumb. The nameless nail should be divided into two parts, one of them should be covered with blue and the other with gold varnish. Gold color should be painted and the middle finger. Now dry the nails and cover them with a layer of top. On a two-color design, you need to glue rhinestones or broths in the middle. And on the nail with gold polish should put a picture. Glue a large rhinestone near the cuticle, and then glue small pebbles in two rows. Then again, a large rhinestone is attached, which is framed by a ring of small ones. And another pebble of medium size crowns this pyramid. The nail is covered with a finish and dried.
Lines and dots
This eye-catching design will complement short square nails. It looks stylish, but simple. Let's get to work. Degrease the nails and cover them with a base. Now apply color. It can be something neutral: pink, beige or flesh. Dry the manicure and apply the varnish with another layer. Now you can start drawing. We dip a thin brush in black varnish, and then draw strips. They can be arranged in a chaotic manner. On some nails, you need to cross them, and on some, one line is quite enough. On a nameless nail, three points should be made. They should be different in size and look like a pyramid. We cover the nails with the finish and dry them. Design square nails ready.
New Year's manicure
Such a design is quite simple. No need to draw straight lines or uniform points. New Year's manicure on square nails will be done as follows. We file and degrease the nails. Then apply the base and color in two layers on them. It should be remembered that white varnish is quite moody. Therefore, it should be applied in thin layers. We dry the nails and go to the design. Black lacquer or gel paint draw a wavy line. You can twist it several times. Then we arrange small dots at an equal distance. And now we pass to the most interesting stage of work. We draw multi-colored lights. First, put a point, and then draw it into an oval. Dry the nails, and then arrange the glare on the garland with white varnish. We cover the design with a top.
Matte manicure
This design looks spectacular due to the combination of pastel colors, matte texture and shiny hardware. How to make such nails at home? To start, we do the standard preparatory work. We file the nails with a buff and degrease them. Now apply the base, and then the color. We cover the little finger and thumb with gray varnish, the middle one with peach, and the two remaining ones with white. Now go to the drawing. It should be depicted two identical triangles on white nails. First, draw a path, and then fill it with color. Dry the result and cover the design with a matte top. We remove the sticky layer from the nails with triangles and draw intersecting lines with silver gel paint. We complete the design by gluing silver fittings. To keep it better, the edges of the decorative elements should be treated with another layer of finish.
French
Such a design will be simple. Making a jacket on square nails will take no more than an hour. We prepare the nail plate, file it with a buff and degrease it. Now apply the base or immediately camouflage. If your base is colorless, then cover your nails with a layer of beige or pink varnish. Now you should glue the strips for the French manicure on the edge of the nail and draw even white smiles on them. We dry the design and cover it with a finish layer. Now you need to cut the flower sliders. Dip them in water for 10 seconds, blot on a napkin and transfer the drawing to the nail. We cover the design with another layer of the finish.