Single lever mixers are increasingly being installed in bathrooms and kitchens. Such taps have recently become a great replacement for conventional old stuffing box mixers. Ball valves are convenient in that they have only one handle for regulating the pressure and temperature of the water. Despite the convenience, taps often break, and it is not always possible to call plumbing. Therefore, every man should know how to disassemble a single lever mixer in the kitchen and in the bathroom.
Varieties of Cranes
Typically, apartments are installed mixers of one type of two: single-lever or stuffing box, with two taps.
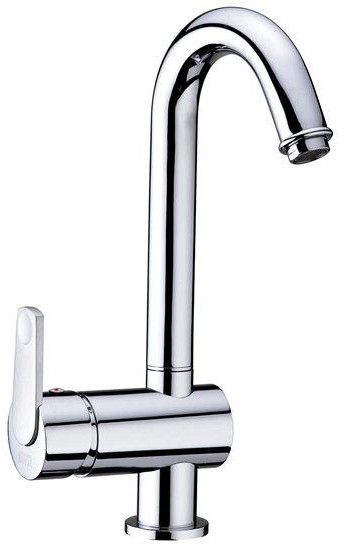
The single-lever mixer allows you to adjust the water pressure and its temperature by tilting and turning the handle. The mixers of this type themselves are divided into two types: ceramic and ball. The device of the ceramic mixer is quite complex, it has ceramic-metal plates tightly adjacent to each other and providing tightness and pressure force of the water. Balls have got their name from the design used: pressure and temperature are regulated by a ball mechanism having three holes.
In stuffing box mixers, you need to adjust the water with two knobs each time after it is turned on.
The tool you need to work
If the tap has a low pressure, or the mixer itself is leaking, repair is needed. You do not know how to disassemble a single lever mixer ? Stock up on the following tools and materials:
- flat screwdriver;
- Allen key;
- pliers;
- sealing grease;
- adjustable wrench;
- work gloves;
- fabric for removing chrome parts.
Pros and cons of single lever mixers
Each mixer has some pros and cons during operation. Advantages include divided control of the strength of the water flow and its temperature. The presence of only one handle on the mixer allows, after the selected optimum temperature, to leave the tap in this position and no longer adjust, but only change the flow rate. An equally important plus will be the relatively low cost with good reliability, as well as a large assortment that will satisfy even the most capricious buyer.
The disadvantage is the strong friction between the gaskets during adjustment, when solid particles get into the water, the tightness of the mixer is violated, which requires the installation of a water filter.
If you know exactly how to disassemble a single lever mixer, you can avoid many problems during operation.
Mixer device
Before disassembling a single lever mixer for a bath or shower, you need to find out how it is arranged. The design of such a mixer consists of a large number of elements, despite the fact that it is a rather small mechanism.
Durability and reliable operation in the crane provides a non-separable ceramic cartridge, which is one of the structural elements. There are no seals in the single lever mechanism, because all its elements are precisely matched to each other. In fact, there is nothing to break in such a mixer, but most often breakdowns occur due to the appearance of scale in the locking mechanism. That is why, when making repairs, it is necessary to change the rotary head of the crane and its lever.
Mixer disassembly
Consider how to disassemble a kitchen single lever mixer, and how to do it right. All necessary tools for work need to be prepared in advance.
A special valve shuts off the supply of cold and hot water, otherwise flood the neighbors. Having opened the mixer, you must make sure that the water is turned off and not flowing. Then the decorative plug on the mixer is removed. After that, the screw that secures the lever is loosened using a hexagon or a flat screwdriver. Then the lever is carefully removed upward, with a slight swinging from side to side. The protective screen is unscrewed counterclockwise, you can unscrew it by hand, if it does not lend itself, you can lightly tap it with a hammer. Be careful not to rotate the screen, otherwise it may result in damage to the water hoses under the tap.
Using pliers, remove the chrome dome; try not to damage the 4-toothed ring underneath. Take the ball out of the mixer, after it the sealing springs, if necessary, they will need to be replaced. The seals are removed with a screwdriver and later replaced with new ones. After the mixer is disassembled, you need to inspect it for rust, scale or defects. If any of the above is found, the part must either be replaced or cleaned. Replace the cartridge if necessary .
To assemble the crane, you will need to perform the steps in the reverse order.
Single lever mixer for shower or bath is disassembled according to the same principle. The disassembly method may differ only depending on which version of the single lever crane is installed.
Useful Tips
To get a general idea of how to disassemble a single lever mixer in the kitchen, shower or bath is not enough. Practice and a couple of practical tips are still needed.
When the lock nuts do not loosen due to rust or scale, excessive force will distort or break the mixer mechanism. Professionals advise applying the WD-40 compound to the place of the unsuitable joint, it will help remove rust and scale, after which the lock nuts can be easily unscrewed.
There are times when the composition of the WD-40 is useless. Then the only option left is to cut the nut across the grinder. And then, using an adjustable wrench and pliers, carefully remove it.
Inspecting the details of the disassembled mixer, you need to pay attention to the cartridge, it is it that most often can cause crane leaks. It can be removed from the mixer with a hex wrench or a small screwdriver.
The surface of the faucets is mostly chrome, so when removing such parts, use a cloth to accidentally leave scratches.
Inexpensive mixers are made of light and thin metal, which is very easy to deform during disassembly. This must be taken into account when disassembling the mixer and replacing some elements in it.
Try to keep these tips in mind as you study material on how to disassemble a single lever mixer.