Replacing or installing plumbing equipment is a common option in an apartment. There are enough reasons for this: spoilage, breakdown, long service life, etc. Installing a toilet bowl with your own hands in a private house or apartment is a simple process. Of course, you can invite a specialist, but you will have to pay for his services. Having detailed instructions on how to complete the work, everyone, even a novice, will cope with the task.
Before starting, you need to correctly plan how and what to do, as well as prepare all the necessary tools.
Space planning
It is clear that in any room it is important to correctly distribute the space. If it is a toilet, the required distance from the side wall, washbasin or bathtub should be at least 50 centimeters. This value is also influenced by such parameters as:
- dimensions of plumbing;
- type of discharge;
- the level of the toilet.
As soon as everything is decided with the main plumbing structure, the remaining components can be distributed. For the toilet to last a long time, you need to choose it wisely. If we are talking about replacing the old one, then it is better to choose an analogue to the previous one. We are talking about the structure of the drain and the principle of fastening (to avoid reconstruction). Otherwise, you will have to install a new drain mechanism, corrugation, etc.
Before answering the question of how to install the toilet on the tile with your own hands, you need to decide on the model of the toilet. It should be noted that the equipment is divided into the main types, depending on the shape of the drain, the bowl, the fastening of the tank. Exist:
- horizontal
- at an angle of 45 degrees;
- vertical
- funnel-shaped;
- dish-shaped;
- visors;
- design combined with the toilet.
There are also differences in fixing to the floor: with glue or sealant, cement, taffeta, a special frame hidden behind a false wall, with dowels.
In the latter case, you can use the full grip, use the corners, double hook or fix it on four sides.
Before starting work, pay attention to the method of water supply. If there are violations, the design must be completely replaced.
Installation procedure
How to install a toilet with your own hands? Before starting, you need to conditionally divide all the work into several stages:
- selection of a new design;
- dismantling of the old;
- repair work of the sewer system and water supply.
First you need to prepare all the necessary tools:
- building tape;
- hammer drill;
- keys of all numbers;
- hose to replace the water supply;
- FUM tape;
- fasteners;
- sealing gaskets.
Getting to work
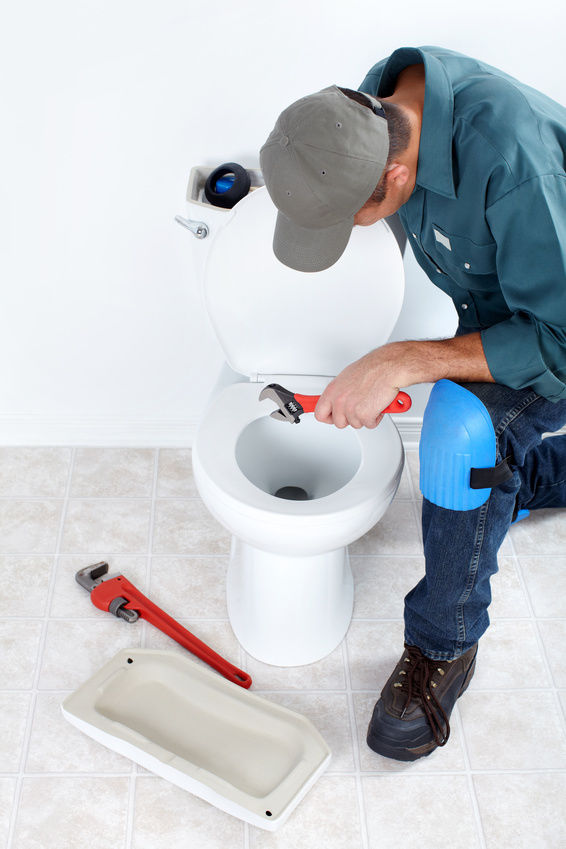
Before installing the toilet with your own hands in an apartment or house, the old structure is dismantled. Before this, the access to water in the drain tank is turned off, after which it will be necessary to drain the residues from it. You will need to remove the drain hose. If the equipment has been standing for a long time, then before starting the installation, you can rinse it using special tools.
After that, the tank is disconnected from the toilet. For this, wrenches are used. The same is done with fasteners to the floor of the main component. In some apartments, the drain inlet may be cemented. In this case, it will have to be broken.
Please note: there is always water in the knee. To remove it, you need to shake the entire structure several times from side to side. And only after that the toilet can be dismantled.
To prevent unpleasant odor from the sewer from entering the room during work, you must plug a hole in the sewer drain with a rag.
After that, preparatory work is done to install new equipment. So that the toilet does not stagger, the floor should be perfectly flat. Level check in progress. If there are differences, it is better to change the screed. This is done even in a new house or apartment. It is also worth checking the water intake and the drain system itself.
Standard installation
The whole process is done in several steps. Before installing the toilet with your own hands in the apartment, you need to study the attached instructions and perform standard manipulations:
- In the drain tank, the drain equipment is assembled.
- Gaskets are oiled with silicone.
- A tank is installed. Do not forget about the rubber supplement between the structures.
- Before fixing, silicone is used for washers and bolts.
- The pipe and the internal float are fixed.
- The bowl is located in the designated place.
How to install the corrugation on the toilet with your own hands? In parallel, work is underway with this equipment. A temporary plug is removed from the sewer hole and the corrugation is fixed in order to make the necessary measurements. Sealant will help eliminate possible leaks. It is used in the place of the corrugation seal and the definition of discharge. Then make holes in the tile under the dowels. In this case, you will need to use a hammer or drill. In order not to drill too much, it is worth making a mark on the drill equal to the length of the fixing device.
Dowels are inserted into the existing recesses, and the toilet bowl is put in place. Then the screws are screwed in. This must be done carefully so as not to spoil the facing material on the floor. Once the work is completed, the screws are hidden under special plugs (rubber or plastic). After that, the tank is filled with water. It should be carefully monitored for leaks in the drain. Only then is the lid fixed on the drain tank.
Next, it's time to fix the seat. The kit always has special bolts, brackets and gaskets. This is the simplest procedure, which does not raise any questions.
Installation with hidden tank
How to install a toilet on a tile with your own hands, if modern technologies are selected? The hidden drain tank looks pretty neat. There can be two options - a floor design or a suspension with installation. The whole process consists of several stages.
How to install the installation for the toilet with your own hands? Here you will have to perform two main actions. This is the installation and fixation of the drain tank, as well as the toilet itself. Where do the work begin? First - installation on the wall under the drain tank. Roulette is used in the work. It is necessary to find the center, and the perimeter of the entire structure should be measured from it. It should be noted that the distance from the tank to the wall should be at least 120 millimeters. The equipment must be fully attached to the wall.
According to the masters, such a design can only be fixed on the supporting wall of the bathroom. Once the preparation and marking is completed, it is worth punching holes for the mounting components. After that, the anchors are displayed. The structure is fixed on them.
Next go to the tank. In this case, attachments from the equipment kit are used. Water is supplied to the tank, the toilet itself is connected to the drain system. Do not forget about the following points:
- During the work, holes are drilled and pins are inserted.
- Couplings should be located on the studs.
- The nozzles must be suitable in diameter.
- Do not forget about the depreciation of the bowl, silicone or rubber copes with this perfectly.
To prevent leakage, a full check is performed after installation. At the end, the drain hose is fixed.
A floor toilet with installation will also be installed. There is no big difference. Here's how to set up the toilet properly with your own hands using this technique:
- Metal fasteners are used. With its help, a knee is installed. For reliability, the structure is fixed precisely using a knee.
- The toilet is installed. It should be noted where there will be holes in the floor.
- The bowl is removed and the corners are superimposed, taking into account the marks.
- The design is put in place. It is necessary to drive the outlet into the pipe and install it with bolts.
- Then a tank check is performed.
- On the panel, a drain button is initially made. At the end, it is displayed in place.
Installation is not difficult. One only needs to know the main steps and do not forget to check all the elements for operability even during installation.
What fastening methods are better to use?
Now it’s clear how to install a hanging toilet with your own hands. But which floor fixing methods are better? According to the masters, several techniques are available:
- On the created pedestal made of tiles. Two or four dowels are driven in for fastening. To make the structure durable, add a small amount of sealant or silicone to each hole.
- Fixing anchors in the floor screed during the pouring process. Such a method should be performed with high accuracy. One of the main points is the selection of the appropriate length of the fastener. This is mandatory, because otherwise it will not be possible to securely fix the toilet.
- Using the originally installed wood backing. This technique is not very effective today, but not so long ago they used only it. The fact is that the tree does not tolerate moisture, and it is always present in such a place. If we install a toilet with our own hands in a private house, this option should be abandoned.
- Iron corners attached to the floor. They are mounted on an adhesive base. In order for the grip to be strong, the surface is pre-treated and degreased.
Many people wonder how to install a toilet on their own tiles on a tile in a house or apartment, if it is necessary to fix it against the wall. Experts say that only a load-bearing wall can act as a foundation. Only the most reliable design is used - a metal frame. It can be fixed on the anchor. Last pre-poured into the wall. There are enough techniques, everyone selects an option suitable for himself.
How can I connect the toilet to the drain?
First you need to purchase pipe fittings, taking into account the available sizes. This is done until nothing is attached to the floor. One option is to use a fan pipe. It is quite effective and provides complete isolation. This method is used in apartment buildings. When buying, pay attention to its diameter. It must exactly match the existing design.
Corrugation is used if the entire system is not located near the central sewage system. It’s easy to work with it, because the length is adjustable as desired by the stretching method, and any angle is created. When the eyeliner is complicated, it’s better not to find a method. Builders recommend not saving on it, otherwise you can purchase low-quality goods, which later will leak or cracks. The best option is a reinforced corrugation.
Today there are bathrooms with a vertical outlet. Basically, such models are found in new buildings. The advantages of this design are enough. This is a complete exclusion of clogging, as well as leaks. There is one feature: the axis of the retaining elements should be perpendicular to the axis of the equipment bowl. In any case, do not forget about maximum fixation so that unpleasant odors do not enter the room. Therefore, high-quality sealant is required in the work. After that, the toilet is fixed.
Horizontal discharge application
According to the masters, this design is similar in work with corrugation fastening. If desired, the equipment can be positioned close to the wall, freeing up additional space. Here you can not do without a hard component, which will become the connecting link for the toilet and the riser of the sewer system.
To complete the connection as accurately as possible, the two people work together. One sets and the other helps you choose the right direction. The toilet is put in place, marks are made for mounting. Then the plumbing is cleaned, and holes are made on the floor. Then everything is according to the standard scheme: installation of dowels and the very bowl of plumbing equipment. The junction closes with sealant. Next, you should check for leaks by making a couple of drain outlets.
Today the leading position is corrugation. Its installation is quick and does not require large financial costs. At the same time, the toilet itself can be moved; no serious alterations are required. There are times when the bowl is fixed oblique release. Experienced craftsmen believe that such work is best done together.
The first step is standard:
- A bowl is installed and places of fastenings are outlined.
- Holes are punched and dowels are inserted.
- The toilet is put in place and securely fastened.
All seams are coated with sealant. After complete drying, a leak check is performed. Since the structures most often have a slope of about 45 degrees, water rarely emerges in an unnecessary place.
How water is connected to the tank
As soon as the tank is fixed with the toilet, you need to start the water. Many say that in an apartment or a house, any sources of water supply must have an overhead tap. It is used during repair. However, in other sources, the fluid supply does not stop.
The same thing happens with the toilet bowl. The hose is attached to the outlet itself and to the water supply system. FUM tape will help eliminate leaks. Today there are enough specialists who agree to do all the work for a fee. But now, knowing the information, you can cope with the task yourself. Saved money can be used for other needs.
Conclusion
It is not difficult to replace or install a toilet if you follow the instructions from the manufacturer and the simple recommendations of professional builders. All the nuances of the installation process are described above.
If there are doubts about the correctness of independent execution, then you should not start, otherwise serious mistakes can be made. It is necessary to study in detail the stages of work. Install a wall mounted toilet with your own hands, as we see, is also possible. Self-confidence and strict adherence to installation rules guarantee success.