The purpose of the article is to tell the reader in detail how to make and install sliding interior doors with their own hands. This design will visually increase the space of the room, as well as complement the interior of the room. Sliding door - a stylish product, characterized by an unusual principle of operation and installation method. Further, the article will consider in detail the features of a sliding door and how to install it.
Benefits
Before you make the mentioned product yourself, you need to consider its positive aspects. The benefits include the following features:
- simple installation;
- compactness and versatility;
- saving room space by moving along the wall;
- original and modern design;
- lack of so-called dead zones (there will be an additional place for furniture);
- simple and smooth opening of the leaves.
In addition, a sliding door can be installed within the same room for zoning the space. This is especially important for cramped spaces.
disadvantages
Making a sliding door with your own hands is not an easy task. Moreover, such a home-made product has some shortcomings:
- low sound and heat insulation indicators (to increase these characteristics, the canvas will have to be sheathed with a special sealant);
- can not be used as an entrance door (sometimes glass structures are installed leading from the room to the balcony or loggia);
- high price of accessories and fittings;
- complicated repair.
Wizards recommend purchasing several clips so that you can quickly replace them.
Varieties
Doors according to the type of sliding systems are classified into the following types:
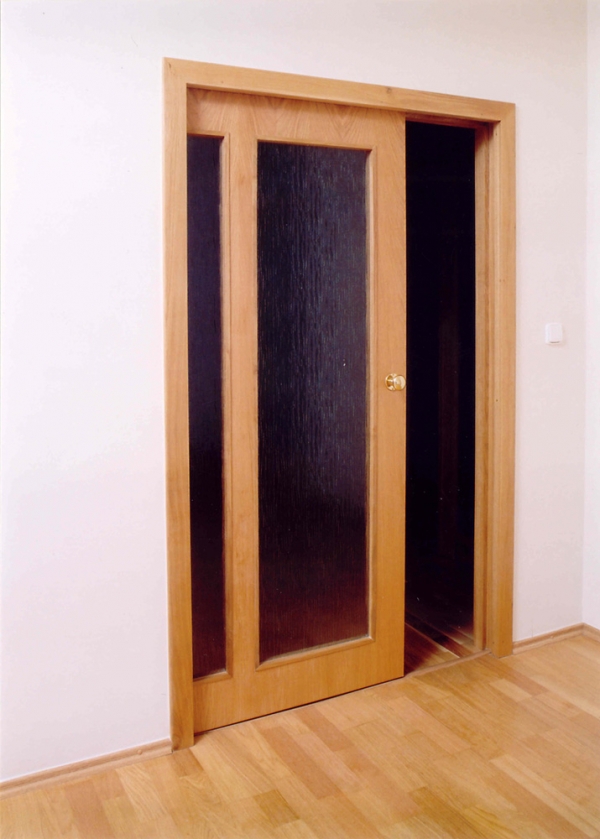
- Built in the wall (in the pencil case) - models that work on the principle of a compartment. In this case, the design consists of two wings, which move in parallel. To make a sliding door into the wall with your own hands, it is necessary to install rollers on the canvas, and on the opening - a guide bar.
- Cascading - products consisting of several wings that move in different directions. They are often used for installation in large openings.
- Accordion doors, the canvas of which is made of lamellas - thin plastic or wooden plates. These rotary-sliding parts are connected by hinges, thanks to which the structure folds when moving to the side, forming a kind of accordion (hence the name). Do-it-yourself installation of a sliding door of this type is quite simple, since manufacturers, as a rule, attach assembly and installation instructions to their products. Masters rarely make such interesting, but impractical and fragile products.
- One and two-winged - popular and simple models that are easiest to do with your own hands. Sliding doors of this type work thanks to a special guide that carries out the movement of the blade in one plane.
Sliding mechanism: types and features
This system must be selected taking into account the variety of the door, the number of wings and the material from which the canvas is made. Different designs have a certain mass and create different loads. For example, a single-leaf polycarbonate door is lighter than glass. Therefore, for the first option, a light sliding (roller) mechanism is suitable. There are two main types of the device in question:
- The hidden mechanism. The design of such doors must be equipped during the construction of the wall, because in it it will be necessary to make free space (case) for the door. Thus, the useful area of the room will be slightly reduced. However, in this case, the walls for installing furniture or interior items will be freed. Doors with a hidden mechanism are called penal.
- Open gear. The advantage of this system is the absence of the need to rebuild the walls, since the canvas will move along the outer guide part. To install an open-door sliding mechanism with your own hands, you need to leave free space along the wall (on one or two sides).
Web Mounting Options
Before you start developing and installing a sliding interior door with your own hands, you need to choose a guide system. This is a part that is necessary for a smooth and rectilinear movement of the canvas. Guides are classified according to their location into the following types:
- Suspended (upper) is used with a small weight of the door. Such parts are durable because the bottom of the product will not come in contact with the floor covering.
- Lower guides are rarely used, because they are easy to deform. In addition, a door without an upper support will not move quite smoothly.
- Retractable (combined) - parts used for the installation of massive structures (for example, for a glass door). In this case, one guide is installed on top of the opening, and the other on the bottom. The result is a stable design that can withstand heavy loads. However, it is almost impossible to make such a system on your own, since the lower rollers must be hidden at the end of the canvas.
According to craftsmen, the best option for manufacturing is a single-leaf product with a hanging guide. However, before making do-it-yourself sliding interior doors of this modification with your own hands, you need to prepare a lot of materials and construction equipment for work.
Necessary tools
To make a quality product, you will need the following devices:
- drill with a set of drills on wood;
- screwdriver;
- Angle grinder ("grinder");
- puncher and drill with a diameter of 12 mm;
- manual frezer;
- a circular saw;
- hammer and mallet;
- screwdrivers;
- pliers;
- chisel;
- hacksaw;
- jigsaw;
- clamp;
- a plane (manual or electric);
- tape measure, ruler, plumb line and level.
Necessary materials
For the manufacture of a do-it-yourself sliding door of a suspended modification, you first need to buy such building parts and products:
- Canvas. However, it is advisable to do this part on your own, as it will turn out immediately to adapt it to the dimensions of the opening.
- Suspension guide rail - aluminum profile designed to move the rollers. The width of this part depends on the number and size of the wings.
- Wooden beam with a cross section of at least 50 x 50 mm - material for the manufacture of supports under the guide.
- Roller mechanism, the size of which depends on the weight and thickness of the web.
- Boards - lumber needed for the construction of the door frame.
- Accessories (mortise handles, lock, plugs, stoppers, etc.) and a closer for smooth closing.
- Fasteners - self-tapping screws with a diameter of 6-10 mm, finish nails, anchor bolts.
- Foam
For decorative decoration of the sliding system and the lining of the opening, a pair of bars and a set of platbands made of wood or plastic are needed.
Blank blank
You can make a sliding door with your own hands from MDF, particleboard, solid wood, polycarbonate and other materials. The technique of making canvas from boards includes several stages:
- Buy lumber not less than 25 mm thick. However, you should also pay attention to humidity, since a suitable indicator is 12-15%. Masters recommend buying material that has been previously dried in a special chamber: in this way, the boards do not deform, because they were exposed to temperature effects.
- Sand the surface of the boards with sandpaper with fine grains, and align the ends with a plane.
- Combine lumber in a single composition. To complete this stage, the boards must first be aligned and sized. As a result, they need to be fastened together with wood glue. It is advisable to carry out the described work on a workbench in order to lay the harvested canvas on a flat surface.
- Press the glued product with clamps in several places.
- After drying, re-sand the sliding door with an emery cloth with your own hands.
- Fix three small trims on top, bottom, and center of the canvas with a dowel.
- Install fittings.
In addition, the canvas can be made from an unnecessary swing door:
- Remove old hinges, locks, handles and other parts.
- Glue plywood inserts into the holes obtained.
- Putty and paint the old canvas.
- Install new accessories for sliding doors (lock, recessed handles, etc.)
To develop an original canvas, you can make small holes for glass in it.
Aperture preparation
When the work on the manufacture of the canvas is completed, then we must begin to carry out the above tasks. First you need to remove the trim from the door installation side, and then measure the size of the opening. The main condition is its height and width should be 6 cm less than the dimensions of the canvas. If this requirement is not met, then it is necessary to reduce the entrance aperture in this way: fix the wooden frame to the inside of the slopes.
Before you perform the installation of a sliding door with your own hands, you need to consider the following conditions:
- The maximum thickness of the baseboard is 23 mm. If more dimensional elements are installed in the room, they must be replaced.
- The adjoining wall must be flat (deviations of not more than 5 mm are allowed).
- Side slopes must be strictly vertical, and the upper - horizontal.
If all the requirements are met, you can proceed with the installation of the product.
Mounting a sliding door
This work consists of the following steps:
- Fasten the rollers with screws to the upper end of the door.
- Slopes and the front part of the opening should be trimmed with platbands, which must be fixed with finishing nails.
- Secure the dowels to the wall above the opening with a wooden beam with a section of 40 x 40 mm. The top of the lumber should be located at a distance from the floor, equal to the height of the door plus 9 cm.
- Screw the guide to the fixed beam using self-tapping screws in increments of no more than 15 cm. The main thing is that the length of the part is two times the width of the blade. The horizontal rail must be checked with a long level. If there are minor deviations, they must be eliminated, otherwise the door will spontaneously open or close.
- Hang the web with rollers on the guide.
- Set limiters.
- Glue rubber seal to side trim.
Installing a sliding door with your own hands according to the described method is a difficult task that requires the correct measurement of parts. To complete the installation of a double-leaf door, you must follow the same instructions. In this case, a long guide should be installed above the opening.
How to install a do-it-yourself sliding door into a niche with your own hands: instructions
This option is the best method for installing the product in simple gypsum partitions. This method of installing the door includes the following steps:
- Make a supporting frame with a thickness of at least 100 mm. For these purposes, it is necessary to use guide profiles (floor and ceiling) with a width of 100 mm. In turn, rack profiles should be taken, on the contrary, narrow (width - 28 mm), and the minimum distance between them inside the frame should be 40 mm. In addition, in the place where the pencil box for the door will be located, the frame should be two-layer.
- To make a supporting beam from double profiles. The result is a support for the guide, which can be strengthened by a beam with a section of 40 x 40 mm.
- Fasten the rail to the beam from the bottom with screws.
- Fix the beam with the profile to each pillar inside the frame. The main requirement is that the bottom of the guide should be at a level equal to the height of the door plus 3 cm from the floor covering.
- Fix the mounting platforms to the upper end of the door, and the steel or aluminum profile with a rubber seal and a recess for installing the guide flag to the lower end. The last element must be fixed to the floor along the center line of the structure inside the frame.
Installation of a door in a pen-type construction
This work must be performed according to the following instructions:
- Install the front stop with the stopper in the guide.
- Insert the roller carriages (two pieces) and the rear stop in the same way.
- Hang the hanging bolts into the holes in the mounting plates.
- Hang the sash to the sliding mechanism.
- Adjust the height of the door, and then carefully tighten the bolts.
- Adjust and tighten the stoppers.
- Sew the so-called skeleton of the structure with drywall and clad the walls with decorative material (for example, paint or wallpaper).
Finally
The article examined the optimal and well-known options for how to make a sliding door with your own hands. If the inventory does not have the necessary tools and materials, it is better to buy a finished product. In addition, to make a door on your own is a laborious task, for which you need to carefully measure the dimensions of all parts and be able to handle carpentry. It is easier to install the finished product according to the instructions given in this article.