Any self-respecting hunter in his arsenal has hunting knives, he once made them with his own hands . You can, of course, go to a specialty store and buy there, but when you do something yourself, put your soul into it. To take a piece of iron and grind it on a stone is not serious.
In order to make knives with your own hands, you need to have a pair of hammers of various weights, pincers with a long handle, an anvil and a forge. As experienced blacksmiths say, such a craft must begin with forging ... horseshoes. In order to fill your hand. It makes no sense to read special literature, as it is written by professionals and for professionals that we are not.
The fittings are ideal for our horseshoes, which is easy to find in a landfill or elsewhere. And besides this, it is great for studying the color of metal during forging thanks to its notches. The main task is to learn how to forge iron evenly, precisely, without resorting to the help of a file and a file. After passing such training, you can proceed, in fact, to the main thing - to make knives with your own hands.
The forging process is time-consuming and involves many stages, during which something new comes up that captivates and interests. That is why forging is an art. Do-it-yourself knives should be made of strong steel, and 65G steel is best suited for this. Where can I find her? There is nowhere simpler, this steel is used in truck springs. Yes, and from one spring you can make several knives on which experiments will be performed during hardening.
Now you can start forging directly. You have already decided on the extreme color at which it is possible to forge (reinforcing horseshoes), but it is worth remembering that the steel of this brand cracks when forged at insufficient temperature, and therefore it is better to heat it more often. Thus, we process about 15 cm of spring and form it into a rectangle. After that, a plate perpendicular to the spring should be forged from the rectangle. Its thickness should be slightly larger than the thickness of the future knife, and 15 cm long - chopped off with a chisel. In our case, we get about 10 pieces of blanks for future blades.
So, we change the large hammer to a small one, take the workpiece with ticks, warm up and proceed to the formation of the contour of the blade. By the way, do-it- yourself throwing knives can be made from unsuccessful options, since they are smaller in shape and thickness of the metal. You can choose a different form, but for a start it is better to take a classic Finnish as a sample.
After that, it is necessary to form the blade itself, for this the blade heats up and with light hammer blows is brought to a trapezoidal shape. After that, it is necessary to create descents with a file or in another way without final sharpening.
Do-it-yourself homemade knives as well as in factory production should be hardened. This is an important stage and, therefore, should be thoroughly prepared for it. To determine the desired temperature, it is required to heat each blade, while lowering the degree and throwing them into the water. Then, breaking them by granularity at the break, we determine the blade and the temperature with which it was heated. The blade is quenched under the same conditions, but the oil acts as a cooler.
Vacation is carried out by heating it to appear yellowish in the cleaned areas and immersed in the same oil.
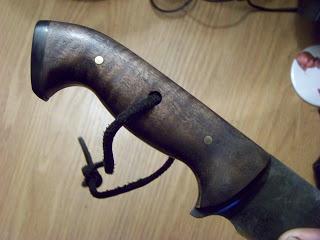
Thus, we get a blade, but already a pen is a master's business, there are no boundaries to the imagination and everyone can do something for themselves.