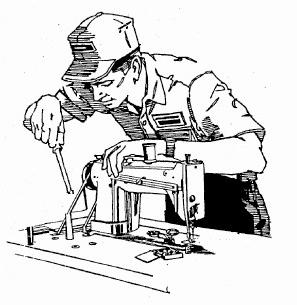
Do-it-yourself sewing machine repairs often may not be necessary at all, sometimes adjusting the tension of the upper and lower threads is sufficient. Typically, repair work involves a violation of operating conditions, which are recommended by the manufacturer, as well as non-compliance with the rules for the selection of threads and needles. The purpose of household sewing machines is to sew lightweight fabrics, but thick and coarse - not. There is also a requirement for sewing needles - their sharpness should be sufficient, and the thickness should correspond to the thickness of fabrics and threads. A sewing machine requires periodic cleaning and lubrication. Repair of household sewing machines is not needed if you follow all the rules for their operation. This condition is mandatory for perfect and long-term operation of the device.
Major manufacturers
Repair of the Podolsk sewing machine with an electric or manual drive is easy to do with your own hands, since usually there is a need for only minor adjustments and adjustments. This type of equipment is very reliable, the shuttle run has such a structure that the position will not stray, and this allows you to not make constant regulation. The characteristic of sewing machines is that breakdowns can be different. Quite rarely, it is necessary to establish the correct position of the needle bar, but this is easy to do with your own hands, that is, there is no need for the services of a master. Before you start troubleshooting, you need to remove traces of oil and tow of thread accumulated on it.
Operating the sewing machine can sometimes be accompanied by such a nuisance as skipping stitches. This phenomenon has quite simple reasons: an incorrectly installed needle, thread and needle size are chosen incorrectly for this fabric, the thread tension is incorrectly adjusted, the needle is bent or dull. A fairly common reason for skipping stitches is the failure of the settings or parameters of the shuttle mechanism. The shuttle nose does not fit the needle on time or the gap between the needle and the shuttle nose is excessively large. In this case, the implementation of a complex repair is necessary, it is necessary to adjust the interaction of the needle and the shuttle device.
Sewing machine "Seagull"
Repair of sewing machines "The Seagull" is a more complicated event, since the feature of this unit is the ability to perform zigzag stitches. An extremely qualified experienced craftsman is able to handle this task. However, you can make certain settings and adjustments, that is, independently adjust the gap between the needle and the nose of the shuttle. This parameter is the main reason for skipped stitches for this model of sewing machine. You can replace the belt for the sewing machine with your own hands, and also correctly adjust its tension.
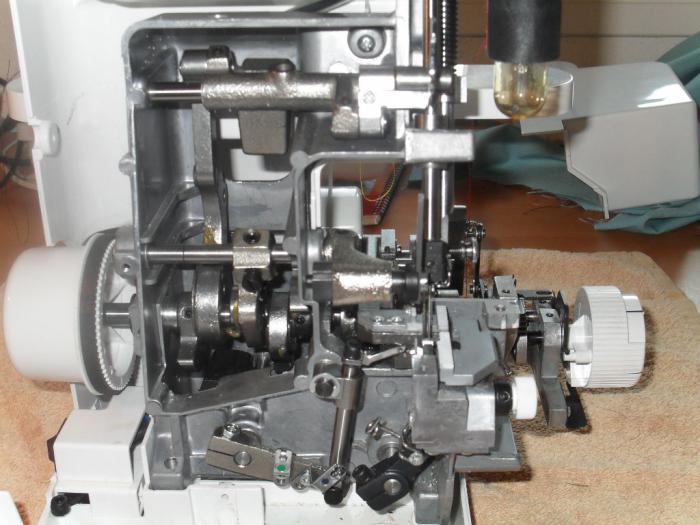
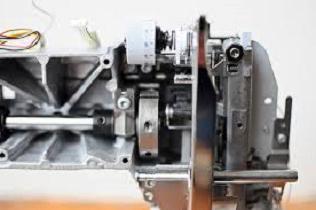
The main device of any device in this category is a sewing shuttle. The quality of equipment operation, the absence of gaps, thread breakage and other troubles depend on the interaction with the shuttle and the condition of the needle. Its surface should be perfect, it should not have nicks and roughness, rust and other formations. The sewing shuttle is not repaired if it has nicks or rust. In this case, the solution to the problem is only to replace it. In some cases, it is possible to replace the spring plate, the task of which is to adjust the tension of the threads.
Needle breaking
Repair of household sewing machines may be required if the device constantly breaks the needle. This is a sign that they need repairs. Sometimes the needles break due to the fact that when sewing the seamstress pulls the fabric by hand. It is required to slightly increase the pressure on the fabric of the presser foot, and raise the teeth of the rail higher, then the need for “help” to the device will completely disappear. However, the cause of the breakdown quite often is a malfunction of the shuttle device. In this case, the master must repair the sewing machine with his own hands, configure and adjust the operation of the main equipment unit.
Do not try to fix the problems associated with the electric pedal yourself. There is nothing special to repair there. The engine can be in one of two states: working or non-working. If he stopped working, then there will be only one way out - to replace him. The main sign of a burned-out engine is the specific smell of burnt wiring.
The device of the sewing machine is such that it can only be assembled and disassembled by a professional craftsman who knows about the features of its device and the electrical circuitry that is used in it. And it is precisely professionalism and experience that allows a specialist to quickly cope with a task. Most often, the pedal for the sewing machine fails due to the fact that the wires get tangled under your feet, fray, which gradually leads to their failure.
In some cases, it may be necessary to repair the sewing machine with your own hands, for which it is necessary to disassemble the device, that is, remove its plastic case in order to gain convenient access to certain nodes. Such a need arises quite rarely, in particular, when replacing an electric motor or drive belt. Sometimes, to replace the first, it is enough to remove only the bottom and side covers. And to eliminate jamming of the mechanisms, it is required to completely disassemble the equipment.
Stitching
Most often, the most difficult repair is associated with such an unobtrusive nuisance as the appearance of periodic loops on a line. The master is sometimes forced to check almost all nodes to eliminate it. Most often, the cause of this phenomenon is a notch or scratch along the path of the thread. If we are talking about the Chaika typewriter, then here the incorrect setting of the parameters of the shuttle's stroke may be a reason. This type of repair is quite complicated, so it is difficult to perform without experience in the relevant field.
The most common problems
Most often, as a malfunction of sewing machines can be called a break, tangled threads, broken needles. This depends, as previously noted, on the thickness and type of threads used, as well as on the width of the gap between the needle and the thread picker, predefined in advance. This problem concerns not only classic sewing machines, but also overlocks. In the latter, the tasks of the filler are placed on loopers that require precise installation to avoid skipped stitches and other troubles. You can pay attention to the appearance of such troubles as a braid of stitches or systematic breaks of threads. This may be due to the too weak tension of the threads in the hook or, conversely, too tight, and sometimes the thickness and quality of the thread does not correspond to the material that needs to be processed. All of these malfunctions are a frequent occurrence in domestic-made cars, in particular, Podolsk and Chaika, and almost never occur in foreign units. In this case, you can repair the sewing machine with your own hands, but you may encounter more complex problems that require the intervention of qualified specialists.
Detailed description
The breakage of the upper thread may be due to improper threading or when using threads that are very old and have lost their original characteristics. The type of thread and its thickness may not match the type of fabric being sewn, as well as the number of the needle inserted for the job. Sometimes this is associated with the weakening of the bobbin case spring clamp, which does not provide the necessary thread tension. Repair of Brother sewing machines in this case is quite simple, for this there is a small screw on the cap itself, and in older models this spring is already losing its elasticity, so the right decision would be to purchase a new bobbin case. In addition, if the old machine has been used for a very long time, the thread itself can be made in the places where the cuts pass, which need polishing. This is usually found on the rod of the upper thread tensioner and on the plates holding the thread.
Bobbin thread break
The first thing that should raise questions is the quality of the thread. If nothing changes after replacing it, then you can search further. In this case, you have a very simple repair of the sewing machine with your own hands. It is possible that adjusting the pressure of the spring-tightening spring in the bobbin case caused the slot to break out on the head of the adjusting screw, which led to the formation of a notch or it began to protrude further than necessary. The bobbin case spring itself could be rubbed so that it became sharp and began to cut the thread. In such a situation, the situation will be corrected only by replacing the bobbin case.
Sometimes the problem is with excessive pulling of the thread in the bobbin case. Much depends on the bobbins used, so it is worth changing them more often. Long-term use leads to their grinding, and when dropped even from the table it is possible to get significant deformations, which affects the quality of the seam. The first sign that the bobbin has deteriorated is the repetition of a stitch defect every 5-6 cm. The bobbins often have cracks and nicks resulting from a broken needle, which makes them completely unsuitable for future use.
Ugly line
If an ugly line is visible, there is an uneven tension of the threads, then it is likely that the winding of the thread on the bobbin occurred without proper tension by the clamping straightening device, and this leads to uneven winding of the thread on the bobbin. During sewing while unwinding the bobbin, the thread is unwound under different radii, and this is the source of uneven tension, resulting in an ugly line. If the thread is wound on the bobbin evenly, then it is unwound evenly. You can not wind the threads by hand, since the subsequent scrolls are linked to the previous ones, and this affects the quality of the stitch, because even the bobbin case spring clamping the thread is not able to compensate for this uneven winding.
Too weak tension of the lower thread leads to tangling and the appearance of breaks, similarly occurs when the upper thread is too strong. Do-it-yourself sewing machine repair in this case consists in adjusting the thread tension. It is required to hold the thread threaded with the bobbin in the cap by its end on weight, release it into free fall, making sure that the unwinding of the thread occurs no more than 5-6 cm.If this does not happen, then you need to adjust the adjusting screw on the bobbin case.
A seal may creep between the press-tight plates of the upper tensioner over time, which interferes with the adjustment of the thread tension by the required amount. These are fleece tows that are mixed with dust, engine oil and rust. The thread can stick in this dirt and just break. To remove them, use a hard brush, which is included in the kit that accompanies the sewing machine, or use an old toothbrush.
It also happens that the machine is set to excessively weak upper thread tension or the lower thread is tightened more than necessary. The bobbin case is also equipped with a thread take-up plate, so it is worth checking to see if there are any scratches or dirt under it. All this must be removed if necessary. Despite the fact that the bobbin case is quite simple in terms of the device, it also sometimes causes poor-quality stitching. A long working time can cause the thread to pierce the groove under the plate, so it will cease to stretch as it is required. In this case, repairing the sewing machine with your own hands is simple - just replace the bobbin case.
If you notice that the thread tension is too strong or excessively weak, you must add or loosen it. If your sewing experience is not too great, then it may be difficult to understand where the upper thread is and where the lower thread is. It will be most correct to thread the threads of one number, but of different colors, then the seam will be very visual. By his appearance, it will become clear to you which thread needs to be loosened, and which one needs to be pulled up.
Poor tissue promotion. Uneven stitches
In this case, the presser foot pressure should be adjusted first. It is necessary to check the horizontal position of the foot, it is possible that it does not press the fabric over the entire area, that is, not completely. The device of the sewing machine is such that sometimes the height of the toothed rack does not match the required level. If the rise is too low, then you can observe how the stitch is small or completely stands still. The teeth should not be in direct contact with the presser foot, only in this case can their dullness be avoided. Under the presser foot, put paper or a piece of cloth. Some machine models are equipped with a mode for switching the height of the feed teeth to the embroidery mode, you should find this switch, and then transfer it to the "sewing" mode. Sometimes the lifting height of the clamping teeth does not correspond to either the embroidery mode or the sewing mode. Sewing fabrics of medium thickness suggests that the correct position of the gear rack corresponds to that which ensures the complete extension of the teeth above the surface of the needle plate when it is fully raised. At their higher position, the probability is high that the fabric will be pulled together and tied up, giving the effect of “landing”.
Needle breaking
Repair of household sewing machines often consists in the need to replace the needle. In this case, it is important to understand the reason for its breakdown. It may simply not match the number of fabric you are stitching. It is necessary to visually check whether the needle itself is bent, the tip may also be bent or broken off, it is easy to check with a fingernail. When he slides off the tip of the needle, he will certainly catch on the burr. Sometimes it turns out that the needle is not fully inserted into the needle holder, that is, not to the full length. Sometimes the needle when sewing with a straight line is not in the central position, but somewhere to the left or right of the center, and when it is sewn in a zigzag, it breaks. In this case, you need to check the curvature of the thread guide and needle holder. It is possible that the second has shifted from its level. You can set it in the right position experimentally. And it doesn’t matter what kind of sewing machine you have, the instructions for it in any case do not contain such specific information.
When sewing, it is strictly forbidden to pull the fabric by hand, this leads to only one result: it carries along the needle, which rests on the needle plate, which leads to breakage first. In this case, you need to figure out why the fabric in your machine is not progressing well.
Skipping stitches on the sewing machine may be due to improper needle placement, for example, back to front, or the tip of the hook shutter will not be able to grip the upper thread. Sometimes the cause is the bluntness of the tip of the needle, or it may break off completely, and the needle may be bent. It must be checked by rotating through the gap to make sure there are no defects. If they are, then there is only one solution - replacing the needle. When buying needles, it is also important to be careful, as they can be used for other models of machines, that is, relate to some special standard that does not suit you.
It is possible that some parts for sewing machines have failed. For example, a desynchronization of the operation of the upper needle portion and the shuttle device could occur. In this case, you must contact the workshop or call a specialist. It is quite possible to repair Singer sewing machines at home, but it all depends on the complexity of the breakdown and your level of knowledge related to this problem. You can spend a lot of time experimentally selecting the position of the nodes and mechanisms of the device.
Herringbone and Dots
Many craftsmen have favorite questions regarding equipment repair. In the case of sewing machines, they may relate to the appearance of a “Christmas tree” instead of the line and the visibility of “dots” from the upper thread. The answer to these questions is only one - it is required to use threads of suitable thickness. It doesn’t matter if you use a foot sewing machine or an electric one; a problem can appear at any time. , , "". , № 50. 3 № 40 . «», .
, , . , , . . . . , . , . , , .
, . , , , . , .