The modern nail art industry offers a ton of options for creating beautiful nail designs. Skillfully applying the proposed materials, you can beat and emphasize the length, shape, natural beauty of the plate, turn manicure into a highlight of the image, hide all the flaws. However, this requires a master of certain qualifications and skills. But what about those who are just taking their first uncertain steps? Do not despair and do not panic, believe in yourself and learn! In the meantime, we will show you that the design for nails for beginners can be simple, but beautiful.
Everything you need at your fingertips
Often, the most commonplace objects can serve in skillful hands as real magic wands. Creating a nail design for beginners, the main thing is not to immediately try to master the super-complex techniques and drawings. It is better to perfectly master simple techniques, and then move on. But imagination can not be restrained, it will help to create unusual compositions with a minimum of skills.
Rainbow
What you need: base, varnishes of 3 colors, fixative, pieces of foam. It is better to choose varnishes in one gamut from light to dark or adjacent in the rainbow, so the result will be more beautiful. We cover the nails with the base, wait for drying. Then we apply one varnish on the foam (for example, you can pinch off pieces from a new household sponge). With patting movements we cover 1/3 of the nails with it. Then repeat the operation with the remaining two colors. Layers should not have clear boundaries, as if shades flow from one to another, creating the illusion of a rainbow. This simple technique helps create an original nail design. For beginners, that’s it.
Typed text
What you need: base, light matte varnish (beige, white, gray), alcohol, newspaper, nail polish remover, varnish-finish. We apply the base and the main color, carefully drying each layer. Immerse a fingernail in alcohol for a couple of seconds and press a piece of newspaper with letters to it. Carefully remove the paper and see that the printing ink adorned the surface of the nail plate. All that remains on the skin can be easily wiped off with nail polish remover. Now it remains only to carefully apply the fixative. Already similar to drawings, but does not require special skills, it can be the design of acrylic nails, gel or natural.
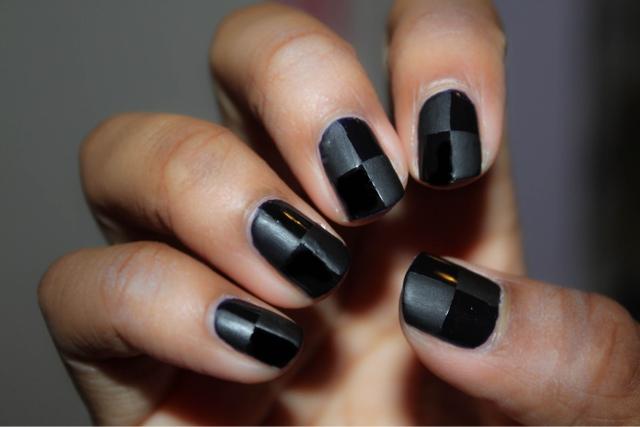
Sticky Tricks
Scotch tape is in every house and it can also be safely applied, creating a nail design. For beginners, this is a good opportunity to expand the range of created compositions. The tape should not be too sticky and one-sided. The easiest option is to cover the nail with a base, dry it, apply a layer of varnish to half the plate, and dry again. Then we take the tape and glue it so that the edge of the tape falls in the middle. Now we cover the unpainted space with another varnish. We are waiting for drying, then remove the tape. It turned out a nail with a clear border of two colors in the center. In general, with the help of such a universal technique, you can make dominoes, a chessboard, depict geometric shapes or stripes. Such a design for nails for beginners can safely compete with salon compositions. Also, do not be afraid to use rhinestones, foil, sequins and other materials for decoration in your work. If you can’t create drawings yet, you can try replacing them with ready-made translations and stickers.
Focused Trends
Nail art also has its own fashion. In order not to lag behind life, it is necessary to monitor what new trends arise in it. Try to learn all the time about various techniques and techniques, to practice. Pay attention to last year’s fashionable nail design. Photo 2013, new products in the nail industry, competitive works by eminent gurus - all this will help you create your own style of work.