To date, the construction uses a variety of materials. Diversity has led some resources to become much more popular than others, forcing them out of the market. However, wood has always been and remains a common material, despite the fact that it has been used for a very, very long time. Wooden gates and gates will never lose their appeal.
Why exactly a tree?
Many may ask why wood, if there are many other, more modern materials. The answer here is pretty simple. Firstly, the manufacture and installation of do-it-yourself gates made of wood is a task that almost anyone can handle. To do the same, but from a metal or other material will be much more difficult. Secondly, processing such raw materials is much easier. There is the possibility of applying a wide variety of artistic carvings, patterns and other things. All this can not be done on metal and other material.
Types of gates
Before you start making wooden gates with your own hands, you should determine the look of this product. In total, there are three main types of gates: swing, sliding, lifting.
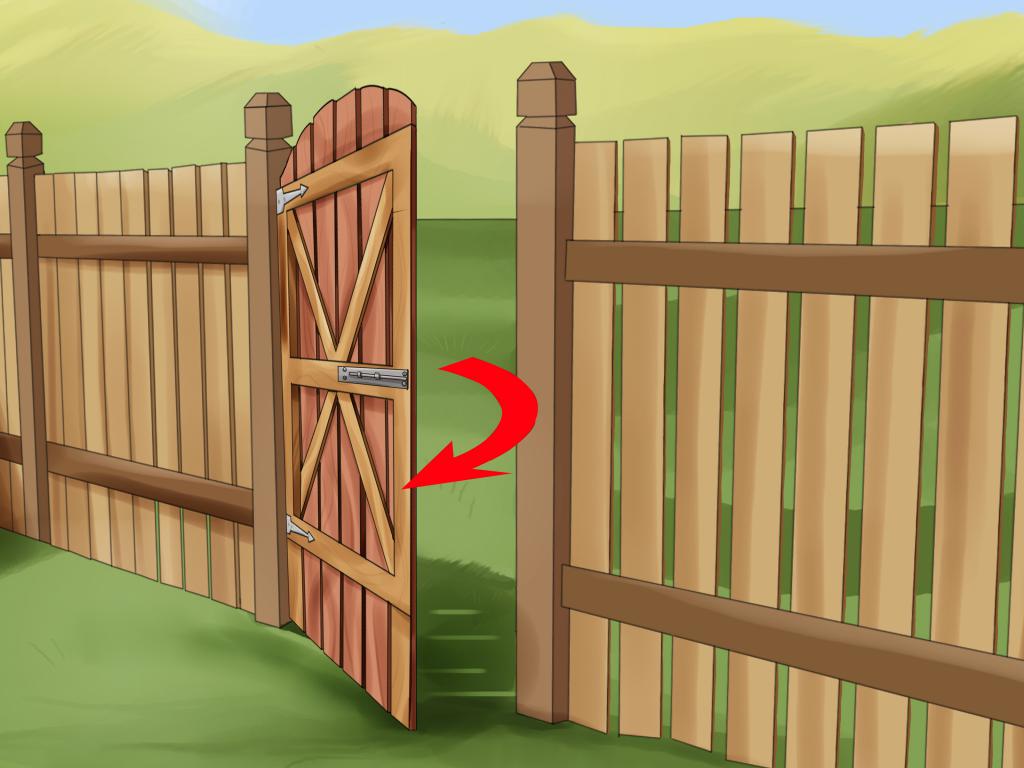
The most common type is, of course, swing. Such gates may have either one or two doors that open inward or outward. In order to lock the gates, most often use a lock or a latch. A big disadvantage of such a fence will be that it will take a lot of space to open it. In addition, the wider the leaf of the wooden gate, the more space will be needed. It is also worth adding that it is best to carry out installation in such a way that they open inward. Then they will not block, for example, the sidewalk on the street or the carriageway, if the site is adjacent to the road.
The second option is retractable. Naturally, the main difference and advantage of this type over the previous one is that they take up much less space. This is mainly due to the fact that they will open using rollers. The gate leaves will be scattered to the sides, adjacent to the fence. However, for the normal operation of such wooden gates at any time of the year, it is necessary to clean the paths along which the rollers move from dirt, debris, leaves, snow, etc. Naturally, the installation of this type of fencing is possible only if there is enough straight section on the sides so that the sashes can go apart.
The third and rarest, perhaps, view is the lifting gate. They are opened using a cord or a rope that lifts a monolithic wooden cloth up. However, it is fair to say that it is not practical to install such wooden gates to enter the site. They are best suited to a garage, for example.
Swing gate option
Since this option is considered the most common, it is worth considering the question of how to make wooden gates of this type. Naturally, the work begins with what the drawing is. You can do this manually or on a computer. The final diagram should look something like this: the image of the frame, the image of the canvas, the method of fastening the canvas. It is also worthwhile to apply all the small details, such as handles, bolts, heck and so on.
The choice of wood for construction
This issue is about half the successful implementation of the entire construction. There are many photos of wooden gates that amaze with beauty, but few people know that it was the right choice of raw materials that became the key to success. It is immediately worth noting that buying expensive wood species is not always necessary. A product can look beautiful even from an ordinary cheap pine. The texture of such wood is quite pleasant, the tree itself is very soft, and therefore there will be no problems during processing. Further, despite what kind of wood species will be selected, it is important to ensure that the percentage of humidity does not exceed 18. If this value is greater, then after the construction is completed, the wood will most likely dry out and the gate will skew. Another necessary step that must be completed before starting construction is the impregnation of raw materials with antiseptic and flame retardant substances. This will significantly extend the life of the material, protecting it from pests and rot.

Gates for gates
You can find many photos of wooden gates for a private house, which will seem pretty impressive. This is mainly achieved through powerful supports. Of course, you can also make them from wood, but you must not forget that they will be under significant pressure constantly.
In order to further increase the service life, it is necessary to cover that part of the support that goes underground, with bitumen, and on top to cover with roofing material. All this will help protect the tree from moisture. Some people prefer a combination of wood and metal. Metal poles, of course, will be more durable, however, they will have to be properly processed, otherwise they will be covered with rust. To avoid this, it is necessary to clean the surface, degrease, paint with anti-corrosion paint or cover with two layers of anti-corrosion primer.
Materials and Tools
In order to make a wooden gate for a private house yourself, you will need the following tools:
- tape measure, plumb, level;
- drill, screwdriver;
- drill, grinder, hacksaw;
- welding machine.
A welder will be needed, as metal poles will be used. To work, you need minimal knowledge and skills to work with this tool. However, if not even them, then you can replace the metal with wood. Of the basic materials for construction you will need:
- pipes of 150 mm are used as supports;
- pipes are also used for the frame, but already 50 mm;
- 10 mm reinforcing bars will be used to reinforce the carcass;
- steel corners;
- loops in the amount of 6 pieces;
- you will need 4 beams 50 x 50 mm;
- boards for door trim;
- paint or varnish for coating wood;
- cement, sand, gravel;
- necessary fittings (heck, bolts, handles).
Installation of supports for gates
In order to successfully make your own wooden swing gates, you must follow the instructions.
- Work begins with the installation of support pillars. To do this, 150 mm pipes are cut to the desired length, cleaned and covered with an anti-corrosion compound. The height of these parts should be greater than the gates themselves, at least 1 m. That is how much you need to dig into the ground. If the fence is planned to be made heavy and bulky, it is better to increase to 1.5 m.
- Pits are excavated, the diameter of which is larger than the diameter of the posts by about 20-25 cm. You can use a drill or a shovel.
- At the bottom of the pit you need to pour a layer of crushed stone of 15 cm. The layer must be carefully tamped. To do this, crushed stone can be slightly moistened with water.
- Inside the pit, formwork is installed, in the center of which a column is placed. It is advisable to work together to successfully install the pole.
- Next, prepare a normal solution of cement and sand in a ratio of 2: 3. The resulting mixture is poured over the entire space between the support and the formwork. If you need to get a stronger mixture, then you can add crushed stone. Then the proportions will be 2: 2: 3.
Continuation of work
After the columns have been concreted, work is stopped until the solution is completely dry.
- After the concrete has completely dried, hinges are welded to the posts at the right height. The ends of these devices are closed with caps to avoid getting into the garbage. To securely fasten the sash, three loops are required for each post. It is important that each loop is at the same distance from each other. The upper and lower loops should be 20-25 cm away from the end of the column.
- In order to assemble the frame, 50 mm pipes are taken for the first sash and cut into the required number of parts. After that, all the received segments are laid out on a flat surface in such a way as they will be installed on the gate. After checking all the verticals and the evenness of the angles, you can begin to weld the structure.
- Similarly, the frame for the second door is assembled. It is important that the diagonals coincide with the first.
- A steel bar is welded diagonally across the frame. This is done to increase the strength of the gate.
- After that, the “ears” are welded to the frame, of course, in accordance with the loops on the posts. Some help will be needed here for someone to keep the flaps while the other is marking.
End of installation
After completing all of the above steps, the installation is almost complete.
- Above and below the frame, steel corners are welded. You need to do this at a small distance from the side elements (20-30 cm).
- Next, you need to attach the boards to the bars. This will be the door trim. There may be two options. Either the boards are located close to each other, forming a continuous canvas, or with a small gap. If the installation is carried out according to the second method, it is better to first markup so that the boards have an equal distance between each other. A small nuance - the boards should be slightly longer than the frame below and above.
- After this, it remains only to hang the wings on the hinges. The last step is to secure the selected hardware. It is necessary to cover the gates with varnish and paint before fixing the handles, bolts, etc. It is recommended to check the quality of the coating annually so that the wood lasts a long and reliable time.
A bit of decor
The use of wood as the main material has one significant plus, the ability to decorate the surface. Here you can show maximum imagination. For example, if you used pine for construction, you can use a stain to give a more attractive appearance by changing the texture of the tree.
If there is a desire and skill in woodcarving, then you should think about decorating the gate in this way. You can also decorate the sashes with multi-colored mosaics, for example.