In the article we will talk about how to make drawers with your own hands. Very often there is a need for additional space in the kitchen, in the bedroom, as well as other rooms. The thought immediately comes to mind to make lockers. They can be installed both in cabinets and under the bed. In the article, we will talk about how to independently make cabinets for storing various things. With their help, you will be able to expand the space, as well as remove as many things as possible from prying eyes. In the article we will talk about the simplest design, but, based on all the calculations and data, you can make a bed with drawers with your own hands or a kitchen cabinet.
What tools do you need to work
In order to manufacture the boxes, you will need the following set of tools:
- High-quality screwdriver or drill. It is necessary that the chuck was designed to install drills up to 12 mm.
- Electric jigsaw. Precise sawing is necessary, so experience in cutting wood should be required. If you are not confident in your abilities, then it is better to find a workshop in which they will precisely cut the material. The angles must be right in all details.
- Roulette for measuring dimensions. A ruler is also desirable.
- The square.
- Pencil or marker.
- Iron.
- Drills on wood - will be needed when working on 5 and 8 mm.
- Hex and cross bits for screwdriver. They are necessary for tightening fasteners.
- Knife, sandpaper and rags.
A similar set of tools is necessary in the manufacture of DIY kitchen drawers. But in the manufacture of any other piece of furniture you will need it. In the event that you do not have any tool, and you want to make furniture, you need to purchase it. It’s best to choose quality products so that you don’t have to visit stores and purchase expensive electrical equipment.
The simplest example of drawers
To understand how the boxes are made, you need to decide on the place in which they will be placed. In other words, you need to measure the entire space that you are going to fill with drawers. In a cabinet, for example, it is best to install internal drawers hidden by doors. And this is a rather complicated design. While you still do not know how to make complex designs, it is worth practicing on the pedestals. If we are talking about a bed, then you need to carefully measure the entire space under it to decide how many boxes are needed and what size. First, practice on simple bedside tables, it turns out to be much easier with them. Next, we will look at how to make do - it -yourself kitchen drawers .
The essence of the whole alteration is to remove the door and unscrew the response elements of the hinges. This will be the space for the boxes, it is defined by us. For example, take a kitchen table with a width of 400 mm, a height (with countertop) of 850 mm, and a working depth of 500 mm. The last parameter is measured strictly on the inside of the sidewall, where the box will subsequently “drive”.
Suppose you want to put 5 identical drawers in place of one door. In a standard kitchen nightstand, the facade has dimensions of 715x397 mm. It is unlikely that you want to use it, so you need to calculate the dimensions of the facades of the boxes, leaving only the width unchanged. Divide 715 mm by 5 and get 143 mm. After this, be sure to remove the gaps between the drawers. When installing the drawers with your own hands, these gaps will play an important role - they will ensure the absence of stress.
As a result, we see that you need 5 facades of boxes, each 140x397 mm in size.
How to choose and calculate guides
The choice of guides is the highlight of the entire project. The most convenient will be the guides, which have a full roll out. Simple roller skins are also suitable, but in order to do the marking for them, you have to pretty work out. The tolerances are the same for everyone, so try experimenting. Too thrifty people can choose simple pieces of wood, slats as guides. Therefore, it is worth mentioning immediately that they do not show themselves very well during operation, and the following size calculations will not work.
All rails have a pitch of 50 mm. If the internal depth of the cabinet is clearly 500 mm, then you need to buy rails with a length of 450 mm, in which case the drawers will close normally.
It is recommended that the rails with a full roll-out be installed on the structure, therefore, when calculating, it will be repelled from them. Marking for elements is not very difficult, but it requires attention from the master. Counting should always be from above - this is the first thing to remember. The upper pair is marked at a height equal to half the upper facade. In our case, it is 70 mm. Subsequent notes are also very simple. Please note that guides with a full roll out do not differ on the right and left, it is very convenient. Calculation formula:
Distance from top = Height of the upper line + (Height of the upper facade (s) + Tolerances).
The marking line is the straight line on which the fasteners will be located. That is, subsequently it will be necessary to get into it with a self-tapping screw through an opening in the guide.
Box size calculation
But not all, then we dive deeper into the question of how to make a drawer with your own hands. The calculation looks something like this:
- The first box is 70 mm + (140 mm + 3 mm) = 213 mm.
- The second box is 70 mm + (140 + 140 + 3 + 3) = 356 mm.
- And by analogy, consider the following.
We tried to paint everything in detail in case you suddenly want to make the drawer non-standard or if they (drawers) turn out to be of different heights. Please note that the tolerance is the same in all of the above cases - approximately 3 mm.
Box Detailing
You need to build on the facades that were given above. It is not necessary for boxes to purchase a whole sheet of chipboard or chipboard. Of course, if you are not going to completely abandon the doors in all furniture. In stores you can buy furniture panels of any size. They can be used as blanks. Cutting parts is best ordered in the workshop. All calculations below are made for chipboard, 16 mm thick.
Edges with glue have a thickness of 0.5 mm. Before you make a drawer with your own hands, you need to prepare the following items:
- Workpieces 140x397 mm - 5 pieces, used for facades. How to count them, we wrote above.
- Billets with a size of 110x450 mm - 10 pieces, they are needed for the manufacture of box sides. Subtract 30 mm from the facade in height. The length you need to get on the guides.
- Billets of 110x310 mm - 10 pieces, of which you make the front and back walls of the boxes.
Such an algorithm is used to calculate the width of the last part. If the cabinet is made of chipboard 16 mm thick, then the width of the inner space is 400 - (16 * 2) = 368 mm. Please note that in each case, the width may be different.
The back and front walls of the drawers are fixed between the side parts, so they are immediately subtracted twice in 16 mm. Guides with a full roll-out, like roller guides, will be taken 25 mm each (pair).
Total: 368 - (16 * 2) - 25 = 311 mm.
Next, you need to throw another 1 mm into free travel and get 310 mm. Using this formula, you can calculate the overall dimensions of the elements for the cabinet of any width.
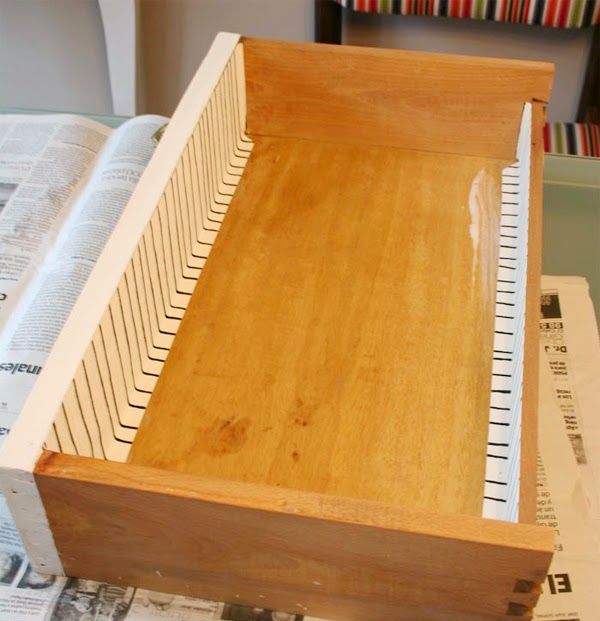
It would be nice to attach the bottom to the drawers. Otherwise, it will look rather strange. Cut from the hardboard (fiberboard) five elements with a size of 340x450 mm. After you screw these bottoms down with screws. Next, a few words about fasteners.
Hardware and fasteners
And the most important thing in any furniture is fasteners and fittings. From them directly depends on how convenient it will be to use a piece of furniture in the future. Before you make drawers with your own hands, you need to prepare a minimum set of accessories and fasteners. For manufacturing, you will need such fasteners:
- Confirmates measuring 5x70 - 40 pieces.
- 4x16 screws - about 0.5 kg. They are best to buy more.
- Self-tapping screws 4x30 - 15 pieces are enough. With their help, you will fasten the facades to the drawers directly.
From the fittings you need guides with a full roll-out - 450 mm long and 5 furniture handles to your taste.
How to collect boxes
Before you make drawers, you need to process all the details, or rather, glue the edge. This is done with an iron, you need to warm up at about 3/4 power. Apply the edge with a beautiful part up on the desired end of the part and warm it with an iron. After this, several times run along the edge that has not yet had time to cool down with a dry rag. This will allow you to tighten the edges. Use a blunt knife to cut off the excess. Dumb is needed in order not to harm the laminate. Work ribs with sandpaper.
For confirmations, 8 mm holes should be drilled into the plane, and 5 mm into the end. Marking under the guides is carried out along the line of fasteners and simply carry out 1/2 of the height of the part.
The full roll out guides can be divided into two parts:
- Wide should be mounted on the sides of the cabinet.
- The narrow part is placed on the side of the box.
It is best to ask the seller in advance how to divide the guides. On the one hand, everything is simple, but it is better to see once. There are locking elements that are not so easy to find.
Final stage
On the pedestal, the guides are indented about 3 mm from the front edge of the side. On the drawers - flush with the front edge. Due to the indentation, you will be able to level the facades and the main part of the curbstone. Fasten the facades from the inside using 4x30 screws.
The trick is to fit the facades evenly: first drill holes for the handles in it, then attach it in place and screw it on the outside. Pull out the drawer, fasten the facade from the inside in the normal mode and turn out the external “rough” fasteners. After drilling holes for the handles through the front wall of the drawer and put the last element of the hardware.