Many girls consider lunar manicure as classic as French. It looks neat, well suited for both long and short nails. In order to create such a design, you do not need to have special skills. In this article we will talk about interesting variations of the moon manicure.
Fashionable interpretation
Lunar manicure is a design in which the hole near the cuticle remains unpainted. But this design does not look unfinished. On the contrary, emphasizing the natural pattern of the nail, the girl makes her hands neat and attractive. In a new interpretation, nail art masters advise the fair sex to try to do a manicure in which the unpainted space near the cuticle creates not a semicircle, but a triangle. How to repeat such a design? To do this, you will need manicure tape, or you can immediately buy triangles stencils in the store. Getting to work. Degrease the nails, gash them with a buff and apply the base. Now we fix the stencil near the cuticle, and apply the color in two layers to the rest of the space. When the varnish dries, you can remove the adhesive tape and cover the design with a finish layer to achieve the effect of an even glossy finish.
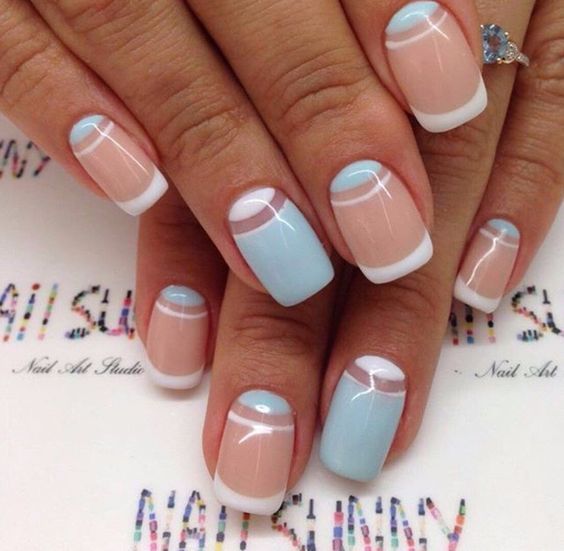
Gentle manicure
This design looks cute and feminine. It is great for daily wear as well as for special occasions. Lunar manicure can be done before a date, study or an important interview. To beat a simple design somehow, you can choose a pastel color scheme and add a French manicure. Thus, you kind of limit the nails on both sides, on one side in a semicircle, and on the other a strip. How to make moon manicure gel polish? Everything is very simple. First of all, you need to prepare your nails for work. After you have washed and degreased them, you can apply the base. You can take both transparent substance and color camouflage. It is advisable to give preference to beige or pink colors. Dry the base coat in the lamp. Now you need to apply color in one thin layer. Dry the nails. Take a thin brush and white paint. Draw a hole and a striped smile. If your varnish flows heavily, then you need to dry the design every two nails. We fix the manicure with the finish, hold our fingers in the lamp, and then remove the sticky layer from the nails.
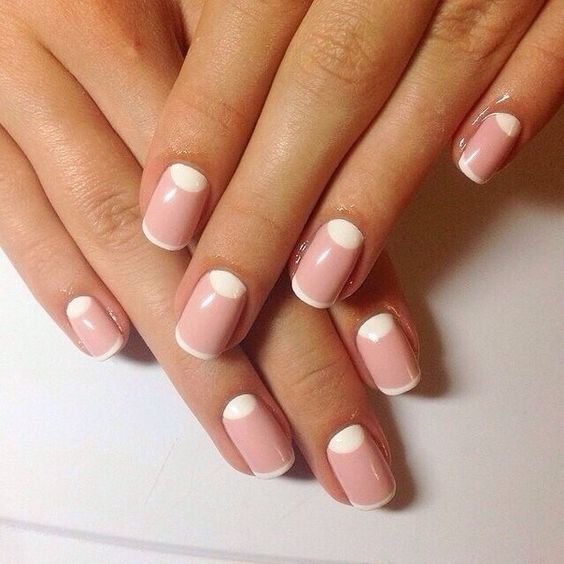
Classic
If you do not like the complex design, give preference to a simple moon manicure. Classic is always in fashion. Not sure which color to choose? Give preference to red. It fits all outfits. How to make a beautiful manicure? We prepare the nail plates and apply the base on them. Now we take a thin brush and on each nail we draw a semicircle near the cuticle. Using a wide brush, which is attached to the lid of the jar of varnish, paint over the nail, trying not to go beyond the previously allotted contour. When the first coat is dry, apply the second coat. If this is your first time doing this design, you should draw a fairly large half circle. If in the process of work you accidentally go beyond the borders, at the final stage with a thin brush it will be easy to correct the situation, simply by specifying the contour of the semicircle. Do not forget to cover the finished manicure with a finish.
French + moon manicure
If you like custom solutions, then this design is likely to appeal to you. To perform such a manicure, you do not need to grow your nails. Although on long plates, the design will look good. If you decide to quickly grow your nails, then you can use the lunar calendar of manicure.
How to make a design? Varnish for this manicure is not required. Instead, we will use sparkles. But you still have to process the nail. We file the plates and degrease them. Apply a transparent base and dry it. And now we immerse the thin brush in the base and draw a semicircle at the cuticle, and then a strip at the free edge of the nail. Dip your finger in a jar of sparkles and then wrap it on a piece of paper. All this must be done carefully so that the sparkles do not fly apart much. When all the nails are decorated, cover them with a top and dry.
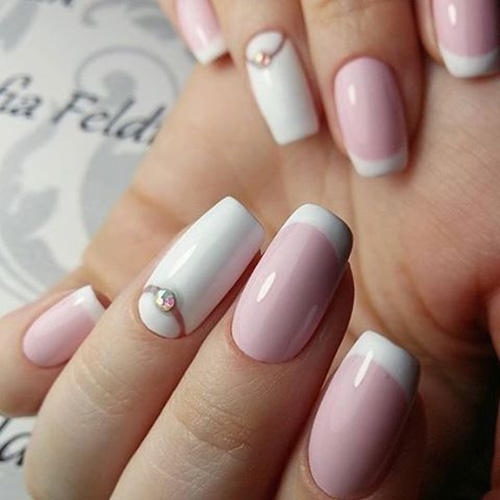
Fashion trend
Many girls like to highlight one nail with unusual varnish. Shiny or bright coatings are often used for this purpose. You can’t apply them to all nails, otherwise you will create an opinion of yourself as a lady who has no taste. How to make a fashionable design for every day? Lunar manicure is done according to the standard scheme. Only in this design they are not allocated all the nails, but only two. The first step is to file and degrease the nail plates. Now apply the base and color in two layers. We leave one finger without a color coating. We arm ourselves with a thin brush. Draw the holes on the index and middle fingers with shiny varnish. With the same varnish you need to paint over the nameless nail. Dry the result and cover it with the finish. To achieve a greater effect, you can cover the pink varnish with a matte top.
Golden moons
If you like shiny textures, then this design will appeal to you. Today, a similar manicure can be seen in many fashionistas. How can one explain such popularity? The fact is that the lunar manicure, the photo of which you can see above, is done very simply, but looks stylish. Such a design will fit well both in a business image and in a festive bow. How to create a similar manicure? We process nails and prepare them for further work. We apply the base, and then color coat. Light shades should be preferred. White, pink, beige, peach and cream tones are suitable. Why not use bright varnish? You should not focus immediately on two details - a bright color and a shiny texture. It will not look stylish, but vulgar. When the color coating is ready, you can begin to design. We cut out semicircles from manicure foil. We cover the nail with the finish and glue the blanks on the sticky layer of this coating. Dry the result and fix it with a double layer of the top.
Pastel shades
Very interesting lunar manicure nails are presented above. The design is unusual and attracts attention. But it is interesting not due to the color, but due to the stylistic decision. A similar manicure can be created in any pastel combinations. The main thing is to take colors that look good on the nuance. How to repeat this manicure? We prepare nails for work, and then cover them with a base. You can use camouflage as the first layer. We cover the nails with color. On all plates, except one, apply beige varnish. On a nameless nail, draw a semicircle near the cuticle, and then paint everything above this hole with a pale blue color. Repeat the procedure twice. Now you need to draw and paint semicircles in the cuticle of each beige nail. We arm ourselves with a thin brush and draw. When this work is completed, duplicate the semicircles with a thin white line at a distance of 1 mm from the blue shaded part. White color the hole in the nail on the ring finger. If you wish, you can complement this manicure with white smiles. To do this, a thin brush should carefully trace the free edge of the nail. Finished design overlap finish.
Wedding manicure
If you are getting married soon, but still have not decided on the design of the nails, pay attention to the picture above. It is very simple to make such a moon manicure with gel polish. No need to exert titanic efforts to achieve a good result. How to repeat the manicure from the picture? We prepare the nails for work and apply the base on them. Now all the plates, except the one on the ring finger, are covered in pink. Take a thin brush. Using it, with white gel paint, draw a semicircle around the cuticle on the ring finger. Duplicate this line by stepping 0.5 mm up. Paint the hole and the free part of the nail. We cover the finger with the finish and glue the large strassin onto the middle of the transparent strip. We dry the result and once again cover the nail with the top. Now we turn to the creation of smiles on pink nails. Glue the stencils on the nails so that all the free edges are the same length. We paint the strips with white varnish and remove the stickers. It remains to cover the nails with the finish.
Nontrivial gradient
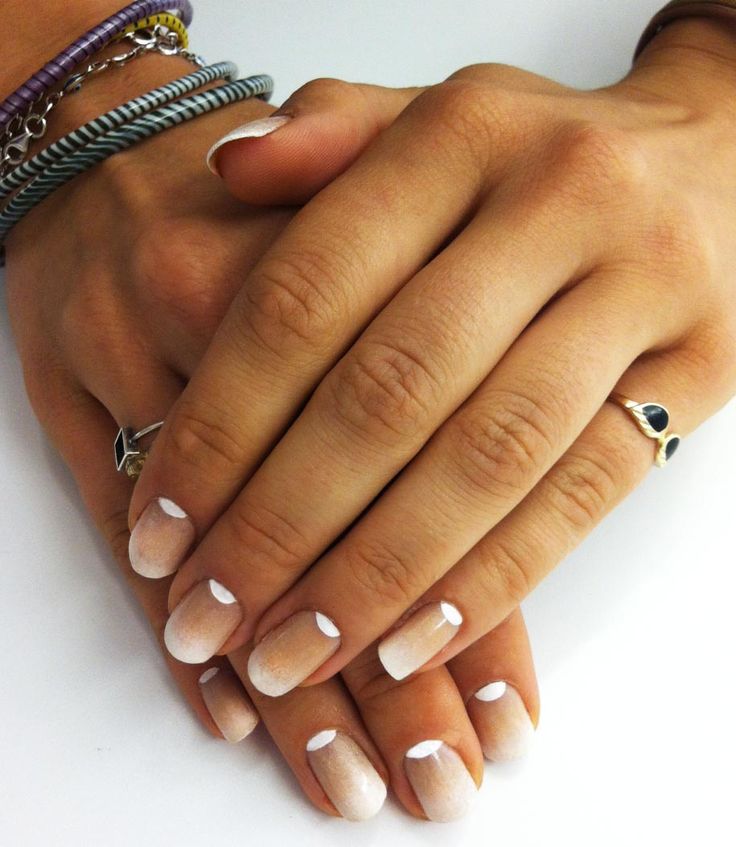
Do you like smooth color transitions? You can modernize this design by adding white semicircles to the cuticle. Lunar manicure with varnish can be done in an hour and a half. If you have already done the gradient more than once, then you know how it works. If you are creating such a design for the first time, you should be patient. We repeat the manicure presented above. We file the nails, degrease them and apply the base. Now you need to paint the nail plate with the main color. In our case, it will be brown. When the first layer has dried, you need to apply coffee-colored varnish on one part of the nail, and white on the other. We take a synthetic brush and make smooth shading. If this way of creating a gradient seems too complicated for you, you can do it differently. On the palette, mix white and brown and achieve a smooth transition. Now blot the result with a sponge and transfer the print to the nail. Dry the result. It remains to create a semicircle in the lower part of the nail. We draw it with a thin brush and carefully paint over. We apply the topcoat and the manicure is ready.