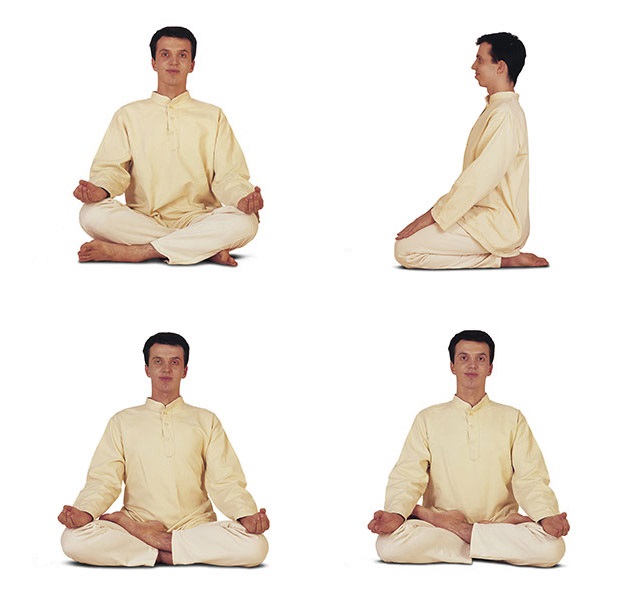
Many yoga teachers argue that breathing practices can and should only be practiced in a stable (see sitting with a straight back) position. Say, so prana easily rises and beneficially affects all aspects of existence. But what about those who are inaccessible at this stage of practice, the lotus position and Siddhasana, because in the first year of practice, units can sit freely in these positions for at least an hour. It turns out that pranayama is not available for beginners? In fact, this is a misunderstanding of the essence of practice, because at each level of development there are accessible or lightweight methods for mastering all branches of yoga for beginners, without exception.
Pranayama: what is it?
If you delve into the details of Sanskrit, then this word can be translated in two ways: "prana-pit" and "prana-ayama." It would seem an insignificant difference, but the meaning is changing globally.
In the first option - this is breathing restriction, that is, control, and in the second option - accumulation, that is, an increase in the energy reserve (prana). At the same time, it is possible to do these techniques at the same time, or you can do it separately, which is good for beginners who do not yet have subtle sensations and a large volume of inspiration.
What is the best way to start development?
Pranayama for beginners boils down to the fact that a person learns:
- be aware of the breathing process, that is, do not breathe automatically, uncontrollably;
- to control the inhalation and exhalation, that is, to know how to consciously make it deeper, slower, etc. You also need to learn to balance the inhalation and exhalation, that is, to make equal to each other.
- breathe correctly in asanas, they should not focus on the poses and their difficulties, but on the quality of breathing in them, because this process makes it clear how correctly a person practices asanas and is yoga really that?
- pause between inhalation and exhalation. This is a very sensitive process that requires the transfer of knowledge from a competent teacher. In one of the fundamental works on yoga “Hatha Yoga Pradipika” it is said that if you practice breathing techniques correctly, they will heal all diseases, and if not, then you can buy many new ones.
Subsequent levels of breathing exercises work with subtle energies, so beginners should not touch them. Below we consider a few breathing exercises - pranayama for beginners.
Ujjayi
This exercise of pranayama for beginners is considered basic, since it is used not only as a separate type of activity, but also in the practice of hatha yoga, that is, in asanas. It is Ujjayi that is the simplest but most powerful tool to combat most diseases of the human respiratory, cardiovascular and digestive systems. According to some reputable teachers, this type of breathing is able to cure 80% of all diseases, restoring the body at the cellular level.
How to do this pranayama?
Breathing for beginners should be based on improving lung function, which is what Ujjayi practice does. The technique at first glance is quite simple: it is necessary to breathe through the nose, but at the same time, when exhaling, pass air through the half-closed glottis (as if swallowing). Thus, the exhalation path doubles, because he needs to go out not in a straight line through the nose, but through the throat into the nasopharynx and only then out. In this case, it is important to set such a rhythm so that shortness of breath does not occur. A good indicator of the correct execution is the appearance of internal heat, sweat appears, but at the same time the mind becomes stable and calm, and the duration of the breathing cycle is at least 8 seconds (4 sec. Inhale and exhale as much).
Nadi Shodhan
The next breathing technique for beginners is the pranayama of Nadi Shodhana, which means “cleaning the nadi,” that is, the energy channels. There are several levels of execution in it, but for beginners, the simplest is usually used.
Consistently, you need to perform the following actions:
- Sit with your back straight and take a few deep breaths, tuning in to practice. Make the nasagra mudra with the right hand, with the help of which the air flow will be regulated. To do this, put the index and middle fingers on the interbrow, and the large and ring fingers on the sides of the nose, just above its wings.
- Inhale freely, covering the right nostril, that is, through the left.
- Open it and close the opposite - exhale.
- Inhale the right, holding the left nostril.
- Exhale with the left, holding the right.
This is how one cycle of Nadi Shodhana looks like. First you need to learn how to breathe, without confusion, which of the nostrils to open, and which, on the contrary, keep closed. When this action becomes natural, then you can move on to the next level: counting the interval of inspiration and expiration. The most accessible and safest option is the length of the inhalation equal to the expiration (in seconds), for example: if the inhalation is performed for six seconds, then the exhalation must be done with the same duration. The next stage of pranayama for beginners will be to increase the duration of the respiratory cycles to a comfortable limit.
Samavritti Pranayama
This breathing technique is also considered basic, thanks to it a balanced state of mind and the ability to do kumbhaki - pauses between inhalation and exhalation are achieved. “Sama” in Sanskrit means “equal, identical, the same”, that is, the inhale-exhale and the pauses between them are all equal in length. In this case, breathing is performed by both nostrils in a calm state. For example:
- Inhale: six seconds, pause for another six, calm exhale for six counts and kumbhaka also for six seconds.
In the process of adaptation, the length of each stage increases proportionally, provided that the general condition of the practitioner is satisfactory in all respects. If the next breath is taken with a gasp in the mouth, accelerated or jerked, this is an indication that the person was in a hurry and applied too long a breathing cycle. If we compare the second and twentieth cycle of pranayama, then there is no difference between them - neither in the speed of inspiration or expiration, nor in the frequency of the heartbeat. It is very convenient to use a metronome or loudly ticking clock for counting equal cycles, and the modern industry also offers many programs for gadgets with ready-made pranayama schemes.
Anuloma-Viloma
This type of breathing technique is often confused with Nadi Shodhana, considering them identical. In fact, there is a difference, and a significant one: a pause is added between inhaling and exhaling, that is, holding the breath (kumbhaka).
Moreover, this type of pranayama is divided into two stages:
- Be able to control kumbhaka consciously, while all stages of the respiratory cycle are equal in length (number of seconds).
- The main stage of Anuloma-Viloma is pranayama in a special rhythm: 1: 4: 2: 1: 4: 2. In a simple example, it looks like this: inhale - two seconds, a pause after it - eight seconds, then exhale for four seconds. Again inhale for two seconds, pause for eight and exhale for four. In this case, it is important not to get confused and tighten the nostrils in accordance with the rule. When this option is easily accessible, you can change to the following: four seconds - inhale, 16 - pause, eight - exhale, and so on.
Here the question arises: with which nostrils should Anuloma-Viloma begin? Pranayama is identical in technique to changing the nostrils of Nadi Shodhana, therefore, perhaps, confusion arose. The first breath always starts from the left nostril.
Execution technique
To understand in more detail how this pranayama is performed for beginners, it is necessary to go through the following steps step by step:
- Sit with a straight spine and do some preparatory breathing. Fold the right hand in the cherry mudra (as in the photo).
- Close the right nostril and inhale the left, counting two seconds.
- Stop breathing by holding both nostrils and count eight seconds.
- Release the right nostril and exhale through it, stretching your breath for four seconds.
- Clamp both nostrils again and pause eight counts.
- Release the left nostril and exhale through it for four seconds.
This is one cycle of anuloma-viloma. It is better to start small, for example from 10-15 cycles, and as you adapt, increase the length of the lesson to forty minutes or hours. Important! In no case do not chase after long pauses, the main thing in pranayama is absolute comfort and lack of tension.
Visama Vritti
This technique of pranayama for beginners differs from the previous one in that in it the stages of breathing are different in length, because "visama" in translation means "wrong." It is an intermediate step between Nadi Shodhana and Anuloma-Viloma, therefore it is important to master breathing exercises in the correct sequence so that there is no discomfort in the process. There are several options for visama-vritti pranayama, the ratio of the stages of breathing in one cycle can be as follows:
- 1: 2: 4. For example: inhale - two seconds, kumbhaka - four, and exhale - eight. Beginners usually do not pause exhalation.
- 2: 4: 1. Inhale for eight seconds, pause for sixteen, and exhale for four. It is important that during the practice, the heartbeat remains smooth, without arrhythmia.
- The variant with kumbhaka after exhalation for experienced people looks like this: 4: 1: 2: 1. Inhale for 16 seconds, pause for four, exhale for eight, and pause for four counts.
It is worth paying attention to the fact that the practice of pranayama should be mastered under the close supervision of a teacher who will monitor the correct development of each of the techniques of breathing gymnastics.