Outlet failure is a phenomenon that cannot be foreseen. Even if this is not the only device in the house, the problem will cause a number of inconveniences. Reflecting on how to change the outlet, we are still inclined to believe that this business is best entrusted to a specialist. Someone turns to a “knowing” acquaintance, someone in the Housing Office, someone finds a private company, an “hour foreman”. But replacing the outlet yourself is a process that almost any of us can handle. And the instructions in the article will convince you of this!
When do I need to change the outlet?
It would seem that the answer is obvious - when the device ceases to function. Yes, this is one of the cases. However, an urgent replacement is also required when the following is observed:
- The protective housing of the device is fused.
- The socket falls out of the wall. Here, perhaps, the matter will cost a simple fix - a more reliable fixation in the undergrowth. However, if parts of the internal mechanism are broken or damaged, replacement is indispensable.
- You want to replace the device with a safe one - with grounding.
- Would you like to choose a more modern, aesthetic, equipped with additional functions option and so on.
Necessary consumables
So how to change the outlet yourself? The first thing you need to stock up on the necessary consumables:
- Actually a new outlet.
- Podrozetnik (not required in all cases - we will talk more about it in the "Second Option" section).
- Alabaster, gypsum (also relevant only for the "Second option") - about 200 g.
Essential Tools
We need such tools:
- Flat screwdriver.
- Crosshead screwdriver.
- Nippers
- Technical knife.
- Pliers.
- Hammer and chisel (for difficult cases).
- Voltage indicator - the presence of a tool is desirable for your own safety.
First thing...
We will start the work by turning off the electricity supply to the apartment on the dashboard. On standard devices, just turn the toggle switch in the opposite position. Since there may be several switches (if you are doing this kind of work for the first time, it is advisable to deactivate all the toggle switches then), turn on the light in the room where you are going to change the outlet. If the light did not turn on, you turned the desired toggle switch - you can, without fear, proceed to work.
Removing an old outlet
So, how to change the old outlet to a new one:
- First of all, we unscrew the protective case of the previous device with a suitable screwdriver. It is standardly mounted on two screws.
- So we exposed the internal mechanism of the outlet. Before us will again be two screws holding the spacer tabs. It is they who fix the mechanism in the depths of the undergrowth.
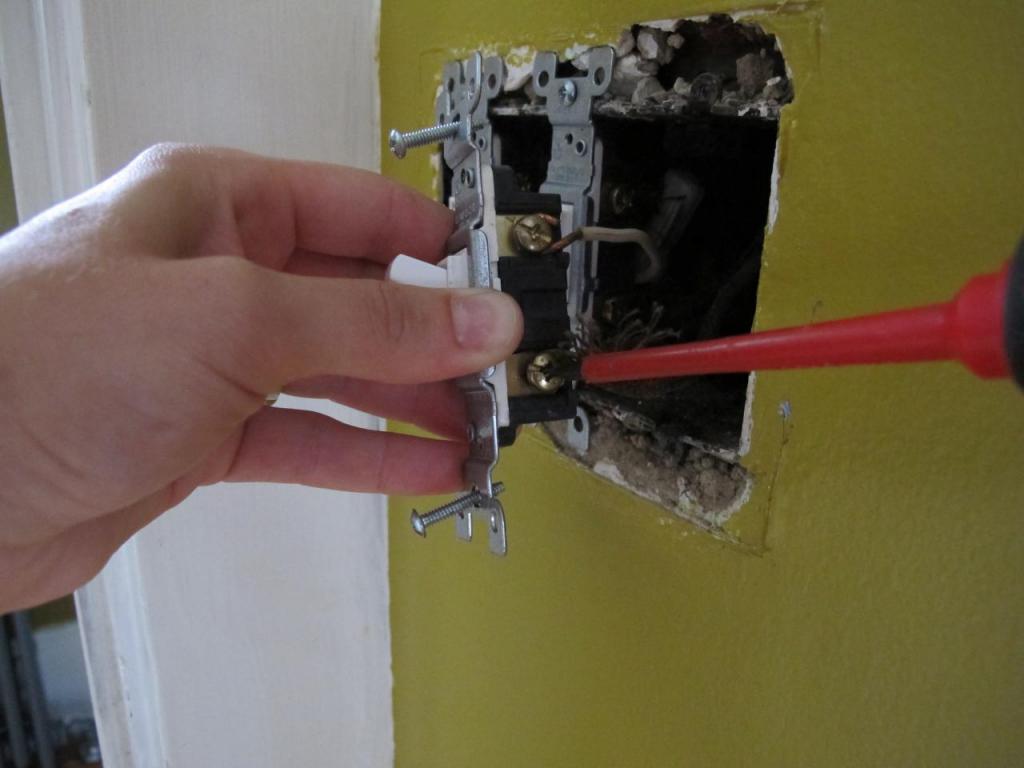
- At the top of the device you will notice two contact screws. They connect the wires, and it is in this place that the voltage passes.
- How to change the outlet? Before you remove the old mechanism and disconnect the wires, we recommend that you use the voltage gauge. This device will show that there is no voltage on the contact screws (that is, you have deactivated the correct toggle switches on the shield). And at the same time - that nothing threatens you.
- All is well? Unscrew the screws on the spacer legs.
- After that, pull the mechanism towards you slightly (so as not to break anything and not break).
- Now it's up to the contact screws. We turn them off and release the wires.
- If the wiring was fastened to the old screws wrapped in rings, then carefully straighten them, nevertheless trying not to touch the bare parts.
The old mechanism is removed, the socket is empty, loose wires stick out. That's all, dismantling is over.
Choosing a new outlet
And we continue to tell how to change the outlet at home ourselves. The new device can be selected according to the type of the old one or differ from it in the decor of the front cover.
In the previous paragraph, we disassembled the socket without a grounding contact. This is a standard case - most of our apartments will not have this third wire. But if in your case it is, then we recommend that you somehow mark it during dismantling - for example, stick a piece of electrical tape. But in some cases, electricians take care of you and immediately make it of a different color than zero and phase.
If you do not live in a new house, then there is probably no grounding in your apartment. Previously, they could only ground the power cabinet in the building. This was due to the fact that no equipment was needed that needed such an addition, and the plugs of all devices were stamped without ground. However, if you changed the wiring to a new one or specially bought a wire for these purposes, then the corresponding socket device is purchased.
Even if the wiring in your house is laid without ground, we still recommend buying a socket with a grounding contact. Although it costs a little more. Why? Specialized springs are installed in earthed outlets, which guarantee additional clamping of the plug of the electrical device. As a result, we get a more tight connection of contacts. And this is the guarantee that such a socket will last longer than usual.
Preparing a new outlet
We analyze how to change the outlet in the apartment. The device we bought was most likely sold assembled - the protective frame in it was screwed to the mechanism itself. We disassemble the structure by unscrewing the connection.
Before changing the outlet, consider the mechanism:
- To the right and left, as in the old design, there will be foot screws.
- Above them are again two screws - they are designed for contact wires. Also gravitate to the right and left side.
- If you bought a socket with ground, then there will be a third one between the contact screws - the ground screw.
- Turn the mechanism over with the end, the back. Behind the contact and ground screws you will see holes for the wiring - two on each.
- We go further. If you look closely, inside each hole we will see a clamping spring. Its function is that it must press the wire in order to form a contact connection. The spring is driven by a terminal screw.
Having familiarized ourselves with the mechanism, we will further understand how to change the outlet ourselves.
Wire connection
A responsible stage of our work. Pay attention to the wires - each of them we have to strip. In other words, slightly remove the insulation layer. Since the contact depth in the outlet is approximately 6-7 mm, we clean it a few millimeters more than this value. Then, with wire cutters or pliers, you need to adjust the wire to the desired size. Note that the maximum to which the uncleaned part protrudes from the contact on the socket mechanism is 2-3 mm.
How to change the outlet - look further. Now postings need to be inserted into the recessed hole. Tighten it with the clamping screw. Check the fixation - pull it towards you. The wire should not stagger or wobble. If it is motionless, then everything is fine, the contact is good.
If you are too lazy at this moment and do not begin to remodel low-quality work, this will have consequences. Bad contact will begin to burn, which will contribute to the failure of the outlet mechanism.
According to the same plan, we connect the second neutral wire to the outlet. Last (if available), connect the ground wire. We coped with this business!
The placement of the mechanism in the socket
And now we are close to completing the story "How to change the outlet." Carefully place the mechanism with the wires attached to it in the recess of the socket.
Fix the device horizontally, align it as it should. After that, fix the mechanism in the socket using the spacer tabs.
And now it's up to the small. Install the protective frame on top. Fix it to the socket mechanism with screws (or one screw, depending on the design). Now it remains to turn to the shield and turn the toggle switches to the working position - to supply electricity to the apartment. Test the outlet by connecting to it (just in case) a weak electrical appliance.
How to change the outlet at home: second option
Imagine such a situation - the mechanism cannot be fixed in the socket, the spacer legs of the purchase do not reach its walls. In this case, we take the following steps: we again make a trip to the electric goods store in order to purchase a diameter socket suitable for the purchased outlet.
Returning home, using the same screwdriver, we carefully dismantle the old socket. Try to be as careful as possible so as not to damage the wires. To fix a new undergrowth in the thickness of the wall, you can use either special glue or gypsum mortar. It is imperative to wait for the set time for this case to come to grips.
And now about how to change the outlet in the apartment yourself. The socket can mean two mounting options. The first, most common, we have already designated - with the help of spreader feet. The second option involves the use of a plastic or iron frame for mounting. It is fixed with screws, the holes for which you will see on the socket itself.
The procedure proceeds further, as described above: the wires are connected to the holes in the socket mechanism, it is inserted into the recess itself, aligned with you. Then, the protective housing is screwed on with screws. By the way, in addition to the protection frame, in addition to the outlet, a decorative socket can also be installed.
We also advise you, if the mechanism is attached with the help of an iron frame or with the help of spacer legs, use not one, but two of these methods at once. What for? There are frequent cases when the outlet flies out of its shelter. When, for example, you, not calculating the strength, sharply pulled the plug of an electrical appliance from it. Double fastening will save from such an unpleasant situation. And you will not need to think about how to change the old outlet.
Last Tips
In conclusion, we want to give you a number of general useful recommendations on everything said:
- Since to replace the outlet we need to turn off the electricity in the room (apartment), the work should be carried out during daylight hours. For another case, you need to stock up a powerful flashlight or, at worst, candlelight.
- We advise you to purchase a voltage indicator - a very useful and at the same time inexpensive device. In its shape - a probe screwdriver.
- One contact of the outlet is connected to the phase conductor, the second to zero, the third (if any) to the ground wire. We check the presence of voltage by the phase wire (the lamp on the indicator lights up).
- If you have to install a new podrozetnik because of the unreliability of the old one or because it does not fit, then it is best to prepare a gypsum solution for fixing it. Use alabaster (building gypsum). The solution should be so thick that the undergrowth in it is held securely even before the composition sets. Alabaster is applied with a spatula both on the wall thickness, and on the socket itself - make sure that the holes for the wires in it remain free.
- If the length of the wires is not enough for the installation of a new outlet, then it is possible to increase them - connect new segments. For aluminum, a terminal block is used. Copper wires are twisted, and then sealed. The connection must be insulated.
So you and I were convinced that there is no particular difficulty in independently replacing the outlet. The main thing in work is taking care of your own safety!