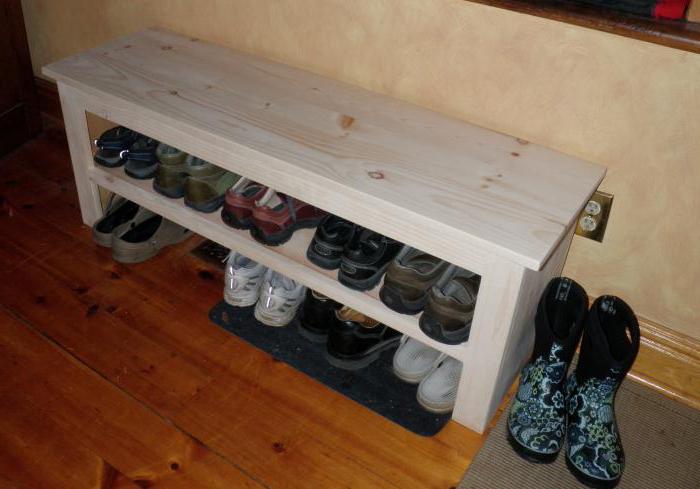
Each apartment or house needs a place to store shoes. You can purchase various pieces of furniture in the store, but it will be much cheaper to make them yourself. Such a solution will not only be beneficial, but will also allow to realize the design ideas of the home master. DIY shoe rack can be made from improvised materials. It is not at all necessary to purchase a whole sheet of chipboard for work; furniture panels will be sufficient. Such blanks can be bought at any building materials store. They are completely ready for assembly - they have edges and are cut into equal parts.
Preparation before starting work
If you will make a shoe rack with your own hands, then for it you can purchase metal nets. Their standard width can be equal to 46.4; 56.4; 76.4, as well as 86.4 centimeters. If there is a need to make a custom size design, then the mesh can be ordered depending on your wishes, but this approach will cost a little more. If the shelves will have the most impressive width, which was mentioned above, then the external dimensions of the shoe will be as follows: 120x90x34 cm. Depths of 34 cm will be enough to fit medium-sized boots there.
If the shoebox will be made with your own hands, then the important point is functionality and compactness. For this, it is recommended that the shelves be placed under a certain slope, which will be facing inward. In this case, the cabinet will occupy the minimum amount of space.
Parts preparation
When a shoe rack is made with its own hands, several elements are prepared. Among them, one can distinguish the sidewalls, facades, top cover, back wall and drawers. The last three elements will be needed in a single copy, while the sidewalls and facades will be needed in an amount of 2 pieces. The sides can be made of furniture panels, and the facades will look great from MDF or chipboard. The back wall may be formed of hardboard.
If a shoe rack with a seat in the hallway will be made, then we should not forget about the presence of fasteners.
Preparation of fittings and fasteners
The master will have to purchase 8 confirmations, 4x16 screws, facade handles and dowels, steel furniture corners, 4 pieces of hinges and a drill, as well as a hammer and a screwdriver.
Assembly
With the help of confirmations, you need to fix the tsars on the sidewall. To do this, you need to make through holes for fasteners, the diameter of which will be 8 millimeters. The tsars in the end parts should have small holes, the depth of which will be 60 millimeters. All holes should match as closely as possible. Half of the corners should be screwed to the top cover, while the remaining 4 are used instead of wall fasteners. They need to be installed to the side parts.
If you are going to make a shoe rack with a seat in the hallway, then all the elements are pulled together with self-tapping screws. Before attaching the hardboard, you need to check how smooth the box will be, its diagonals should be equal to each other. On the vertical sides of the facades you need to measure 15 cm from the bottom and top. Whereas 2.2 cm should be retreated inward. At the marked points, holes with a diameter of 3.5 cm should be made. At the next stage, the doors are installed and fastened, and the handle is fixed.
Such a shoe rack, the drawings of which can be made by you yourself, is installed on the floor or suspended at a certain height from the surface. This will allow wet cleaning under a new piece of furniture. The distance between the second and lower shelves should be 35 cm, which will allow the boots to be placed there.
Making compact shoe racks
If your hallway does not have too much space, you can make a compact shoe model. Any master is able to cope with these works. First of all, prepare long shoe brushes, special plywood, self-tapping screws, spikes, wood glue, moisture-resistant varnish, acrylic paint and a brush.
Technology of work
A shoe rack, the sizes of which you can choose depending on the number of family members, must be made according to a certain technique. It involves the use of brushes at the first stage. In the edge of the plywood, 6 holes should be drilled into which the spikes pre-treated with glue are installed. Identical holes are made in plywood, which will subsequently make it possible to grease the elements and connect them together. For reliability, workpieces are pulled together with clamps.
This design will also have side elements that are installed in the same way. Using a hacksaw , cut the handles of the brushes, if any. In each of them, drill two holes and fasten the workpieces with short screws to the base. Brushes will eliminate damage to shoes at the time of operation of your homemade design. It is recommended that the shoe rack be placed with a slight slope with respect to the vertical surface. This will allow shoes to stay on the shelves and not fall out.
Conclusion
A metal shoe rack is considered not very practical, since, for example, varnished shoes in it can be accidentally damaged. However, it is still possible to make it, for this you should use new dish dryers, which are installed in several rows using metal corners or wooden battens. The last elements are recommended to be painted under the color of the dryer. Self-made shoe rack is not only a useful piece of furniture. It can be an excellent interior decoration for your hallway - it all depends on the imagination of the master and the desire to create.