To build a chicken coop and place a bird in it is quite simple, these stages are just the beginning in order to achieve a positive result. In order for the laying hens to supply you with eggs all year round, you should make sure that in winter the temperature in the chicken coop does not drop below 0 ° . Poultry farmers in this case resort to thermal insulation of the room. Such work can be carried out in four directions, among them:
- space heating;
- wall insulation;
- litter arrangement;
- thermal insulation of the ceiling.
Straw floor insulation
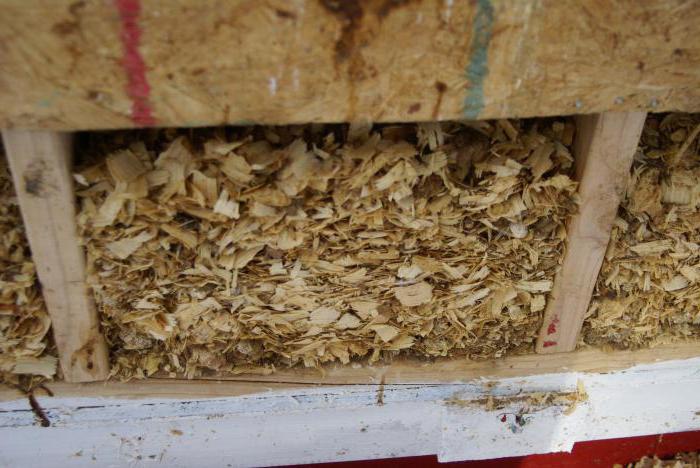
If you have a question about how to insulate a chicken coop for the winter with your own hands, then initially you need to take care of the lower part of the premises. Litter is used for this; it can be deep or shallow. Proper bird keeping requires the first option. In a deep litter, the temperature can vary between +25 ... +28 ° . The material used for this is moss peat, straw, shavings or sawdust. The last option is created from three parts of the chip and part of the sawdust. The best way to do this would be sawdust of conifers. They are distinguished by disinfecting properties, among other things, they do not cake and perfectly pass moisture.
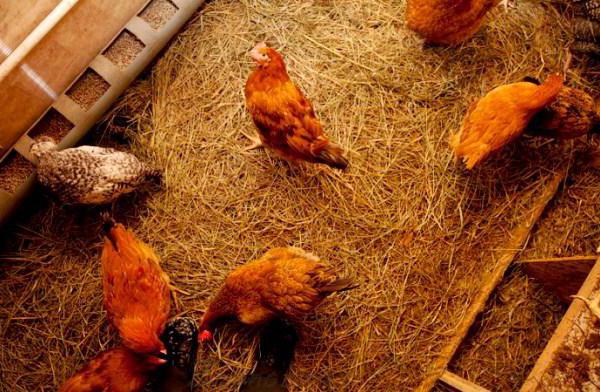
When arranging a floor of sawdust and shavings, do not let the bird in if there is no food in the feeders. This is because the litter can be eaten by birds. On top of it should lay a small straw. In spring, the materials that were used to create the litter can be used as fertilizer. Thinking over the question of how to insulate the chicken coop for the winter with your own hands, you can pay attention to the cross section of grass or straw, which has excellent heat-insulating qualities. The thickness of such a layer can range from 3 to 5 cm. When choosing a similar material, you should prefer one that has a shiny surface, it is better to refuse moldy insulation.
More about bedding
The most suitable option for litter is moss peat, it absorbs bird droppings and moisture, eliminating an unpleasant odor, and also drying chicken paws, so the bird does not get sick. If peat is mixed with litter, it will be an excellent fertilizer for a personal plot. When you are faced with the question of how to insulate the chicken coop for the winter with your own hands, you should lay a deep litter, the layer of which will be 20 cm or less. New material should be laid in a layer up to 10 cm, this must be done as the floor becomes dirty. The litter should be periodically loosened and mixed.
Work on the walls
As a rule, premises used for breeding birds whose walls are made of coniferous wood. For severe climatic conditions, it is best to use a log cabin. If the chicken coop is installed in an area with a mild climate, you can use inch boards. You can close the gap with tow or moss. In order for the chickens not to eat the insulation layer, it should be sheathed with wooden slats. Thermal insulation from the outside is carried out by fixing the foam plates, which are covered with a flat slate.
You can use the option, which involves the creation of walls by laying two rows of boards, in which case insulation material should be laid between them. As thermal insulation, you can use dry leaves and wooden sawdust, as well as fallen needles of coniferous trees. Before you insulate the chicken coop for the winter with your own hands, it is necessary to mix the insulation material with lime. In this case, a certain proportion should be used: a part of lime and 25 parts of thermal insulation. To lay the material, which was obtained by mixing the two ingredients, it is necessary by ramming.
If you have a question about how to insulate a chicken coop with your own hands for the winter, then you can consider the option that involves the use of shingles. This technology is the most common. For its implementation, the walls must be beaten with material laid in two layers. Excellent heat-insulating qualities can be achieved when the shingles are plastered from above. The mixture must be made of clay, to which a certain amount of sawdust is added. The latter should be added to wet clay. The resulting composition is mixed well until a homogeneous mass can be obtained.
Wall Treatment Recommendations
Once the clay solution is infused, which takes about 3 hours, it can be applied to the surface of the walls, and a 3-cm layer should be formed. If you are thinking about how to insulate your chicken coop with your own hands for the winter, then you can use the above technology, it provides for the need for aging the walls until they dry completely.
Cracks that have appeared must be filled with clay solution; to prepare it, 2 parts of finely graded sand are added to the clay part. The walls dry, and then they can be treated
with quicklime. In conclusion, their surface is studded with inexpensive material, and fiberglass is perfect for this. If this stage is excluded, then it is likely that the bird with an insufficient amount of calcium in the body will peck the plastered wall.
Door and window insulation
After we managed to warm the walls in the chicken coop for the winter ourselves, we should take care of the doors as well as the windows, because it is through them that a large amount of heat leaves. For normal lighting, just one window is enough, which is best placed on the east or south side. It should have double removable frames, because in the summer it is better to replace them with a mesh. This method will allow you to effectively ventilate the room.
Before the onset of winter cold, a plastic film can be fixed to the window. Door insulation is best done with a dense thermal insulation material. Save on insulation is not worth it, because it is through the opening that the maximum amount of cold enters. Sometimes the insulation is carried out by a carpet or an old palace in addition to the main activities.
Ceiling insulation
Now you know how to insulate the floor in the chicken coop for the winter with your own hands, but this will not be enough to make the bird feel comfortable. It is important to take care of the ceiling. According to the laws of physics, warm air will always rush to the top of the room. If there are gaps in the ceiling or roof, then the heat will certainly go up.
Technology
The insulation of the ceiling is divided into several stages, among them:
- removal of rotten old boards;
- processing new boards with an antiseptic;
- installation of boards on the walls;
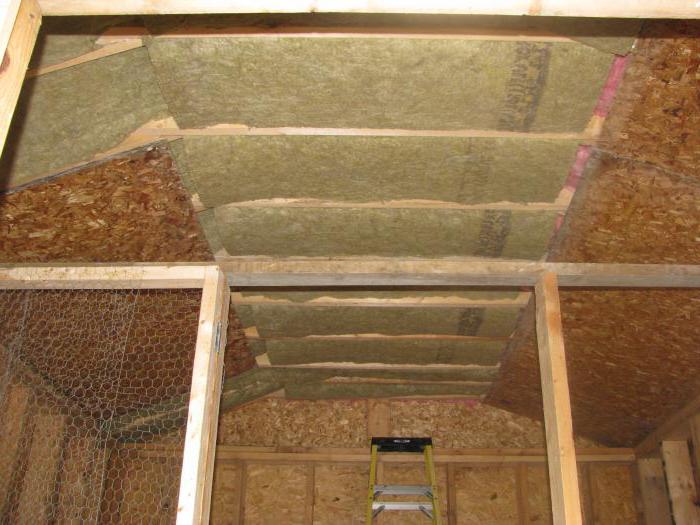
- installation of mineral wool;
- lining the surface with a finish coating.
Mineral wool on both sides must be covered with a film for vapor barrier, this will eliminate damping and weathering. Using the brackets of the building stapler, the insulation must be attached to the lower surface of the beams. The finish can be a wooden lining, with its help it will be possible to form a ceiling without cracks. The lining is fixed with metal clamps. The first rail should be located near the wall, all subsequent ones are installed in the grooves of the previous ones.
Important to remember
If there is an attic in the chicken coop, then cotton wool can be laid on beams or on top. A layer of 10 cm will be enough, the cotton wool is covered with vapor barrier and fixed with a beam ceiling using a stapler. The lining should be painted, and after drying the paint, lighting fixtures are attached to it.
Wall insulation with sawdust
Quite often, modern poultry farmers are wondering how to insulate the chicken coop for the winter with their own hands. The choice of material today may seem really difficult, however, some experts still use methods proven over the years, among them the same sawdust can be distinguished with the help of which the ceiling is insulated. This technology allows you to save on building materials. To begin with, it is necessary to ensure fire safety, for this, the heating wiring, switches, chimneys and sockets, as well as other fire hazardous areas, must be protected with non-combustible material. The wiring should be placed in metal pipes, the wall thickness should be 3 mm or more.
Thermal insulation using sawdust can be performed after preparing a special insulation mixture. To begin with, the frame is installed, and the material will pour out there. Moving away from the wall, it is necessary to install wooden slats, on which the crate is stuffed. As soon as the walls are ready, it is necessary to take care of the presence of dry sawdust, they are sometimes replaced by small chips. Before you insulate the chicken coop for the winter (with your own hands), it is important to choose the material. In the described case, this should be waste resulting from sawing or processing wood. The fraction of thermal insulation should be relatively large.
Training
In addition to sawdust you will need:
- water;
- gypsum or cement;
- lime;
- antiseptic.
As the latter, boric acid is most commonly used. For cooking, use 10 parts of sawdust, about 7 liters of water, part of gypsum and lime.
Work
The ingredients are mixed, and you can control the amount of water yourself by compressing the solution. The lump should not crumble. During stirring, the insulation is sprayed with an antiseptic. Once the insulation is ready, it can be poured into the prepared frame to the level of the crate. The material is well compacted so that it does not sag in the future.
Sawdust thermal insulation
They will help you learn how to insulate the chicken coop for the winter with your own hands, expert advice. For example, experienced craftsmen in this matter say that the attic can also be insulated with sawdust, if there is a place to be in the chicken coop. The surface for laying the insulating layer must be prepared, for this, all the cracks are covered with clay or filled with foam.
If there is a chimney in the attic, then for fire safety it is necessary to lay slag or any other non-combustible material around it. Then sawdust is prepared, the size of which will affect the density. The larger it is, the smaller this parameter will be. It is better to use small filings. To prepare the mixture, it is necessary to take 85% sawdust and 10% lime-fluff, 5% gypsum is added to these materials. Sawdust is treated with an antiseptic and dried. In a pre-prepared container, all components are mixed, and then diluted with water.
They clearly demonstrate how to insulate the chicken coop for the winter with their own hands, the photos used in the article. From them you can understand that the solution prepared according to the above technology should be covered with a dense layer over the attic area, its thickness should be approximately 25 cm. The process should be performed as quickly as possible, since the gypsum dries quickly, during this time you may not have time to tamp it in time. If the attic will be used, for example, to store equipment or feed, then after drying the solution from sawdust, it must be covered with a plank floor.
Conclusion
Now you know how to insulate the chicken coop for the winter with your own straw and other materials. If the construction is capital, then the roof is equipped with rafters, on top of which it is necessary to lay a film. It will not only maintain a layer of thermal insulation, but also eliminate wood decay. The waterproofing is fastened with the brackets of the construction stapler; a thick plastic film can be used as it. Well, the question of how to properly insulate the chicken coop for the winter with your own hands can be considered closed. It is preliminary recommended that you familiarize yourself with the qualities of some modern thermal insulation materials in more detail - you may discover new options for yourself.