Posting in the apartment with your own hands from the shield is carried out quickly enough and does not cost too much. This is due to the fact that in this case no line connection is required inside the housing, as this is provided by the construction company. As a rule, a ceiling is used to conduct the wires, but wiring in the apartment from the dashboard on the floor can also be carried out. The article will describe all the main points of work.
Room cabling steps
Posting in the apartment from the shield with your own hands begins with creating a schematic plan. In this case, a detailed wiring diagram for the room is required. Prepare it, adhering to certain rules:
- The location of the switchboard is envisaged , and further actions are planned in accordance with it. When the shield is located outside the living area, it is recommended to conduct wiring using a copper wire. Its cross section should be at least 6 mm kV. It is also necessary to find an additional point for distribution in the apartment. It should be placed under the ceiling at the entrance to the apartment.
- Next, you need to determine how many outlets you will need, based on the calculation of at least one instance for rooms for every 6 m 2 . For the bathroom and kitchen, you will need two outlets of 6 m 2 .

- Wiring in the apartment from the shield with your own hands to sockets and lighting devices is laid separately. At the same time, individual lines designed for sockets with a high indicator of electricity consumption - from 2 kW and above are taken into account. Such devices are used to connect heating boilers, powerful climate devices, etc.
- After all the points of electricity consumption are calculated, they should be included in the schematic plan.
Installation of sockets
Doing yourself in the apartment with your own hands from the shield, the photo of which is presented in this article, is carried out at a certain height. As a rule, sockets are installed at a distance of 30-40 cm from the floor. Switches of lighting devices should be located at a height of 1-1.5 m.
This article will describe the process of conducting electricity by a hidden method. We will consider how it differs. It should be noted that to date, conducting electrical wiring in an open way is no longer used. The article provides step-by-step instructions on how to do the wiring in the apartment with your own hands from the shield. Recommendations will be useful both for beginners and for people who are familiar with all the subtleties of electricity.
How to make a circuit
So, how is the wiring in the apartment done by yourself? From the dashboard in a one-room apartment, you can independently connect electricity. For this purpose, it is recommended to use a photocopy of the new building plan, on which it will be convenient to mark the locations of sockets, switches, chandeliers and other components.
The starting point of the circuit is the location of the electrical panel for distribution. It is usually installed in the hallway near the front door. The height of the flap from the floor should be about 1.5 m.
What to consider when drawing up a scheme
When drawing up a plan, the following important points must be taken into account:
- The electrical wiring route in the apartment should have a vertical direction and horizontal along the walls. This provides a low probability of damage. For example, the location of the outlet will be an indicator of the location of the cable.
- The angle of rotation of the track should be straight.
- Wiring in the apartment with your own hands from the flap on the ceiling is laid below its level by 20 cm. This is the best option. This position will protect the wire from mechanical damage and will not affect the convenience of repair work. Can also be done wiring in the apartment with your own hands from the flap on the floor. In this case, a special baseboard is used.
- Switches should be located at the entrance to the room from the side of the door handle. The height of their location is not standardized, but, as a rule, is equal to 80 or 150 cm. The European standard involves installation below. In addition, it is very convenient for children.
- Mounting outlets is carried out below at a height of 30 cm from the floor. But if necessary, they can be placed at any height, for example, above the countertop. In the kitchen, the number of outlets should equal the number of electrical household appliances. Usually installed 6 pieces.
- Each room must have a junction box installed.
- Before drafting the electrical wiring in the apartment, the locations of furniture and equipment are taken into account.
- At least two outlets are installed in the bathroom (for connecting a washing machine and hairdryer).
- The circuit necessarily takes into account an RCD of 30 mA, which will serve as protection against electric shock. A separate RCD is set to 10 mA. It is designed for a bathroom.
How to choose fittings
Before going to the electrical goods store, you should decide what type of outlets and other elements you are going to install.
It is recommended to opt for the following models:
- Hidden configuration switches and sockets. They are easy to install on the wall and not too flashy. In addition, their cost is acceptable.
- The cable diameter should be 2.5 mm 2 for sockets and 1.5 mm 2 for switches. You must first calculate the power and length of the wire. The most suitable cable model for an apartment is VVG, as it has an optimal ratio of cost and functionality. In addition, the copper wire is able to withstand high current loads and is durable.
- Pads on the terminals, serving as a wire connection, are inexpensive and have high functionality.
- An automated switch for sockets with a capacity of 25 A with an RCD of 32 A. For lighting, as a rule, choose a power of 10 A or 16 A.
- Box for distribution of wires of non-flammable material.
And finally, I would like to note that it is not recommended to purchase cheap products from China. Wiring is done for a long time, so it is better to spend one time than to make a complete replacement of communications after a few years.
Wiring Methods
Do-it-yourself wiring in the apartment There are two types: open and closed. The vast majority of cables are under the plaster. This is explained by the fact that the outdoor conduct makes the appearance of the home unattractive. Although this method is applicable in suburban wooden houses and offices.
The main stages of work
Many are interested in how the wiring in the apartment is laid from the shield. How to do it yourself is described in stages. To lay the internal wiring, you should make a 2 cm recess in the wall. Before this, you need to make markings. Only after this are grooves designed for switches and sockets knocked out.
How to mark walls
Installation of wiring from the shield in the apartment with your own hands involves the implementation of marking the walls for gating. In some apartments, construction companies are preparing the finished grooves for the electric cable. The article discusses the installation option in the absence of these recesses.
A method with high efficiency and simplicity is the use of a cord for marking. All that is required from the performer is fixing the rope at the starting point of the route. She gently stretches to the next point. The result is a clear trace along which wiring is laid. Once again, it should be noted that the route should be directed only horizontally and vertically. A plumb line is used to create a vertical line, and a construction level for a horizontal line. The conductor is guided strictly perpendicularly. Fastening of cords is carried out by means of collars and expansion bolt shields. Then the wall should be plastered.
It is advised to lay the wiring in a special sleeve that serves as protection. However, the cost of work in this case will be higher. The sleeve provides laying of wires without disturbing the plaster. It will be very convenient in case of repeated repairs in the apartment.
Power lines are drawn from a panel mounted separately from outlets. Then, through junction boxes, communications are laid throughout the room. All this can be done with your own hands, but such manipulations require time.
After marking the walls, they switch to their independent gating. It should be noted that conducting electric cords without gating in an open way is more simple, but less reliable. The apartment is advised to do closed wiring. The outdoor method is only suitable for the balcony.
How to perform wall chipping
To strobil walls you should prepare the following tools:
- chisel;
- hammer;
- a grinder with a disc designed for working with concrete.
The width and depth of the strobe should be 2 cm. Then you can proceed to the installation of wiring.
How to build a track
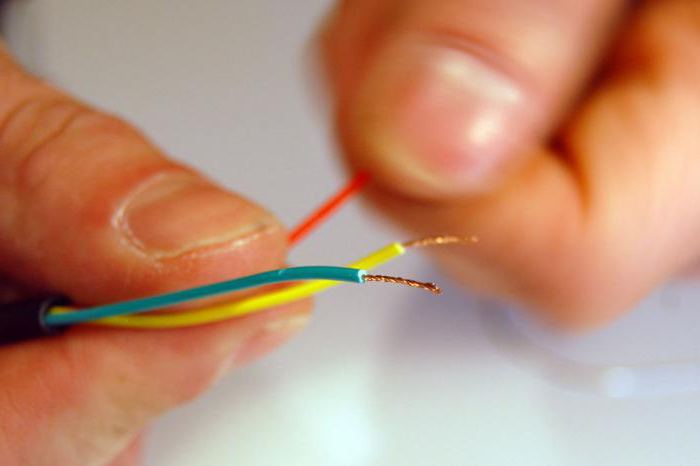
As noted earlier, wires must be purchased with a margin. Extra footage will be needed to connect. On each side, the core should be bare by 5-10 cm. A length margin of 5 to 15 cm is taken for connecting sockets, switches and fixtures.
To begin with, you need to decide on the question of how the wiring will be fixed on the wall. Modern methods involve the use of clamps, but the old way of fastening with alabaster is considered more reliable. For this purpose, a line should be drawn in the gates and every 30 cm fasten the wire with alabaster.
Important information
Alabaster undergoes a very fast hardening, so you need to work quickly. After the line is fully fixed, it is recommended to photograph all the walls. At the next repair, you can accurately determine the passage of the wiring.
How to connect fittings
This stage is not difficult. Sockets and switches should be connected. To this end, podrozetniki and boxes are installed in the strobes. It is also recommended to fix these elements with alabaster, as it is reliable.
How to connect machines and RCDs
The last step in the installation of electrical wiring in the apartment is the assembly of the shield. Based on the diagram drawn up, circuit breakers and RCDs should be connected. There is no complication: the lead-in wire should be wound from above, and the outgoing wire - to the distribution box. After the electrical products are connected, it is necessary to check the electrical wiring with a multimeter. So you can see how correctly the work was carried out. If no interference is detected, then you can connect the machine.
Safety precautions
Wiring in the apartment with your own hands from the shield should be carried out subject to certain safety rules.
Guided by a number of rules:
- a preliminary power outage in the apartment should be carried out;
- in no case should you attach the cable if current flows in it;
- Before installing drawers and shields, make sure that the structure is firmly fixed;
- soldering of wires must be carried out in gauntlets from tarpaulin, as well as special safety glasses;
- Before tightening the wires into the pipe, remove all burrs from it.