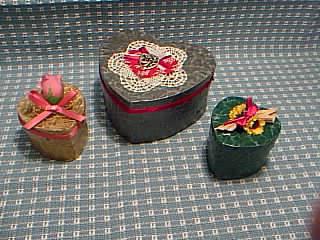
There are special shops and departments for gift wrapping, where professionals in their field will beautifully decorate any present. But the faceless wrapper does not express the whole spectrum of feelings that the giver would like to convey, moreover, very often it is simply thrown away and not stored as a memory. Instead of standard packaging, we propose to create an unusual, original, conveying a warm attitude. Further we will tell you how to make a heart box suitable for a gift for Valentine's Day, March 8, birthday or any holiday date.
Options for creating a heart box
It may seem to someone that this
type of packaging is very difficult to create with your own hands, but it is not. Anyone without preliminary preparation will be able to make a "heart" using paper, cardboard, glue and decorative elements. Due to the fact that a beginner needlewoman will not immediately master wood cutting and metal smelting, we will not consider these materials as starting materials. The simplest and fastest way is a heart-shaped box made of paper: it can be an origami technique, cutting according to a template and assembling, independently calculating the required sizes, creating patterns and gluing elements. You can decorate and decorate the finished packaging with ribbons, embroidery, knitted patterns, add colorful inscriptions.
How to make a heart-shaped box out of cardboard
Here's what you need to create a colorful, unique package:
- white paper (suitable for office);
- thick cardboard (box details);
- pencil;
- ruler;
- scissors;
- compass;
- a piece of thick paper (cardstock);
- a sheet of paper with a pattern (you can take a packing one);
- glue;
- decorative elements;
- Distinction inks are used to give a vintage look.
Steps for creating a heart-shaped package
Depending on the size of the gift, the size of the box is selected. To make the heart even and symmetrical, you should take a compass and draw two slightly intersecting circles on a sheet of office paper. Lower the strip down through the intersection points, for example, if the radius of the circles is 4 cm, then the length of this line will be 12 cm. Draw straight lines from the lateral roundings to it - you get the main workpiece that needs to be cut. Place the template on a blank sheet of white paper and draw a pencil around it. Inside the drawing, departing from the edges by 3 mm, outline the contour of the heart a little smaller and cut a second blank on it. In the same way they make the third template, 5 mm smaller than the previous one. In order not to get confused in them (because they are similar in size), it is recommended to number the bases. Further, the blank contour is transferred to thick paper (cardstock), two details of size 1 are cut out - this will be the basis of the package. On colored or wrapping paper, draw two large contours, one small and one medium. Cut bright workpieces and go to the gluing step.
Assembly and connection of parts
How to make a heart box from these cut out elements? Two blanks from a dense cardstock are glued with two pieces of wrapping paper. On one of them, from the plain side, the outline of the smallest heart is drawn with a pencil, and on the other - the middle. Side parts will be glued along these lines, for which 4 rectangles are cut, 2 larger and 2 smaller. For the declared dimensions of the heart, parts 21 x 3 and 22 x 3.5 cm are suitable. On the narrow side of each rectangle, add 1 cm, and on the wide side - a 5 mm strip for gluing the parts. Cut zigzag cloves along a long strip for fastening. Lubricate these triangles with glue and attach to the base: longer along the contour of the blank 2, shorter - according to number 3. Cut rectangles of equal size to the sides of the colored packaging paper and stick to the inner and outer sides of the box. Inside the lid, attach a heart made of decorative wrappers, cut along the contour of template 2, and the smallest on the base of the box. The bulk of the work is completed, and the do
-it-yourself heart box is done. You can proceed to the decoration stage.
Making finished packaging
A heart-shaped box made of paper looks very beautiful, the edges of which are trimmed with ribbon, inlay, suitable for coloring. As for decorating the top of the box, there are no restrictions for the giver’s imagination: you can stick multicolored hearts, paper flowers, strengthen bows, put inscriptions, drawings or simply tie a satin ribbon. There are a huge number of options for tying simple and fluffy bows with different canvas widths and volumes. Experienced needlewomen can decorate the lid with bead or thread embroidery, knitted details or decoupage elements. In any case, a handmade box-heart will become the best decoration for any gift.
Other paper packaging options
How to make a heart-shaped box, if there is no time for all of the above actions or a small gift, and a small package is suitable for it? We suggest using the attached template. It is enough to apply it on a sheet of wrapping paper and cut along the contour. To seal the walls, you can use cardboard, for example, boxes of cereal or cereal. The cut workpiece can only be bent along the dashed lines and connected. If desired, strengthen the contact area with glue. If white paper was used as the material for such packaging, the time has come to color it: apply drawings, patterns or stick on ribbons. In such a cute heart box, it’s convenient to present a small pleasant gift.
More experienced craftswomen can use the origami technique and assemble a heart-shaped box from a sheet of paper without a single cut and the use of glue. Also, in the lid of the package, some make a transparent recess through which you can immediately see the whole gift or its decorated part. To do this, it is enough to make a cut in the shape of a heart in the center of the lid, and glue thin transparent (or in the tone of the box) plastic onto the scotch tape. Let the gifts please those to whom they are addressed, but now you know how to make a heart-shaped box for packaging a meaningful present.