Even if the front door is made of quality materials, it still needs the protection that the visor provides. Materials constantly exposed to sunlight and precipitation deteriorate faster. A visor above the door will extend the life of the metal or wood, and also preserve the appearance of the porch.
Planning
When planning, you need to think about the size of the structure and what consumables will be used in the process. It is important to consider that the canopy-visor above the door must have such design features that the door can be opened wide enough, without fear that it will touch the elements or supports of the canopy. Thus, the visor should be 40 cm or more wider than the front door.
Material selection
The visor above the door may be based on different materials, but before purchasing them you must take into account which decoration and roofing were used during construction. It is recommended to cover the visor with the same material that was used when arranging the roof, this especially concerns the location of the canopy under the ramp, and not from the pediment.
Steel frame for visor
The visor above the door can be made on the basis of a metal frame. To carry out the manipulations, it will be necessary to prepare a steel pipe, a paint intended for metal, as well as a primer. As fasteners, metal screws can be used. In the arsenal of almost any home master there is a drill, a screwdriver, as well as a grinder. You will need a welding machine and a perforator. The frame structure can be formed from straight blanks or elements that will make it possible to make an arched shape of the canopy. If you decide to use the latter option, then the pipe must be cut along the width of the canopy, leaving a small margin for bending. The visor above the front door with your own hands should be made according to a certain technology, which involves laying pipes on a flat surface, so that it is convenient to work as a grinder. Using this tool, in increments of 40 cm, counter cuts must be made along the entire length of the pipe.
Then you can bend the product, and if necessary, the slots can be made slightly wider. After you can achieve the desired radius, the junction of the slots should be grabbed using a welding machine. According to the same technology, the second pipe is bent, it must be applied to the first and try to ensure that the elements coincide completely. Now the master will have to cut the jumpers of the required length, and then connect them to the previously formed blanks. In this case, the welding method will also have to be applied. If the visor above the door is planned to be made large enough, then it will be necessary to weld the stops to it, which will go from the outer corners to the wall surface.
Recommendations for work
After completing the welding work, you should clean and smooth the joints, this will help the grinder. For a more aesthetic appearance, the metal surface should first be primed, and after the visor above the door, the hands should be painted in the desired color, as for the frame. Fixation of the finished structure should be made to the outer wall of the building using long anchors. To install them, drill holes in the pipe so that it is possible to strengthen the element to the wall. As an alternative, mounting plates that have holes for fasteners can be welded to the pipe. Before you make a visor above the door, you should think about what covering material will be used. As the final stage, the fastening of the upper trim just acts.
Making a visor based on a wooden frame
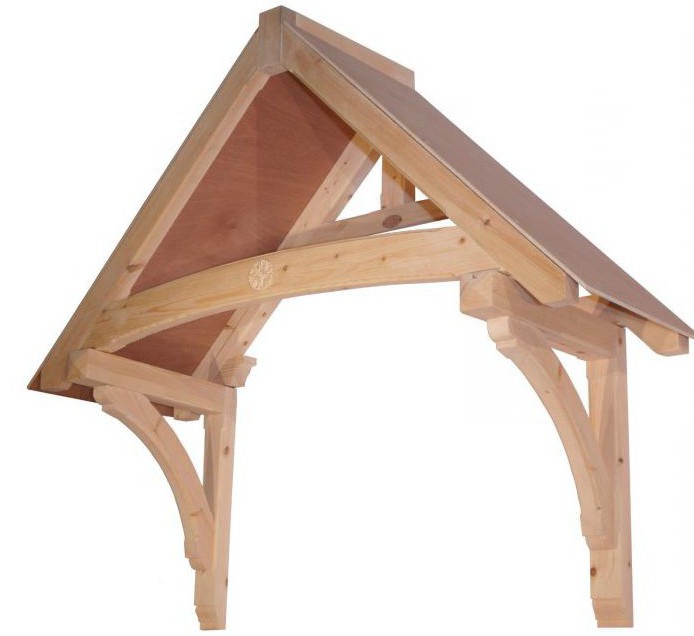
If you are not ready for the fact that in the process of carrying out the work it will be necessary to prepare special tools, then the frame can be made of wood. Some home craftsmen choose this technology also for the reason that they do not have enough experience to work with metal and a welding machine. Wooden visors above the front door are quite light or more massive. The latter option requires the installation of stops that are buried in the soil. Initially, it is necessary to set aside a horizontal line at a certain height above the door. Several holes should be drilled along it, and then with the help of anchors you need to fix the wooden beam. Its length will determine the width of the future canopy. Under the upper beam using the same technology, two vertically oriented beams should be strengthened. Elements that will be attached to the vertical workpiece must be cut at the right angle for connection between themselves. It is important to supplement the design with a beam, which will act as support for the supporting beams. On the last and the roof will be held visor.
Technology of work
If you are making wooden canopies above the front door, it is important to consider that with an impressive canopy area, you should lay the crate on the upper beams. Only then can the roofing material be fixed. If the design is massive enough, then the above scheme of work cannot be used. The system simply can not withstand the load. In this case, it is required to install support posts. In those places where the supports will be located, dig holes. The number of racks will be determined by the size and weight of the structure. In order to extend the life of wooden elements, their lower ends must be treated with machine oil. Further, the workpieces are wrapped with roofing material and installed in well prepared in advance. In this case, it is important to maintain verticality, so it is recommended to use a plumb line.
At the next stage, the hollow space of the pits is poured with cement mortar, after which the entire structure is left until the mixture completely hardens.
The nuances of the work
While the concrete will harden, it is worth fixing to the walls of the support, which will be located opposite the racks. Their upper ends should be higher in comparison with the upper ends of the outer racks. Now the external supports can be linked together from above. Beams are placed on the upper ends of the external and internal supports. Now holes are drilled through them through. It is important to go deep into the racks and fix everything with long screws. The length of the beams should be more impressive than the step between the supports. Only in this way will the overhang be formed.
Final work
Before you make a visor over the door with your own hands, you need to evaluate your capabilities. If you are not confident in your abilities, it is worth abandoning the use of a metal frame, even though you have a welding machine in your arsenal. This is due to the fact that even a beginner can work with lumber. At the final stage of manufacturing a visor based on a wooden frame, it is necessary to lay a crate on the beams. Elements of this system are nailed, only after which it is recommended to lay the roofing material. If there is a need, then the perimeter racks can be connected in the lower part at a level of 100 centimeters from the surface of the earth. The resulting frame can be sheathed with a picket fence or lining.
Alternative metal visor
If you are thinking about how to make a visor above the door with your own hands, then you can use metal corners, bars, and also a cornice for this . To carry out work on the formation of a single-pitched metal canopy, you will need an abutment bar, as well as a gutter. Prepare a pipe, profiled flooring or shingles. It will be possible to fix the structure at different stages with anchors, screws and self-tapping screws. By measuring the step from the door to the place to be protected, you get the length of the structure. The canopy should have a slope of 20 degrees. The next step is to trim the corners to the desired size. The length of the rafters from the corners is equivalent to the height of the ramp. From the same corners, struts and a beam are made, which is fixed to the wall. Between themselves, the frame elements must be assembled by welding.
Metal visors above the door, the photos of which are presented in the article, are more difficult to perform compared to wooden ones, but they are more durable. After it was possible to form a frame, it should be fixed above the porch. The wall beam must be strengthened with stainless screws in front of the entrance. Whereas, anchors should be used to fix the struts. The bars will help form a crate system. If a profiled flooring is to be used, then a distance of 30 centimeters should be left between the slats.