Books, regardless of the genre of works, must always be kept in order. As a rule, special cabinets or mezzanines are used to store paper literature. Hanging shelves for books are very popular. These devices can be made independently. Next, we will figure out how to make a bookshelf with your own hands.
Simple designs
The most common are shelves for books, consisting of vertical racks in which holes are drilled. Special pegs are inserted into them. On them, in fact, holds a shelf for books. Do it yourself is not difficult to make such a design. As racks, you can use wooden blocks or metal square pipes. The holders of the bookshelf can be a steel corner.
Shelving
They are different. Shelves for books of the simplest design are made with the help of bars stacked in piles on both sides. A wooden panel is laid on top of them . The sizes of shelves for books can also be different. It all depends on the number and size of the publications themselves. For example, there may be shelves for books, the dimensions of which are 220x22x2 cm. The bars are recommended to be used from larch, pine or fir. It is also quite possible to use chipboard or elements of old furniture. For the construction of a medium-sized rack (5 shelves), about 65 bars will be required. Metal constructions are also popular. They are collapsible, as a rule. If you increase or decrease the number of volumes, you can add or remove shelves for books. You can mount the lights on the back of the rack. If desired, the bars and shelves can be painted, pasted with wallpaper. Such a simple design is suitable for a room decorated in a minimalist style.
Important point
When the bookshelf is assembled with its own hands, the distance between the supporting bars should be at least 1.2 meters. Otherwise, the panel will bend under the weight of literature. In general, such a design will look unattractive.
Is it possible to do without bars?
Can. Not everyone would like to see bars on the walls. There are two other ways to make a bookshelf.
1. The first option. In this case, the rack looks like a box. It is built in between two walls. So a niche is formed. The vertical sides are not formed by a solid board. They are made up of scraps, the thickness and width of which is the same as that of a bookshelf. These parts are basic and are used instead of bars. The assembly is assembled as follows:
- The lower shelf is stacked on the bars.
- At the height of the panel, two vertical boards are nailed. Nails need to be driven in obliquely.
- The next shelf is adjusted and installed - and so on, to the end.
- Surfaces are machined, sanded and painted.
The second option - invisible mounts
The bookshelf on the wall can be mounted so that the locking elements are completely invisible. In this case, the boards are mounted on long screws (there should be 4 - 2 on each side). They are screwed using wooden corks (rods). The part of the screw that protrudes from the wall will be the support for the shelf. To decorate the protruding element, you can use a plastic tube of the desired diameter. It can be transparent or painted in any suitable color. Screws are recommended to be used with a semicircular head. In the areas where these support elements will be screwed in, holes of the appropriate diameter should be drilled. Instead of metal screws, pins made of solid wood can be used. Being also supporting elements, they should go into the recesses that are made on the underside of each shelf. Difficulties can arise with the installation of pins strictly horizontally. To control the position (vertical / horizontal), you must use the level. There are also supports in the form of a violin, with a sleeve or screw thread. It is quite simple to install shelves on them - both from wood and from glass. Such designs are quite durable and attractive in appearance. The holes for the supporting parts must be drilled precisely so that they are positioned strictly parallel.
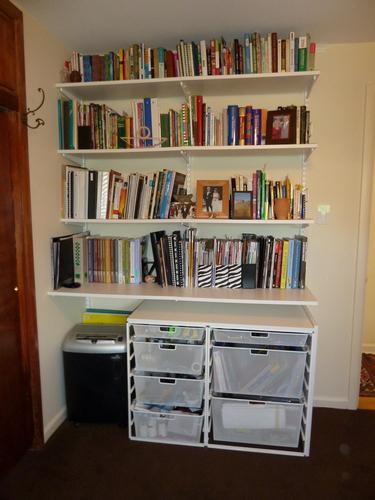
Cremalleiers
You can install shelves along the wall without forming niches. Here it would be possible to fix the consoles using brackets with a gear rack (racks). There are different types of frame designs. For example, there are those where vertical slats are covered with panels of varnished or waxed wood or plywood, which is covered with material. As a result, only shelves and consoles are visible. This design allows you to completely mask any surface defects. You can also use metal or wooden racks, which are disputed from the ceiling to the floor. Blocks are fixed on them - quadrangular compartments. The shelves are fastened with spacer screws.
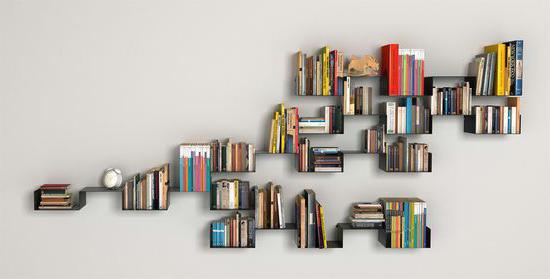
Hanging shelves
Instead of conventional structures, you can make hinged open shelves or cabinets without a back wall. They are quite easily fixed with two bolts and brackets. The first is screwed into the wall. Brackets (pendants) are fixed to the shelves on the back side. The latter can also be fixed in racks with recesses. In this case, they will be invisible. Such mounted shelves are assembled from chipboard. Two-centimeter boards are joined to each other using an insertion spike, putty and stained.
Rack "cubes"
This may look like a children's bookshelf. The design device on the basis of the game of cubes allows you to create fun structures, taking as a basis numerous combinations. Stacking individual boxes in the Christmas tree in the center of the room, you can divide the two parts of the library with publications of different subjects. For example, it can be entertaining and educational literature. Bookshelves can also be placed along the walls at a certain distance between the structures. Gaps between the boxes can also be used, increasing the total storage capacity. The boxes are assembled from chipboard, the thickness of which is 1 cm. The dimensions of the boxes are 50x23x25 cm (tentatively). In each box, two boards (top and bottom) of 50x23 cm can be used, the sides are 25x23 cm and the back wall is 48x23 cm. Since the width of all elements does not exceed 23 cm, you only need to cut out the details along the length. When cutting, it is recommended to mark and saw the material one by one. You should not draw everything all at once. This is due to the probable error when cutting 3-4 mm.
Assembly of boxes
The side walls are attached to the ribs of the rear side. For fixing, you can use cloves and / or glue. After that, the upper board and the bottom are attached to the side and back parts. After that, the whole structure is dried (if glue was used). All sides of the box should be proportional and equal relative to each other. Edges are ground, sharp corners and edges are rounded. In conclusion, the design can be painted. If it is designed to store children's books, then it can be decorated in color, make applications or use multi-colored paint. When choosing materials for decoration it is necessary to take into account their safety for humans, especially for children.
Rotating shelf
It can be a piece of furniture and placed in a recreation area. Very convenient to use whatnot on roller wheels. Such a design, painted in two colors (red and white or white and ocher), looks very modern and attractive. In general, the design is quite simple to manufacture. The main difficulty can only be fitting and fixing the components at a right angle. To build a bookcase you will need:
- The bar is 2x2 cm. It will act as a support rod. It is better to take a bar from beech or oak.
- Boards 2 cm thick.
- Glue.
- Nails
- Roulette.
- The square.
Preparatory work
The same shelves are cut from the boards. A support rod is made of the bar (the required length is sawn off). Diagonals should be drawn on the shelves and a square should be drawn in the center of their intersection. Its cross section must exactly match the size of the bar. A through square is cut out in the upper and lower shelves. It should turn out so that the support bar entered into it without difficulty. Wood can be sampled using a chisel. Next, side vertical walls are made. All finished items are sanded. To facilitate the process, on the shelves - from the lower and upper sides - you need to put labels where the vertical partitions will be located.
Assembly technology
Four vertical partitions are glued and nailed to the support rod. So the first floor will be formed. The whole structure is glued and nailed to the bottom shelf. The upper edges of the vertical partitions are lubricated with glue. The next shelf is mounted on the rod and nailed. Then, in the same way, the vertical partitions of the next floor are fixed. Cloves are oblique. Their hats need to be drowned with a rivet hammer. By the way, you can replace them with wood screws. Next, the next shelf is glued and nailed. Work is repeated until all parts are installed. At the level of the last vertical partitions, the supporting central rod is cut off. Next, four side walls are glued and nailed. They should be so long that their upper part protrudes by 1, and the lower part - by 2 cm beyond the edges of horizontal elements. From the bottom, four rollers are fixed on the axles. Their total height is 9 cm. After this, the surfaces are again carefully sanded, all faces are smoothed, the edges are ground. After completing these works, you can proceed to finish the whatnot. It can be painted, varnished or decorated with decorative carved elements. This design does not take up much space, compact and convenient.