Actively developing areas of activity of nail service masters amaze with their rapid spread and favorable adaptation in the arena of the modern nail industry. Needless to say, at the present time there are so many diverse techniques for performing manicure, so many all kinds of decorating techniques and so many different ideas for creating an original design that you should not be bored. Today, every girl can choose for herself such a decor for her nails, which is able to reflect her mood, and correspond to a solemn occasion, and fit into everyday life. Current contemporaries are experimenting with the design of nails for a specific suit, a specific outfit, a specific case and a specific place of pastime.
One of the relatively new decorative solutions in modern manicure service is the use of sliders: these are multi-colored, multi-sized and diverse water-based stickers on gel polish. How to properly apply this kind of element of nail decoration on the nail base? What are the secrets of step-by-step design of marigold design using such slides?
Features
What is an ordinary sticker - probably no need to explain. Since childhood, we are all familiar with the features of this kind of application, which has various directions in its intended purpose. The sticker is a piece of paper (sizes may vary), covered with a sticky layer on one side and decorated with a decorative image, illustration, pattern or photographic print on the other. The meaning is that the stickers are glued to various surfaces in order to decorate, aesthetically transform or hide any defects on these surfaces. Stickers can be of various formats, quality, density, purpose. They differ among themselves in their appearance, fragments of artistic aesthetics depicted on them, and the scope of application.
Recently, developers of elements of nail decoration have suggested the use of all kinds of sliders as a design for nails. Stickers on gel polish have spread the scope of their application and are loved by many representatives of the beautiful half of humanity so quickly that almost every modern fashionista has already managed to get acquainted with their amazing features and aesthetic superiority. According to nail service masters and amateur girls, the use of such decorations has a lot of significant advantages and an almost complete absence of disadvantages. But first things first.
Pros to use
Before resorting to the use of sliders for nails, you need to understand how to properly apply stickers on gel polish. Water slides or adhesive-based applications are slightly different from each other by the technique of applying to the nail plate. But in general, the instruction for their design on the surface of the nails is simple. That is why a similar method of decorating nails is used not only in nail salons by experienced and qualified nail service masters, but also amateur girls at home when creating an original design with their own hands.
What are the fundamental advantages of using this element of nail design?
- Comfortable application - there is nothing easier than transferring the sticker from the substrate to the surface of the nail bed. It is clear that attentiveness and accuracy in the actions will be required in order to apply the material to the nail plate correctly, but this, in general, is not difficult for even beginners in this matter, not to mention the high-class specialists in their field.
- Instant grip and almost instant drying - the design of the slides on the nails is not only surprisingly easy, but also amazingly fast. After the first seconds of fixing on the nail, the wet surface of the film begins to dry out. In a minute or two, the fingernail will be ready for the finish covering.
- Practicality - you can walk with such a manicure for up to three weeks, given, of course, the fact that the technique of applying stickers to manicures with gel polish was performed correctly and correctly.
- The possibility of independent use - the option with stickers is incredibly popular with girls because they can be used without the help of a manicurist. Hand-made modeling of design with slides at home is now as accessible as the design of makeup itself, which, you see, is quite convenient. At the same time, there is no need to spend money on the provision of professional services of a nail service master. Another plus follows from this - cost savings.
- A chic aesthetic look - to achieve amazing beauty on the nails with the help of correctly selected color schemes and successful art illustrations on the stickers will not be difficult even for beginners. Moreover, in order to get a drawing worthy of admiration, it is not necessary to possess even the basics of artistic skill, because amazing drawings already prepared on the substrates can be transferred to the fingernail in an instant without any small skill to paint with a brush.
Negative sides
Despite the fact that there are quite a lot of advantages to this element of manicure decoration, sometimes girls still note some nuances that somewhat disappoint with their presence. What are these nuances?
- Durability - if we talk about ordinary nail polish, then on it the slide can last no more than three to four days. Subsequently, it begins to exfoliate or fall off pieces. But since modern girls mostly use gel polish as the basis of manicure, this drawback disappears by itself - under the finish layer the sticker is not able to deform.
- Difficulties in removing from the nail plate - since the sticker or slide acts as the most ordinary film with a pattern, it is quite difficult to remove it using ordinary nail polish remover. We have to resort to additional manicure tools in order to scrape the film firmly glued to the nail bed, and this is extra time and effort.
- Difficulties with correct straightening on the surface of the nail - in order for the sticker to lie as evenly on the fingernail (especially in cases when it is solid), you need to practice a little. The first times can nevertheless result in damage to some slides and the need to apply new workpieces to the nail. But this is only a matter of short-term experience and the acquisition of appropriate skill.
In a word, we can note the fact that the number of advantages of using slides is almost double the disadvantages of this procedure. It follows from this that the game is worth the candle - that is why most girls at this stage of formation and development of manicure service use this method of decorating nails in practice more and more often.
Instruction manual
Like any other nail design technique, the use of slides is characterized by a sequence of coordinated actions. Whether it is a nail art studio or a home environment, the meaning of the procedure is that all the manipulations, step by step, are performed in a clear sequence according to the established instructions. But what is the procedure flow diagram? How to apply gel polish stickers?
A step-by-step instruction provides for phased work, which consists in the following actions:
- preparation for sticking slides;
- main part;
- completion of the procedure.
To complete each of them, you need a list of relevant tools.
Tools
To understand how to apply stickers under gel polish or how to apply them to the surface of a natural nail coated with ordinary varnish, you first need to familiarize yourself with the corresponding design tools. What do you need to prepare before applying nails stickers?
- The slides themselves.
- Saucer with warm water (for water stickers).
- Manicure scissors (for cutting solid slides in the shape of their nails).
- Nail file (to give the nails a shape and remove the remnants of a sticker from the end of the nail).
- Buff (to eliminate the shiny layer of natural marigold).
- Primer (to provide a more tight grip of the material with the marigold, optional).
- Orange stick (for convenient straightening the sticker on the surface of the nail).
- Antiseptic (for disinfecting hands, nails and tools).
- Degreaser (for removing sticky layer from nails).
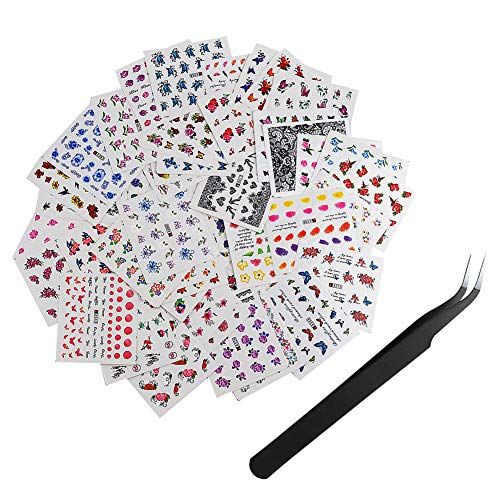
- Tweezers (for convenient separation of a film with a picture from a paper base).
- UV lamp (for the polymerization of the gel composition on the nails).
Preparatory stage
Any work with nails provides for the implementation of a list of hand manipulations that are aimed at cleansing them of dirt and keratinized skin areas that can interfere with the quality of work, and are also focused on eliminating all kinds of obstacles in the form of old design residues, gel peeling, and so on. How to apply gel polish stickers? Performing steps after actions step by step and being extremely attentive and accurate, you can achieve a decent result without making any supernatural efforts in the process of performing manicure work.
So, what actions marks the preparatory phase?
- Step 1: eliminate the remnants of the previous manicure, remove the varnish with a liquid without containing acetone with a pungent odor.
- Step 2: taking a bath for the hands to soften cuticle growths and gently cleanse the nails of excess skin.
- Step 3: disinfect hands and nails with an antiseptic.
- Step 4: preliminary disinfection of working tools.
- Step 5: performing the cuticle removal procedure to prepare the nail for applying gel polish, and then the slides.
- Step 6: shaping the nails and removing the upper shiny layer with a buff; if the nails are not natural, but have already been strengthened with a gel, then it is necessary to adjust their thickness with a more abrasive nail file.
- Step 7: after applying the primer, which provides good adhesion of the gel polish to the surface of the natural nail (optional), it is necessary to apply a top coat on the nails, given that the background color for the sticker should not "argue" with it.
Having finished the preparation process, you can mellowly proceed to the direct design of the nails with the help of slides.
Main stage
The key moment of designing with stickers is the high-quality transfer of the slide from the substrate to the plate. How to apply gel polish stickers? How to stick blanks so that they do not clump, do not clump, do not stick together with free edges together?
An unhurried systematic implementation of the following successive steps will be sufficient.
- Step 1: preparing stickers for use. If they are water-based, dip them in a saucer of water. If the slides are made on an adhesive basis, you need to cut out pieces of photo design that are most suitable for the shape of your nails using nail scissors.
- Step 2: sequential transfer of stickers from the blank to the nail. The important point here is to separate the adhesive part from the base as delicately as possible so that the sticker does not bend, glue its tips and crowding. In this case, it will be more correct to use thin tweezers to maintain the adhesive part of the slide.
- Step 3: choosing the correct position on the plate. If the sticker is partial, an important role is played by the correct placement of the artistic element in the aesthetically correctly selected part of the nail, especially if the nails are long. Often, girls choose an angular root zone or an angular region along the cut line. If the sticker is one-piece, apply it all over the entire surface of the plate.
- Step 4: Level the smallest lumps of film. The finest texture of the sticker has the ability to be squeezed, curled and bent under the influence of pressure on it. Therefore, it is necessary to be extremely careful and not go too far with the onslaught on its surface. If, nevertheless, the sticker has moved off the marigold and is too jammed, it’s better not to regret it and use a new sample. The skill of clearly applying slides also comes with some experience.
- Step 5: Drying the wet surface of the sticker. This is mostly true for water-based slides. How to apply water stickers on gel polish? It is necessary to achieve perfect straightening of the sticker on the surface of the nail, and then dry it with a dry cotton pad or swab.
Final stage
After the direct transfer and fixation of the sticker on the nails was carried out, the final manipulations are carried out to bring the nails to an aesthetically presentable appearance. What are they manifested in?
- Step 1: Securing the slide with a topcoat. After making sure that the sticker is dry from water, it is necessary to cover it with a layer of transparent gel as a fixative for the resulting composition. This will ensure the comparative durability of such a manicure design.
- Step 2: drying in a UV lamp. The ultraviolet rays provide the polymerization of gel polish and accelerate its drying.
- Step 9: degreasing. To remove the upper sticky layer of gel polish, you need to walk on it with a cotton swab, previously moistened in a degreasing liquid.
That's all. By performing these simple steps, you can achieve the desired result without much difficulty and at home. Now the nails are ready for demonstration and publication.
Varieties
Being already aware of how to properly apply stickers on gel polish, you can pay attention to some of their special varieties. We talked about the most popular and popular elements of nail design, but, besides them, there are still a lot of interpretations of such decorative equipment. For general development, we will talk about each separately.
- Water stickers are the most relevant type of slide, which is considered the most popular today due to the ease of transferring to the surface of the nail plate. The point is that in order to activate the adhesive layer, immersion of the stickers in slightly heated water is required.
- Adhesive-based slides - provide a denser film texture and are characterized by a simple separation of the adhesive part from the paper blank.
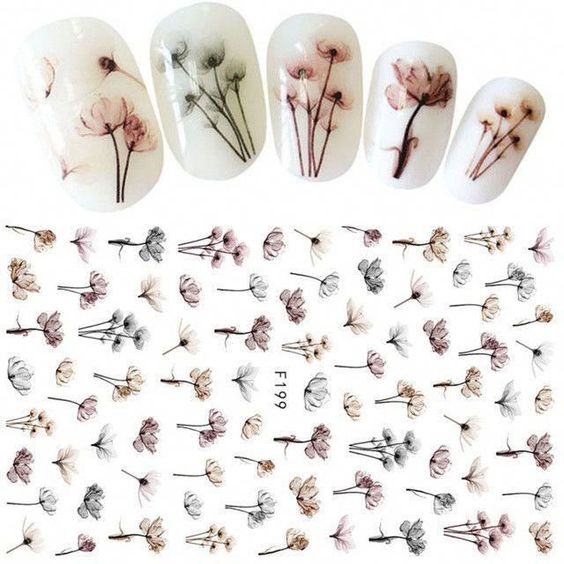
- Photodesign - represented by stickers with a realistic image of phenomena, objects, texts. Such slides are pre-cut along the contour of the marigold and subsequently straightened on its surface with an orange stick.
- Volumetric stickers - are convex figures, being separate fragments of an artistic composition. It can be a volumetric butterfly, volumetric flower, volumetric heart. Such slides give the impression of a 3D picture and have the effect of a three-dimensional realistic measurement.
- Partial - provide for filling only part of the nail space and act as symbols, silhouettes and objects that have a clear outline.
- Solid - suggest one hundred percent filling of the surface with a clear, pronounced print.
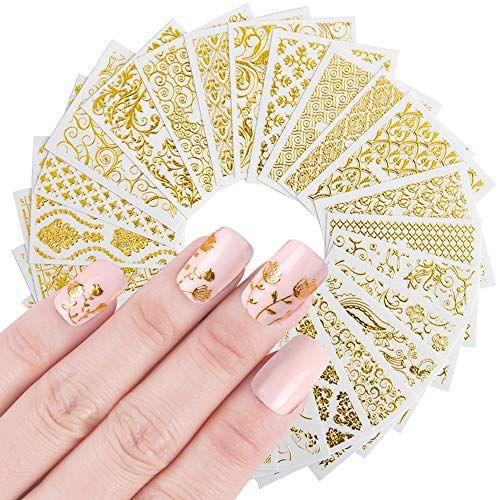
- Mirrored - characterized by the use of foil slides. How to glue stickers on or under gel polish if their base is metallized? The technique for performing such a design is identical to the method described above for applying stickers on the nails, except that straightening along the nail bed should be performed more thoroughly to achieve a better final result.
Additional tips
A step-by-step instruction with a detailed description of how to stick stickers on gel polish and how to apply a sticky film on your nails correctly can be supplemented with a couple of simple but important tips.
- To prevent the sticker from squeezing when separating it from the paper base, you need to use tweezers as a film holder and help yourself with an orange stick, holding the tip of the paper base fidgeting along the saucer.
- To make the foil sticker lay softer and more evenly, slightly warm it on the matte side - it is important not to confuse this side with the glossy one, otherwise the mirror effect will not be achieved.
- , .