Sliding gates are the most suitable option for arranging amenities on a suburban area. This type of gate is distinguished by its reliability, convenience and a long service life. To date, the building materials market offers such a variety of materials that it is not difficult to acquire everything you need to assemble this type of gate with your own hands.
Device Overview
In order to successfully cope with the task of installing sliding gates with your own hands, you must prepare a drawing in advance. You will also have to understand a little about the automation that is used to open it. In addition, it is best to first understand the principle of operation and the arrangement of this equipment.
It is worth noting that until recently, this type of gate was less popular. The most common were swing. This is due to the fact that the cost of accessories for a sliding device was quite high. Today, prices have dropped significantly, and it’s not difficult to purchase a complete set for automatically opening sliding gates.
Types and principle of operation
Immediately it is worth starting with the fact that there are two types of this design. The first type of gate is called cantilever, the second type is called rail.
To date, the second type of design of sliding gates is considered obsolete. You can meet it only at factories or factories that have been operating for many years. In private construction, it is the console version that prevails significantly. This view implies the presence of a console, which is a continuation of the door trim. It is located most often behind the fence, part of which is adjacent to the gate.
The principle of operation of the console-type gate is as follows. A rigid guide (console) is welded to the frame. Due to its presence, the movement of the sliding gate is carried out. The guide itself moves along the sliding trolleys, which are mounted directly on the foundation.
Equipment specifications
Each of the trolleys for such a guide has 8 bearings in which metal or polymer rollers are pressed. In order to extend the life of the sliding gate, it was decided to mount these carts inside the rails. Thus, they have additional protection against weathering, which extends the service life. The approximate number of cycles, that is, open-close the gate, is about 60 thousand times. On average, this is about 20 years of service.
Other advantages of this type of design include the following:
- control can be not only automatic, but also manual;
- there is no limit on the height of the machine, since there are no guides at the bottom and top of the opening;
- a fairly simple installation process, which allows you to mount a sliding door with your own hands;
- There is no need for thorough additional maintenance.
The only significant drawback is that it requires a large free space for their installation. For this reason, often the choice falls in favor of swing structures.
Set of necessary elements
In order to successfully install sliding gates, of course, you need to know what components are needed for this.
The main components include the following components:
- supporting trolleys, as well as roller-type carriages;
- in order to reduce the rolling of the canvas in strong winds, an upper and lower limiter are required;
- a supporting beam, the thickness of which will directly depend on how heavy the final model of a sliding gate for a summer residence or home will be;
- one small but very necessary part that will significantly reduce the noise level, as well as the severity of the casing in the open state, is an end roller;
- a board holding the door leaf from swinging to the sides when opening / closing.
A set of components for automation
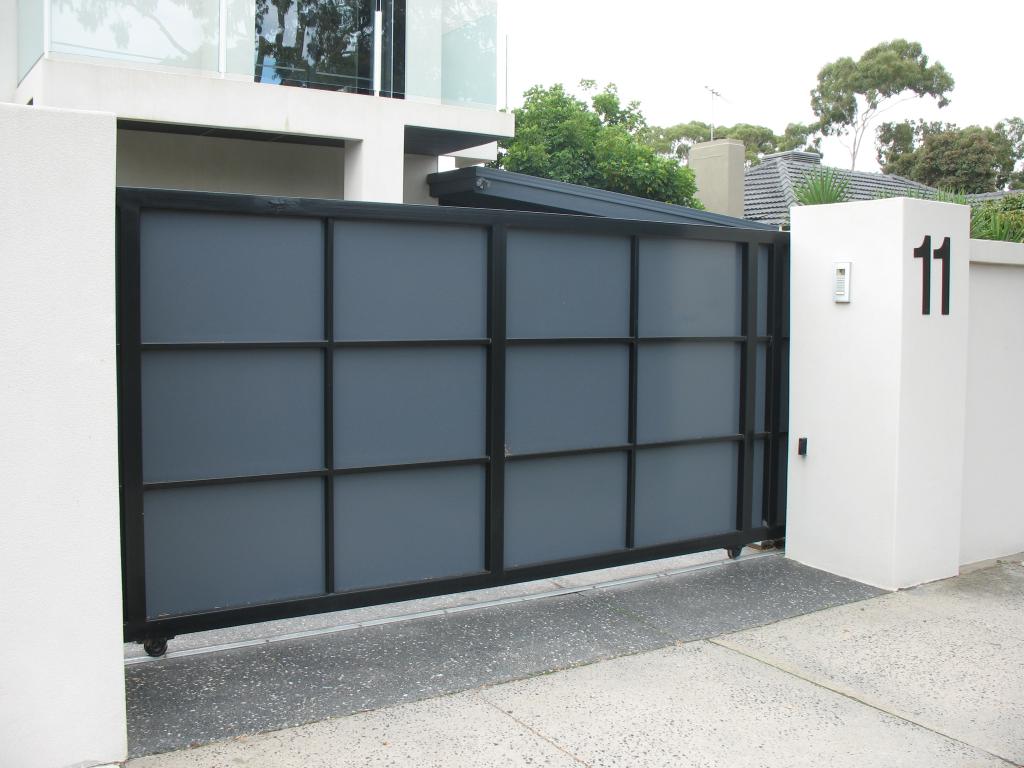
If you open the sliding gate, the photo of which is in the article, using automation, then you need to purchase several additional elements. If you plan to open manually, then this kit is not needed. It includes:
- Rack gear type. If the gate is large enough - more than 5 meters - then the thickness of this element should be at least 9 mm.
- Gearbox and remote control.
- The most important elements are photosensors or light elements. These devices are designed to synchronize the operation of the receiver and transmitter, and they will not allow the gate to close until an object is located in the opening. All this is possible due to the fact that this equipment registers IF rays.
- The basis for the installation of automation and a warning lamp.
The most reliable suppliers of equipment for automatic opening of gates are Italian and German companies. Components of these manufacturers are able to work in almost any climatic conditions. It is worth paying attention to one important nuance. It is necessary to provide for the possibility of manually opening the gate, even if there is automation, for example, in case of lack of electricity.
Necessary tools and materials for installation
How to make sliding gates with your own hands? Naturally, you need to start by buying materials and tools, as well as consumables. The list of necessary tools includes:
- Welding machine. Most often, an invert type of device is selected, which has a power of more than 1000 W, as well as electrodes to it, with a diameter of 2.5-3.5 mm.
- A grinder or a cutting machine with wheels for cutting and processing metal material.
- Concrete mixer.
- To paint the gate, you can use an air compressor or a regular roller, brush, etc.
- Hammer.
- Level.
- Shovel.
- Roulette.
- Screwdriver.
The most expensive tools, such as a grinder and a welding machine, can be rented so as not to buy them and save some material resources. In addition to the necessary tools, you will need the following materials:
- For sheathing the frame, profile sheets are most often used.
- The frame itself is assembled from profile pipes 65x44x2-3; jumpers 45x25x1-2 are also used.
- Sealant, primer and paint.
- Channel 15-25 mm and console equipment.
- Armature with a diameter of 12-16 mm.
- Fasteners for facing material: rivets and self-tapping screws.
First stage. Preparatory work
How to make a sliding gate? The whole process begins with two main stages - this is the selection of a suitable location and drawing up a drawing. It is very important when drawing up the project not to make a mistake with the dimensions of length, width, height, etc. This is very important, since the weight of the structure will depend on the dimensions, and on this the thickness of the materials for the frame and so on. Naturally, the width of the gate should be sufficient for the normal arrival of vehicles. In order to determine the exact width in advance, you can insert several pegs in the selected places and try to call in.
When drawing up the drawing, it is also worth considering that the width of the gate will affect the amount of space required for the rollback. Another caveat - the height of the structure should be 10 cm lower than the height of the fence adjacent to the gate. After the place is chosen, it should be thoroughly cleaned of debris and dirt, as well as level the site.
Gates for gates
Do-it-yourself installation of sliding gates, the photos of which are presented in the article, begins with the installation of support posts. As a support, it is allowed to use brick, concrete pillars, steel pipes, wooden beams, channels, etc. It is very important to remember that the depth of immersion of the column should be at least 1 meter. That is, if the gate height is 2 meters, then the posts should be at least 3.
Pillar Installation
It is worth saying that the steps for installing the column are quite simple. First you need to dig a hole a little more than 1 meter deep. After that, the selected support is placed in it. Next, all the empty space must be filled with concrete mixture. Here it is desirable to have another person in the assistants who will hold the pillar strictly in level, while the other will fill the solution.
It will take about a week to dry the mixture. In order not to waste this time, you can start installing sliding gates. It also begins with pouring the foundation for the frame. To begin with, a U-shaped trench breaks out. Where the racks will be mounted, the depth should reach 1800 mm, in the places of the lintel up to 600 mm. A layer of sand of about 15 cm is laid at the bottom and compacted. Next, it is necessary to cut the existing pieces of reinforcement into segments of 1 meter length and weld them to the channels. After that, the channel is laid "paws" down and is leveled. The resulting frame is poured with cement.
It is important to note that the top of the channel should have one level with the ground for normal passage of vehicles.
Frame assembly
According to the previously drawn up drawing, it is necessary to cut all the pipes into the required dimensions for the jumpers and for the base of the frame. Before proceeding with the welding of the structure, it is necessary to clean all the elements from scale and other debris. It is recommended to treat with a protective agent against corrosion and degrease.
Work Stages:
- In order to simplify the work, you can create a stand for welding. To do this, stakes are hammered into the ground, and then jumpers are laid out.
- After that, the main pipes are laid on an existing stand, which will act as longitudinal and transverse frames for the gate. They are caught by dots, after which the diagonal is checked. If everything is in order, then the joints are welded.
- Next, the lathing for the gate is laid. It is also first grabbed, after which the surface is checked for evenness. The crate should be welded with 1 cm seams in 0.5 cm increments.
- The last stage is cleaning the welds, coating with a protective compound and painting the entire frame.
Automation for gates
Installation of automation is carried out as follows:
- A base is installed on the channel between the rollers for the sliding gate.
- An electric drive is mounted on this base.
- Further, it is important to note that the gear rack should not be mounted on the guide itself, but on the pipe from the gate frame. It is very important that this part should be clearly centered on the gear of the electric drive.
- This element must be fixed across the entire width of the sliding gate.
- Switches are further installed on it, and the drive is also connected.
- On the street side you need to install a warning light. Self-tapping screws are used as fixing elements.
- To connect and supply electricity to the drive board to open the gate, it is necessary according to the instructions that come with the automation.
Frame and trim
In order to successfully install a sliding type gate, it is best to follow a specific plan. To begin with, a cart with rollers is installed, after which the structure is placed on the foundation. After that, you need to install the beam in the doorway. Here it is worth adding that there should be a distance of 5-6 cm between the end of the beam and the column. To prevent the console from collapsing, wooden beams are installed under it, after which the rear trolley is welded. It is also important to scald the trolley platforms. The frame must be welded to the beam on both sides. It is not worth welding the structure at the locations of the rollers, so as not to damage the device by welding.
Speaking generally about installing sliding gates, doing it yourself will be much cheaper than ordering ready-made ones in a construction company. Although, of course, you will have to buy all the components, as well as figure out how to install an automatic gate opening and closing system, if necessary. It will also take a lot of time, in particular due to the fact that the concrete will dry for a long time.