Framing an image, separating it from the background is traditionally both for the design of paintings, and for publishing, and - with the advent of computer technology - in web design. The painting canvas is inserted into the frame not only in order to strengthen it, but also for decorative purposes - to give it completeness, for more definiteness of the canvas geometry. The color of the frame, the presence of a passe-partout often forms a whole with the picture, the presentation and perception of the work depends on them in many respects. When preparing images for printing or publishing on the Internet, it often also becomes necessary to enclose them in a framework, and most effectively use not text editors (for example, Word), but graphic ones, in particular Photoshop. How to make a frame in Photoshop, and this article is devoted.
Framing the entire image
The easiest and fastest way to make a frame in Photoshop is to resize the canvas. It is suitable if you want to make a plain and simple frame around the entire image.
Open the file in the program, in the “Image” menu, find the item “Canvas Size” and click on it. In the window that opens, you will be given the opportunity to reduce or increase the size of the file area by cropping or adding new pixels. If you enter positive numbers in the Length and Width fields, the canvas will be enlarged, if negative, it will be reduced. To create a frame, you need to register positive numbers. Below in the "Location" field, it should be noted where exactly the canvas will be enlarged: from all sides or only from three. To do this, mark the appropriate square.
Below you need to choose the color of the future frame and confirm the action.
Repeating this operation repeatedly and changing the color of a new area of the canvas, you can create multi-color frames.
Inner frame with effects
A plus of the method described above is its simplicity, a minus is that it is neither possible to adjust nor change such a frame further. In addition, it increases the area of the image. If you want to create a more interesting and customizable frame, you can use layer effects.
Before you make a frame in Photoshop in this way, you need to duplicate the layer. Open the file, in the "Layers" menu, select "Create a duplicate layer." External changes to the file will not occur, but a new layer will appear in the Layers window, it is as if two identical photographs were put on top of each other. The difference between the new layer and the original is that it allows you to work with effects.
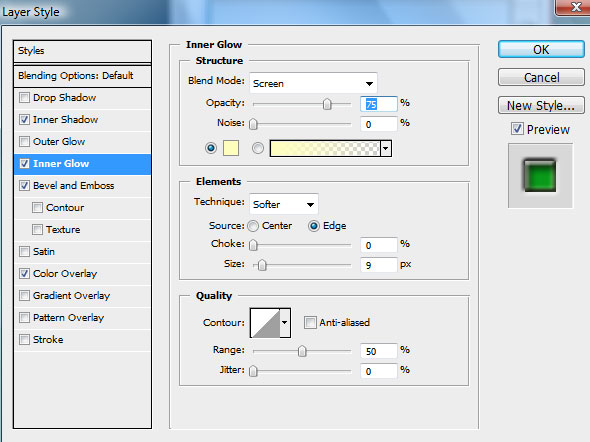
The frame for a photograph in Photoshop can be made, for example, using the effects of “Stroke”, “Inner Glow” or “Inner Shadow”. To experiment with them, you need to open the "Effects" window. The first way to open it is through the main menu (Layer - Layer Style - you can select any further, a general window will open). The second way is through the Layers window. At the bottom of this window you need to find the "Effects" button. You can use any of the effects, the main thing is to choose the “Inside” option everywhere, because otherwise the effect will not be reflected - because all the “external” effects and frames will be outside the canvas and simply will not be visible.
An example of creating a frame using an effect
An example of how to make a frame in Photoshop decorative and attractive is the use of the glow effect. Open the file and duplicate the layer. Open the Layer Effects window. Select the “Internal Glow” tab, check the “Preview” option on the right - then all changes will be immediately reflected in the open image. Then you can experiment with the frame settings. First of all, move the Size slider to the right so that the glow (frame) becomes visible. Then you can choose the color of the glow, adjust its transparency and type (it is better to start with “Normal”), the degree of feathering, usually such a frame is created by repeatedly adjusting all the options to achieve the result that you would like to see.
If you plan to then return to editing the frame, you need to save the file in the format that saves the layers - for example, in psd format.
Copy a frame created with effects
"Photoshop" is able to remember the settings of the layer, so if you need to process a lot of images and create the same frames for everyone, just open the file, select the layer with the effect and copy the effect. This command can be found either through the main menu (Layers - Layer Style - Copy Layer Style) or through the Layers window (right-click on a layer and select the required command).
Open the file where you want to paste the already created frame, duplicate the layer and - either using the main menu or using the "Layers" window - use the "Insert layer style" command to apply the copied effects.
Storing created frames for future use
Many designers store frame templates in Photoshop in a single multilayer file containing images with various effects. By copying layer styles, you can apply settings to layers of other files and, if necessary, edit them.
Using the Frame Tool
In general, the “Frame” tool in “Photoshop” is needed, first of all, for cropping (cutting out a fragment of the image), its use in creating a decorative frame can only be indirect - you will need it if you need to frame a fragment of the image.
Select the Frame tool, position the mouse on the image area, click the left mouse button, draw a diagonal line and release the mouse. A fragment of the image will be highlighted. The selected area can be edited - enlarge, reduce, rotate (move the mouse pointer over the sides of the rectangle and drag it to the desired side) and move it (place the pointer inside the selected area, press the left button and move the area). To confirm the cut command, press the Enter key or click on the checkmark in the upper right corner of the toolbar. To cancel cropping, click the crossed out circle icon.
You can apply any effects to the cut part of the file.
Round frames
Round frames in Photoshop can also be created using effects, but for this you need to cut out the round (oval) part of the file and place it on a transparent layer.
In the Layers window, select the image layer. On the toolbar, find the "Selection" tool, click the left mouse button and do not release - a submenu of selection options will open. Select Elliptical Selection. Select with this tool the fragment of the image that you want to enclose in a frame. Copy it (Edit - Copy) and paste (Edit - Paste). A new layer will appear in the Layers window. Remove or disable the base layer. Now you see an image of a round (elliptical shape) on a transparent background.
Create a frame around this layer, applying effects (in this case, you can use not only the option “Inside”, but also “Outside.” Crop the image using cropping, removing the excess empty area.
Frame around text
To create a frame for text in Photoshop, you also need to create a new layer, enclosed in a frame, and “fit” it under the text.
This layer can be either a fragment of the image on which the text is placed, or a new layer filled with a certain color (select the image area, create a new layer, fill it with the Fill or Gradient tool, apply effects to it to create a frame) .
Photoshop provides great opportunities for creating editable frames of varying degrees of complexity. To achieve originality, you need to experiment a lot and save the results of your successful experiments.