Redrawing living objects is not easy. Chiaroscuro is constantly changing, it is difficult to transfer such an object to a sheet of paper. But a few workouts solve the problem. This will help special step-by-step tutorials on how to draw flowers in a pot realistic. The most important thing is to carefully focus on business.
Materials and Tools
Professionals with a simple pencil create realistic pictures. The advantage of redrawing living plants is that you can carefully view the detail of the object. To draw flowers in a pot, like the masters, you will need the following inventory:
- Pencils of different hardness, ranging from light graphites to dark ones.
- Pen with black paste.
- Scrap to erase unnecessary lines.
- Material for mashing hatching.
- A4 or A5 high density album sheet.
- Ruler.
For a beginner to paint flowers, it is better to choose a simple object for redrawing.
Schema creation
First determined with the parameters of the flower and pot. Professionals recommend taking a pencil, sitting in one position, measuring the vertical with a tool at the same distance from the flower. Fix the border with your finger, then transfer these points to the paper. The horizontal is measured in a similar way and draw a cross. How to draw flowers in a pot according to the scheme:
- Draw the contours of the pot and stem on a ruler, if visually observe symmetry is difficult.
- The container itself is slightly conical in shape. Place 4 points that connect with lines.
- Denote the height of the stem or branches of the flower. It all depends on the type of plant. Outline a thin line.
- Some flowers have curved stems. Therefore, visually, points are drawn along the line at the points of the bends.
- In this way the leaves are worked out. Crosses are erased with an eraser.
Initially, the object is transferred so that it is in the center of the sheet so that the edges of the image are empty.
Detail drawing
It is necessary to study the object, and fill the circuit with details that go from large to small. Draw the exact shapes of the stem, leaves and pot, unnecessary lines erase. Asymmetries must not be allowed. Then, veins, plant texture and containers are indicated. How to draw a flower in a pot with a pencil in stages and simply:
- Draw an element branch in more detail with veins. If this is a tree, then they mark the bark. Everything is done by hatching.
- They study leaves and flowers. Outline bud and petals.
- They put paper under the hand so as not to stain the image.
- The drawn container should be even. At this stage, add a little volume, slightly hatching the edges, but you need to start from the incident light on the plant. Mark the earth with curved lines.
- The texture is given special attention. These are small dots, dashes and other particles on the object. It must be remembered that the foreground is worked out as detailed as possible, and the background should be slightly blurred. The marked elements are slightly wiped with a piece of matter, but not very much, otherwise the entire texture made will be smeared.
- The contour of the image is made more saturated so that the flower in the pot is separated from the white background.
In all areas of the picture, an easy volume is created, according to which it will become easier to work at the next stage of actions.
Realistic with chiaroscuro
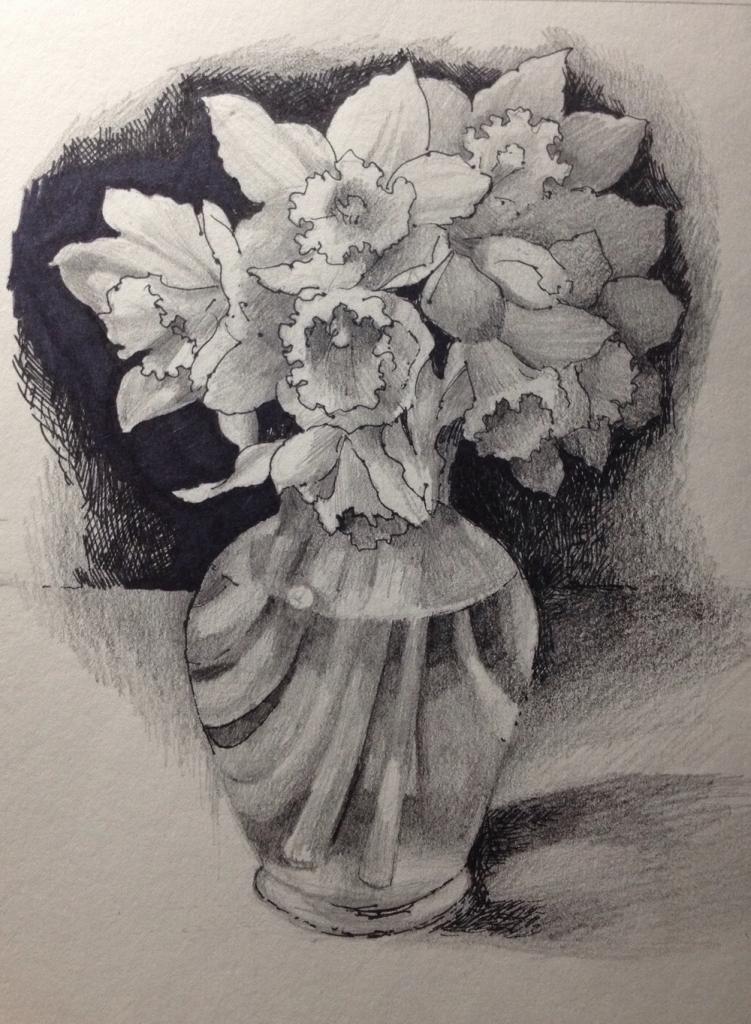
The image will turn out really beautiful when chiaroscuro is correctly applied. Work with an eraser nag. The tool in the form of plasticine takes any form, so it is easier to lighten the small details of the picture. How to draw flowers in a pot realistically:
- Areas that do not fall into the light zone are darkened with high hardness pencils. This is visible on the object being redrawn. These places are indicated by a short hatch, which is tightly arranged to each other.
- Details on which light falls, are clarified with an eraser, erasing the excess with light movements. The same actions are done on the stem and pot. Capacities give the most rounded shape.
- Chiaroscuro is applied not only to large areas by monotonous erasure or hatching. Lighten veins and even texture. Only in this way will the drawing turn out beautiful.
The image is finally adjusted and a background is created. Drawing from nature is almost done. If the flower is on the windowsill, but this does not suit the artist, then you can draw a table on which the shadow will lie from the object. This will enhance the effect. A white background will remain on both sides of the plant, but you should not paint over it with rough black lines, as beginners do, this will spoil the perception of the picture.