A hygienic shower is some analogue of a bidet. However, its operation and installation are simpler. It is possible to do this work with your own hands. To do this, you need to familiarize yourself with the recommendations of specialists, as well as learn about all the intricacies of the installation. In this case, the system will be functional, will improve the hygiene conditions in the apartment. Instructions, methods and installation height of a hygienic shower will be discussed later.
The benefits of using a shower in the toilet
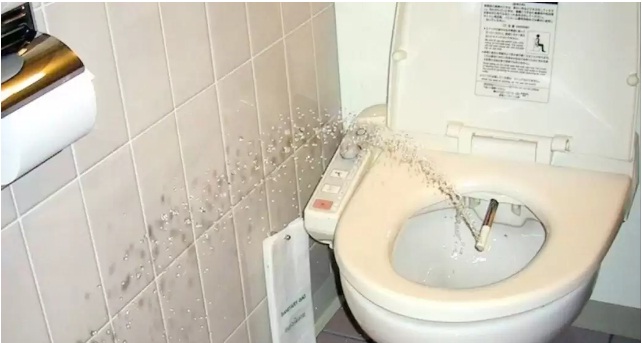
Before you consider how the installation is performed, as well as the height of the hygienic shower (the photo of one of the options is presented below), it is worth determining for what purpose this plumbing is generally needed.
It performs a number of functions. A special shower is installed next to the toilet. This is especially suitable for a bathroom separated from the bathroom.
Gynecologists and proctologists all over the world agree that it is right to use a bidet after every visit to the toilet. This is necessary for the prevention of hemorrhoids, as well as a whole list of diseases of the rectum.
The shower head located next to the toilet allows you to easily wash small children who are just starting to learn how to use the toilet. For adults, this device allows you to maintain cleanliness and hygiene without the use of toilet paper.
To ensure comfortable use of this system, you need to pay attention to how high the installation of a hygienic shower in the bathroom will be as comfortable as possible. In addition to the listed functions, with its help it will be possible to wash the toilet bowl, paws of pets after visiting the street, own shoes, etc. There are many options for its use. A modern bathroom cannot do without a hygienic shower.
Varieties
There are various ways to install a hygienic shower. The installation height largely depends on the type of design chosen. There are 4 main types of such systems:
- Shower with faucet. This is a watering can attached to a regular flexible hose. It connects to the mixing device. At the end, the system has a shut-off valve and nozzle. The first of these structural elements facilitates the procedure for using the shower. This is a lever or button located on the handle. When pressed, water is supplied. On the watering can may be provided with an additional latch.
- Watering can with a connected hose. This design has a hose, like a conventional shower. It is brought to the mixer. In some cases, the hose is connected to the pipe supplying cold water to the toilet. The second option is less preferred. You can not wash yourself with cold water. Its temperature should not be lower than 25º.
- Bidet cover. This is a special toilet lid. It is installed instead of the usual rim. It connects to a 220 V network. It also has leads for connecting to a cold water source. In a special container, which is located behind the lid, water is heated. This device is less functional than a shower. It is suitable exclusively for hygiene procedures. When the device is put into operation, two nozzles extend. Washing takes place. Some models have the ability to memorize the temperature regime and the length by which the nozzles extend. You can also adjust the flow rate. Many models are equipped with a remote control. With it, you can set not only the basic parameters of washing, but also configure the seat heating, the function of hydromassage, drying, and deodorizing the air in the toilet. They may also include music.
- Toilet bidet. Water is heated by electricity. Washing is carried out by sliding nozzles. Like the bidet cover, this system has many additional features.
More often, customers opt for the first two systems. For their installation, it is important to know at what height from the floor the installation of a hygienic shower will be as comfortable as possible.
Wiring diagram
The height of the hygienic shower in the toilet depends on the design features, as well as the location of the plumbing in the bathroom. The simplest is the scheme for connecting a hygienic shower to cold water communications. A tee is connected to the pipe through which water is supplied to the toilet. A hose from a shower is connected to a free terminal. However, in this case, only cold water will flow from it. For personal hygiene, it can not be used.
To make the water temperature comfortable, you need to connect a shower to the mixer. This is easiest to do if a sink is already installed in the bathroom. An ordinary crane is dismantled from it. Instead, a faucet with a connection for a hygienic shower is connected. However, it is far from always possible to install a sink in the toilet.
In this case, the system is installed directly on the wall. In this case, it is important to correctly determine the height of the hygienic shower for the toilet. Otherwise, using it will be inconvenient. In the wall you will need to mount pipes. A single lever mixer is connected to them. If desired, you can supplement the system with a thermostat. It will adjust the temperature of the water to a user-defined level on its own. No need to spend time setting up the stream.
Water can be supplied through a standalone small heater. Most often it works on electricity. The power of such a device can be relatively small. However, more often hot water is supplied from a stationary boiler or column (boiler). In this case, you need to mount a full-fledged mixer, which will set the temperature of the supplied liquid.
Preparation for installation
Most often, buyers opt for wall-mounted systems. All pipes in this case pass inside the wall. They can be brought to the surface, but this option will look rather rude and unaesthetic. This is especially true for a bathroom with small dimensions. Therefore, it is better to lay pipes in the thickness of the wall.
The height of the hygienic shower built into the wall must be such that the hose reaches the toilet calmly. Therefore, you must first purchase the equipment, and then draw up the installation diagram.
The standard installation height for a hygienic shower with a mixer is 60-80 cm from the floor. Make sure that the hose does not touch the floor. You also need to consider the growth of the owners of the house. In order not to make a mistake when choosing a place for installation, you need to sit on the toilet and reach out to the side without looking. Where it touches the surface of the wall, it will be convenient to mount the holder for the watering can.
Having made a mark, you can calculate how the pipes will be located in the wall, where it is better to make a mixer. The latter is usually mounted in the immediate vicinity of the watering can holder. This will make it easy to adjust the temperature and flow of water.
Materials
It is worth noting that the installation height of the hygienic shower mixer can be different. If it is mounted on the sink, this element of the system will correspond to the installation parameters of the plumbing. In other cases, it is mounted at a height of not more than 80 cm. Sitting on the toilet should be convenient to reach the watering can and faucet. At the same time, the hose should be at a small distance from the floor.
To complete the installation, you need to prepare several necessary tools and materials. The system that is installed on the wall, without fail, has:
- Hose. It can have a different length. It can be only 50 cm or reach 180 cm. It is worth choosing models with protection against twisting. The braid must be metal silicone.
- Mixer. This is a compact single lever design. Two-valve mixers are impractical. If you buy a mixer with a thermostat, you don’t have to worry about constantly adjusting the pressure and water temperature. The mixer will perform this procedure automatically. He only needs to set the level of water heating. When turned on, he will mix the two streams in the desired ratio. Models with a thermostat are much more expensive.
- Hardware. The easiest way is to connect the system to communications using polypropylene or plastic pipes. Therefore, you need to purchase the appropriate angles, pipes, adapters.
Instruments
To carry out the installation of the system with your own hands, you need to prepare several necessary tools for the work.
To install a hygienic shower at a height above the floor that meets the requirements of the standards, you will need to use a number of improvised tools in your work. You will need a tape measure, a pencil and a marker. You also need to prepare a hammer drill. With its help, strobes will be cut in the walls. The hammer must have nozzles for drilling and beating. Also, its power should not be very minimal.
In addition, a grinder may be required. With its help, it is easy to cut pipes, and you can also create strobes. Be sure to purchase a set of keys and one adjustable wrench, screwdrivers (flat, cross-shaped). You will need screws and dowels, tow or a special tape for threading. If you plan to lay polypropylene pipes, you will need a special soldering iron.
Having prepared everything you need, you can begin to work.
Charting
Having determined which installation height of the hygienic shower is correct, you can begin to develop a plumbing supply scheme. This is a mandatory step that should not be neglected. It is necessary to create such a route from pipes that would have a minimum number of turns. They can be placed strictly vertically or horizontally. The system must have a shut-off valve.
If a faucet with a thermostat is installed, it is important to consider which side it should be connected to hot and which cold water. For conventional mixers this does not matter. In most cases, in plumbing with a heating element and faucets with a thermostat, hot water is supplied from the left side, and cold, respectively, from the right.
Wall chipping
Knowing the required installation height of the hygienic shower, as well as having developed a communication circuit, you can begin to shatter the walls. Professionals use special equipment for this. It is called a chipper. This is a tool resembling a large grinder. It has dust suction function. It stands out quite a lot.
If the chamfer is not at hand, you can use a hammer drill with a special nozzle. The tool should work in the beating mode. Walls made of bricks and aerated concrete are easier to shred than concrete foundations.
If desired, recesses for pipes can be cut with a grinder. A stone disc is put on it. Further, along the marked lines in the wall, grooves are created. Between two such slots, concrete is knocked out using a perforator blade. This option is the dustiest. When creating slots, a grinder will emit a large amount of dust. It is necessary to work in goggles and with a respirator. All surfaces in the bathroom will need to be thoroughly cleaned after work.
If there is no grinder, you can make holes along the contour at a small distance from each other (10-15 cm). The space between these holes is knocked out.
Connection
The height of the hygienic shower depends on the length of the hose. The owners of the house or apartment should be comfortable using the device. This is calculated during the installation of the system. After creating the strob, you need to withdraw the pipes in the wall. The water supply to the apartment is turned off. Pipes of cold and hot water supply are cut off at a point convenient for connection. Tees are mounted here. Plastic pipes will be connected through an adapter. By soldering, all communication elements are collected. Next, you can close the pipes with a protective box. At the joints, an inspection window is installed. This is necessary so that in the event of a leak, get quick access to the pipes.
Next, a mixer is installed on the pipe leads. A hose and a watering can are connected to it. To conveniently hang them on the wall, you need to install the holder. It does not take a lot of time.
Holder mounting
At a height selected from the floor for installing a hygienic shower, a holder must also be mounted. He will hold the watering can. To mount the holder, you need to use a puncher or drill, which provides the function of hammer drilling.
First, the holder must be attached to the wall. Having determined where it is best to install it, you need to outline the points to create recesses. Masking tape is glued to the glazed ceramic tiles. Further on the marking, holes are created in the wall. Using dowels, the holder is fixed. This will require a Phillips screwdriver.
Next, the system is checked for operability. If everything is normal, you can use a hygienic shower for its intended purpose.