The advantages of showers over baths are known to everyone. They are compact, comfortable. Modern designs have a lot of useful functions - what are shower cubicles with hydromassage, not to mention lighting, the ability to listen to music, etc. The choice today is really great, both in terms of functionality and price.
It is generally accepted that the installation should be carried out by the appropriate specialists, but this is not entirely true. Installing a shower cabin with the power of each owner.
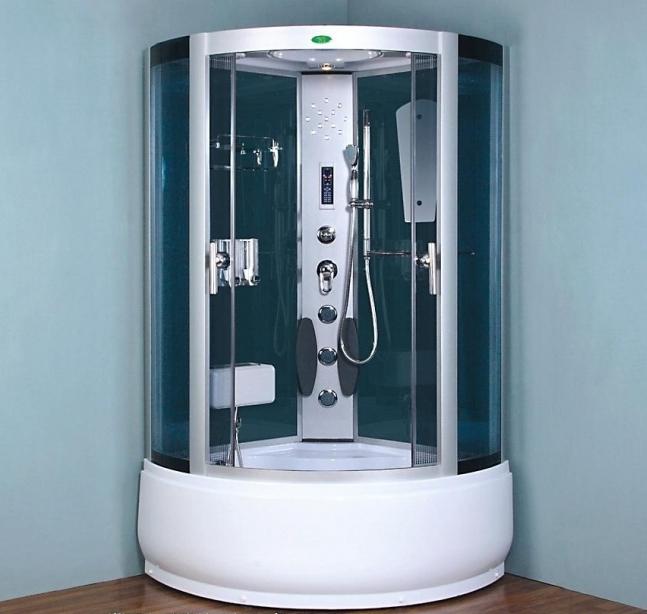
So, first of all, it is necessary to understand that any design, from the simplest to the most multifunctional, is assembled according to the same principle. For example, showers with steam, speakers and the ability to receive phone calls are mounted in the same way as the most common designs, and only strictly according to the instructions.
The process begins with the installation of the pallet. All of them are equipped with adjustable legs, which must be set using the level, and then tighten with nuts. The pallet should fit into the corner ideally, however, if the angle itself turns out to be uneven, a gap forms that will have to be eliminated. If the gap width is not more than 5mm. on each side, the situation can be corrected evenly by distributing this distance to each edge and filling it with silicone. If the gap is much larger, with the help of a grinder, they cut the tiles, and the pallet is deepened into the wall at a distance necessary for a tight installation. The top line of the joint between the pallet and the wall must also be carefully filled with silicone. Important: during the entire time that the installation of the shower cabin takes place, you can not remove the protective film from the pallet.
Comes with a drain hose. One end is attached to the pallet, the second is displayed on the drain hole. It is better to install a tee right away, since the branches of the washing machine, bathtub, etc. will be connected to the system. It is better to seal all joints when supplying water.
Installing a shower cabin requires a separate outlet, it is better if it is designed for rooms with high humidity.
After installing the pan, check the drain. Buckets of water will be enough. If the drain works normally, you can proceed to installing the frame. The frame is assembled separately, mounted on a pallet and attached to the wall. Pre-screwed profiles included in the package.
After the frame is mounted, deaf glass partitions are installed at the edges, on which rubber seals are additionally mounted. On both sides, the vertical partitions are pressed with screws to the profile arc.
The next step is the installation of doors. First they are hung on the upper arc, then the lower rollers are screwed. Now you can attach the handles and try the door to slip.
The installation of the shower cabin is now over; all that remains is to fix the bracket on the wall with a groove for the shower holder and a soap box. Now you can remove the protective film and fully use the booth.