To make skim yogurt, you should purchase fresh or pasteurized milk with minimal fat content. It is worth noting that today there are a great many options for making such a treat. It is made with the help of a yogurt maker, microwave, slow cooker and other devices. But in this article we decided to consider the easiest and fastest way that even a novice cook can use it.
How to cook low fat yogurt?
This issue is not as relevant today as it was several decades ago. Indeed, for the acquisition of such a tasty and sweet product, you just need to go to the store. But not all yogurts sold in supermarkets are beneficial for our body. That is why some housewives still prepare such a treat at home.
Let's look at what products you need to purchase in order to make low-fat yogurt yourself:
- fresh or pasteurized milk of minimum fat content (up to 1.5%) - 1 liter;
- skimmed milk powder - ¼ cup;
- granulated sugar (for “feeding” sour-milk bacteria) - 1 large spoon;
- small salt - a pinch;
- natural yogurt with live cultures (without additives and dyes) - 2 full large spoons (you can also use lyophilized dry sourdough).
Foundation preparation
Home-made fat-free yogurt is done in three stages. First you need to prepare the base. For this, pasteurized milk should be poured into a metal container and gradually heated to a temperature of 45 ° C. If you are using a fresh drink, it is recommended that you first bring it to a boil, remove the film, and then cool to the above numbers. This should be done in cold water, lowering the bottom of the pan into it and carefully stirring the contents. It is also advisable to add ¼ cup of skimmed milk powder to such a drink . It will make yogurt more thick, tasty and nutritious.
Add leaven
While the boiled milk cools, the sourdough should be warmed to room temperature. For this, it only needs to be taken out of the refrigerator and kept indoors for several hours. Then warm non-fat yogurt or dry lyophilized bacteria in a bottle should be put in milk and mixed thoroughly (you can use a mixer).
The final stage - exposure to heat
After the basis for the future goodies is completely ready, it should be poured into a three-liter jar and loosely closed with a glass lid. Next, the container with the mixture must be wrapped with a cotton blanket and put near any heat source. For example, in winter, a jar of milk mass can be placed near the battery or filled into a regular thermos. The main thing at the same time is to remember that natural non-fat yogurt must be aged at a temperature of no higher than 50 and no lower than 30 ° C.
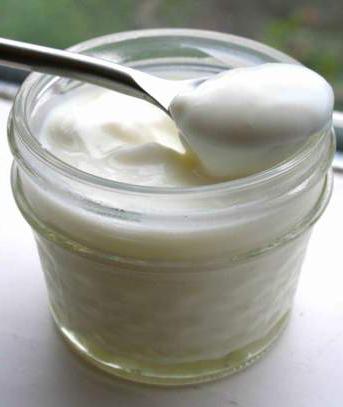
After 4-7 hours, you should receive a product whose consistency resembles a custard, but only with a cheese smell and a small amount of greenish or yellowish liquid on the surface. This is exactly the mass that we need. It is worth noting that the longer the fat-free yogurt stays warm and ripens, the thicker and tastier it will become. In the process of creating such a product, it is extremely important not to move the container with the milk mixture, as this significantly reduces the speed of its thickening.
Proper serving
After the yogurt has thickened and is completely ready, it should be placed directly in a glass jar in a refrigerator, where it can be stored for up to two weeks. Serving such a drink to the table is recommended along with granulated sugar and berries. If desired, you can add a couple of spoons of liquid honey to this delicacy, as well as a pinch of cinnamon.
Useful Tips
If you need to use a certain amount of homemade yogurt as a starter culture, then it is advisable to do this for the first 5-8 days, while sour-milk bacteria are viable. In addition, the serum formed on the surface of the product, which has a greenish yellow tint, should be immediately drained or used to knead the dough, prepare salads, etc.
As a rule, manufacturers add various thickeners (starch, pectin, gelatin, etc.) to many yogurts sold in supermarkets. That is why you should not be surprised and worry in vain if the dairy product you prepared turns out to be liquidish.