Do you like to be in nature? Can't imagine life without hiking in their native land? Build a summer house while you have nowhere to wash? Or maybe you just love extreme sports? You have to learn how to build a camp shower with your own hands. You can make it from almost any available containers. It is not only pleasant to wash in warm water, in a warm room: in cold weather health can depend on such a shower. Build a marching shower under the force of even novice conquerors of nature.
We build a watering can
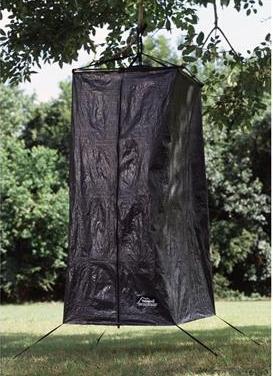
The simplest shower is arranged like this. A curtain is attached to the tree (if you want to wash alone). A hole is made in the cap of a large plastic bottle where a piece of hose is inserted. The lid itself is taped onto the bottle with tape (if there is a hose). If it is not there, then to pour water, just unscrew the lid. For a large capacity, any non-thick hose is suitable, for a “one and a half” - a tube from a dropper. It must be firmly fixed in the hole in the lid. To prevent water from flowing spontaneously, you can pinch the hose with a stopper or use the wire hook to attach the end at the top. Next - cut the bottom of the bottle, close the lid, fasten on a high branch. For convenience, you can place the bottle in a net or simply attach it to the branch with wire. The simplest hiking shower is ready. Instead of a plastic bottle, you can use Esmarch's mug, heating pad, etc. Such a device is quite suitable for summer time.
But what if you are on a hike around the mountain and -20 ° C, but really want to wash? Actually, it is the next building that will be what they call the “real camp shower”. Naturally, you can do it anywhere, but they say that climbers came up with this method of hygiene.
We build a portable walking shower
Actually, only the curtain and the water tank will be portable . We collect all other parts right on a halt. We will need:
- Devices for lighting a fire.
- Boulders are the size of the head of a three-year-old boy, but you can also have a bucket of ordinary pebbles or other stones.
- Curtain
- Plastic bottle with cork and hose.
- Tent or film stretched over the frame. The frame can be carried with you, and can be built between trees.
In order to build a warm camp shower, we make a fire, put stones in it, and heat water over a fire. While everything is warming up, we mount from cellophane (if there is no empty tent) a kind of wigwam. You can use branches, etc.
We make fastening above the wigwam: here we will hang a plastic bottle (see the device above) with water. When the stones warm up, gently lay them around the perimeter of the wigwam. This is the most dangerous part of the procedure: you can get burned. Boulders or pebbles should cool in the “lodge” so that they can be stood. In the process of cooling, they warm the air very much. Then we hang a bottle of hot water and ... with light steam! Usually, stones allow 4-5 tourists to take a marching shower, and only after that the “room” begins to cool. If you do everything quickly, and take more boulders, then even a group of 15 people will have time to complete the proper bathing procedures.