Most users know that absolutely in all Windows-systems, including the seventh modification, at the bottom of the "Desktop" there is a special strip with all kinds of icons, called the "Task Bar". But few people think about its functionality, not to mention fine-tuning the "Task Bar" of Windows 7, as they say, for themselves. Some people think that there is nothing complicated. Yes, indeed, this is true, but most often users ignore some important points and nuances regarding setting optimal panel parameters. Let's try to deal with some of them.
What is the "Taskbar" and what is its functionality?
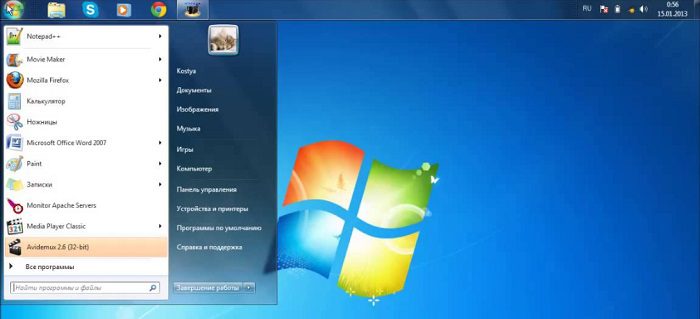
To begin with, we will briefly dwell on what kind of a graphical interface element it is and why, in fact, it is needed. The default panel contains three main areas: the Start button, which opens the corresponding menu, the area for quick access and display of currently active applications or services, as well as the area in which the clock, date, time, network or Internet connections are displayed, volume, hidden icons and notifications called the system tray.
With the purpose of the Start menu, Windows 7, it seems, is clear. The area of active programs and quick access should not cause special questions either. But the system tray is a unique thing, because it contains the icons of some active processes that are not displayed in the main area. Most often among them you can find all kinds of antiviruses, optimizers, updaters, auxiliary system services, etc. It’s worthwhile to pay attention to the fact that it’s by their number that you can sometimes determine the cause of system braking.
Access to the main panel settings
Now let's proceed directly to the configuration of the “Taskbar” of Windows 7. Of course, access to all the basic parameters of this interface element can be obtained from the most common “Control Panel”.
But why carry out a lot of unnecessary actions if it is easier to open the settings window through RMB directly on the “Taskbar” using the properties item?
The settings window contains several tabs (usually three), and by default the tab "Taskbar" opens.
Customizing Windows 7 Taskbar: Basic Actions
In the parameters, you should immediately pay attention to the point of fixing the panel and the point of hiding it. When the first parameter is activated, it will be impossible to add additional elements to the panel. When using the second option, the panel will simply disappear. By the way, many users complain about the panel disappearing, completely forgetting that this setting is activated.
But due to the activation of the use of small icons, you can slightly increase the working area of the screen even without changing the scale or resolution in the settings of the “Desktop”, screen or monitor.
The position drop-down menu allows you to reposition the panel on the screen. If desired, you can place it on the top or side.
Manually changing a panel
Sometimes the panel view may need to be changed. For this, the above parameters are not suitable. It is much easier to perform such actions with the mouse. For example, when you hover over the border between the panel itself and the "Desktop", the standard pointer turns into a vertical line with arrows on both sides. When the left button is pressed, moving up increases the vertical size of the panel by half. How to hide the "Taskbar" of Windows 7, it seems, is already clear. For this, a downward movement is used. However, the panel itself does not completely disappear, but takes the form of a horizontal line.
If we are talking about how to change the “Taskbar” in Windows 7 with respect to the spatial position on the screen, with the left mouse button pressed (click on the panel), you can manually drag it to any convenient part of the screen, and if necessary, change the standard size making it, for example, square. It is clear that this will reduce the workspace, and you should not do such things.
As for the design of the panel in terms of appearance, you can change it through personalization settings, using the default theme change for this. Also, to get a look like the Windows 95 or 98 interface, in the system properties you can turn off all visual effects by activating the item for maximum performance. The view, of course, will be unsightly, but the RAM will be freed somewhat, since Aero effects load the system resources too much. If you want to get something completely abstract, use programs like WindowBlinds, which change the interface of the system beyond recognition.
How to use the PCM menu on the "Taskbar"?
The menu of the panel itself is of particular interest. In addition to accessing properties, here you can immediately use the dock item to disable the panel or disable it when adding a new element.
By the way, if you execute RMB on the active application, you can immediately fix it in the quick launch area. Additionally, you can use the window grouping block, show additional buttons and other standard panels, or launch the “Task Manager” without the need to call it through the “Run” console or from an executable file.
Customizing Windows 7 Taskbar Icons: System Tray and Notifications
But the biggest problem of all novice users is setting up system tray icons, because you won’t be able to add them there or delete them in this area. To remove unnecessary applets that run with the system, you should use the startup section in the configuration (msconfig), where everything that is unnecessary is deactivated.
As for notifications, first you need to click on the button for displaying hidden icons marked with an up arrow, then press the settings button, and then in the notification selection window set your own settings for services whose messages or icons will be shown in the system tray (or removed from it) )
Similarly, you can use the main menu described above by clicking on the button for setting the notification area icons in it.
Display standard optional panels
In principle, if you use the basic settings, you can go to the toolbar tab and activate the display of additional elements. However, the choice here is limited, so it is better to use the PCM menu and create a new panel. But on it it will be possible to add whatever you want.
Adding your own objects to the panel
Now let's see how to add custom applications for Windows 7 or files to the panel. One of the methods has already been discussed above. The second technique, which most users are accustomed to using, is to first unpin the panel, set the shortcut for the executable file of the program or for the file to the “Desktop”, and then simply drag it to the “Taskbar” and then fix the panel if necessary.
Additional settings
In the main menu, attention should be paid to setting options for the displayed icons. In this view, the Windows 7 Taskbar setting looks very flexible. So, for example, if you enable icon grouping, for the same application the open file tabs will be merged into one. In other words, there will be only one button on the panel, through the RMB menu on which you can select the desired document.
Finally, if you unpin the panel, it will show the borders, by shifting which you can change the size of the quick launch area and active programs, swap additional panels (if any), etc.