Highlighting for many years occupies a leading position among the preferences of modern fashionistas. Ideally, this type of staining is best done by a specialist. However, for lovers of budget options there is great news - do-it-yourself highlighting is possible! If you do not have long hair, you can do highlights through a hat. It is enough to learn the technology of execution and prepare everything you need. It is advisable to attract an assistant, since working on the occipital area without outside help will not work. How to make highlighting through a hat? This will be discussed in the article.
Highlights of highlighting
Before learning to do highlighting through a hat at home, let's talk about the benefits of this type of staining:
- Refreshes the face and hair color, avoiding sharp color transitions.
- Creates visual volume and contributes to the radiance of the hairstyle.
- Looks great with regrown roots and does not require a quick update.
- It does not do much harm to the hair and scalp, as individual elements are exposed.
- It has a truly anti-aging effect and is suitable for any age.
- Effectively hides gray hair.
- Corresponds to modern trends of naturalness and naturalness of the palette.
Disadvantages of highlighting
Highlighting through a hat is not such a simple procedure. It takes a lot of time, in particular, the step of pulling the strands is very time-consuming. The following disadvantages can also be highlighted:
- Any lightening is harmful to the hair. Do not perform the procedure for at least a month after curling.
- It is not possible to create uniform application without outside help when painting a house.
Highlighting through a cap at home
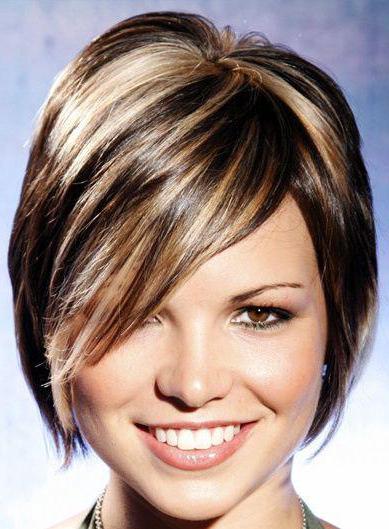
The photos in the article show us how skillfully executed coloring looks great. How to learn to do it yourself? Highlighting through a hat, first of all, requires patience, then the result will not disappoint you. Recall that to implement this method, you should evaluate the length of the hair. For long-haired beauties, he is not suitable. The use of caps for home transformation greatly simplifies this procedure, even if you do it for the first time. Usually a plastic, rubberized or silicone hat is used, in which there are holes arranged in a checkerboard pattern. Such devices are sold in specialized departments of stores, sometimes a hook for pulling hair is attached to them.
How to be smart?
If it is impossible to purchase a suitable ready-made kit, you can create it from improvised means: use a plastic bag for the cap, which must first be adjusted to the size of the head (it should fit snugly to the surface to avoid leaks). Holes are recommended not to be done in advance, but directly when threading the strands, having determined at intervals.
A professional hook can be replaced with a crochet hook. The hook should not be taken sharp so as not to injure the scalp, and not too large to conveniently pierce the holes in the bag. Instead of a hook, a comb with a long thin tip is also used, but it is worth noting that it is harder for a beginner. Polyethylene should be chosen the most dense - this is important for a good result.
What do you need?
- Beanie.
- Hook.
- Means for clarification: when working with dark and coarse hair, a 12% clarifier is suitable, with thin blond hair, it is necessary to prepare a 3-4% concentrate. Sometimes they apply paint a few tones lighter than their own strands. Important: if previously the hair was dyed with henna - do not lighten the curls yourself because of the unpredictability of the result.
- Gloves.
- The container for the preparation of the mixture.
- Brush for applying clarifier.
- Polyethylene (you can use a food film: cover it with curls with a coated composition, which will enhance the reaction).
- A sheet on the shoulders or a hairdresser's cape.
Stages of performing highlighting
- Comb your hair, put on the cooked hat and start pulling the strands through the holes in the hat. Try to get strands of equal width. When using a purchased cap, strands can be obtained from each hole, or at intervals (medium and intense highlighting), depending on the desired result.
- It is more effective to dilute the composition in the container after passing the strands through the cap - so you will work with the freshly prepared mass, and this will improve the result.
- Apply the prepared mixture to strands threaded through the openings of the cap. When applying, work with light movements, in no case crumple strands to prevent smudges through the holes in the cap. To enhance the effect, it is sometimes recommended to use a plastic film - this increases the thermal insulation, thereby accelerating the chemical reaction of clarification.
- The waiting time is usually indicated in the instructions for the clarifying agent. The interval may vary depending on the stiffness and initial hair color. Typically, the procedure takes from 15 to 45 minutes. It is important to maintain the recommended interval, otherwise the hair may be damaged or the result does not meet expectations. You should independently monitor the progress of clarification: due to the increased porosity of the hair, the effect may occur earlier than the declared time.
- At the end of the procedure, the clarifying cream should be thoroughly washed off the hair without removing the cap. Next, free your head from the headgear and wash your hair again with shampoo and a care product to nourish it after clarification. Hair restoration is necessary after any lightening, therefore this stage can in no case be ignored. Home highlighting kits often contain nourishing masks for post-treatment care.
- The final stage is the tinting of the strands, necessary to mitigate and prevent visual color differences. This work is best done at least three days after lightening, do not overload the hair with unnecessary chemicals.
Highlighting through a hat or foil: which is better?
The option of highlighting with foil is incredibly relevant, as it contributes to a good staining of the strands. In addition, it allows you to work with several tones, increasing the depth of color. The dye is coated with curls and wrapped in foil. At the same time, the edge of each sheet of foil is bent inward by at least one centimeter (to avoid leakage).
To perform highlighting with foil, it is necessary to prepare a similar list, with the exception of one item - replace the bonnet with foil, plus a comb with a long end. And do not forget about the assistant. Performing the procedure on the occipital area alone is unrealistic.
The question is often asked: which is better, highlighted through a hat or using foil? The answer is simple - with the obvious advantages of these methods, they have a different purpose: highlighting through a cap on short hair (no more than 15-20 cm) with the effort shown will turn out great. But for long hair, the preferred method using foil.
Tips for performing highlighting through a hat at home
- When re-dyeing, it is not recommended to use previously highlighted locks, this can harm the quality of the hair structure.
- Do not wash your hair before dyeing, it will create a natural protective effect that allows you to withstand the negative effects of oxide.
- Any lightening does not require prior preparation in the form of moisturizing the scalp
- To prevent allergic reactions, it is better to conduct a test reaction on a small area of the hand, according to the instructions of the coloring composition.
- For thin and weakened hair, do not rush to the process of lightening, it is advisable to carefully treat hair beforehand.
- The finer the feathers are obtained when passing through the cap, the more natural the result will be.
- Classical highlighting and zonal are distinguished. The first type involves the coloring of the entire length of the hair threaded through the hat. Zonal - work is carried out with individual sectors. It opens up great opportunities for creativity: "asymmetry", "diagonal", radical application of the coloring composition, "avant-garde" and many other types of intermediate staining.
As a rule, highlighting through a cap on short hair (the photo represents the result of dyeing in the article) is no worse than when performing the procedure in the salon. If the result does not suit you, it will be easy to fix. But with long hair, everything is more serious. If you are not sure of success, it’s better not to risk it, but trust the masters in the salon!