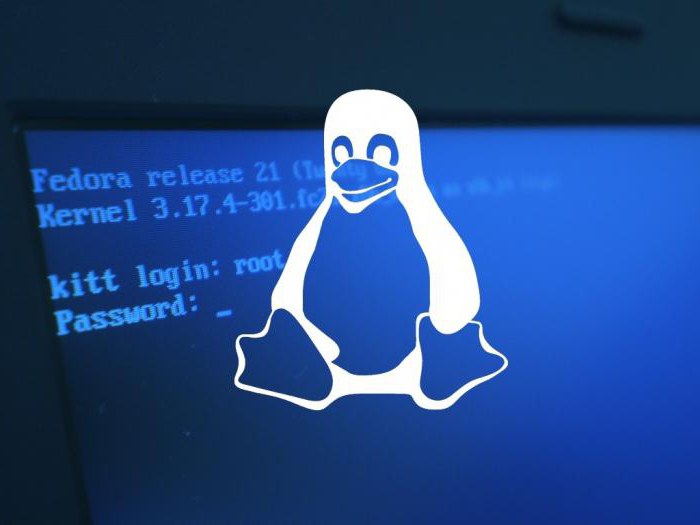
More than a dozen new users of operating systems other than Windows, with a fair amount of doubt and skepticism, meet the phrase "bootloader" today. And there is an absolutely logical reason for this: most beginners before using the other, less common OSes on the market, used the same Windows in everyday life. In it, this bootloader is implemented as primitively and transparently as possible. And although this to some extent adds convenience to the average user, but at the same time it cuts down the functionality of the already most popular and universal OS. Therefore, all those who decided to pay attention to other products of the IT industry should definitely get acquainted with the universal GRUB bootloader, which in the future will significantly help in working with several OSs installed on one computer at once.
Universal tool for non-universal systems
First of all, let's start with the GNU GRUB name. This acronym for English GRand Unified Bootloader translates as "main unified bootloader." Its creator is the non-profit organization GNU Project, which has become famous in the IT field for its freely distributed software. GRUB itself, by its very nature, presents a menu for selecting the boot OS that a user needs from a whole list of supported systems:
In this case, GRUB can even work with Windows. However, to run such systems, which are not supported directly by this bootloader, there are some special nuances that we will study a little later in all the details and details.
Technology Development Path
The ever-growing popularity of GRUB was a fundamental reason for steadily developing and improving the bootloader in the future. The very first version of the bootloader, called GRUB Legacy, still copes with the tasks of a unified bootloader for UNIX-like systems. Broad support for major companies (like RedHat and Novell) and server distributions provided her with an even longer lifespan in general.
However, even this fact did not affect the further improvement of the bootloader at all, due to which users received the latest version of GRUB 2. Being rewritten from scratch, GRUB 2 hardly has anything in common with the outdated GRUB Legacy, except for the name itself . Today, being the default Ubuntu operating system used since version 9.10, GRUB of the second revision, thanks to its more advanced and powerful structure, completely stopped any further development of Legacy, which had already proved itself so well in the past.
However, from the very beginning, a novice should understand that GRUB 2 is a loader that is more difficult to work compared to the previous version. Therefore, in order to protect users from possible difficulties and problems, all the smallest details will be simply and detailed below, an understanding of which will make it possible to take full advantage of all the innovations of the latest version, and there are quite a few of them:
- Scripting support (loops, conditions, variables and functions).
- The graphical interface adds the possibility of flexible changes in the appearance of the bootloader to the individual taste of the user (GRUB 2 can be easily changed from a black and white table to a stylish multi-colored window).
- Possibility of dynamic loading of modules. This will expand the functionality not at the assembly stage, but directly at runtime.
- Compatibility with different architectures.
- Added support for downloading Mac OS.
- Added stable operation with file systems such as: FAT16 , FAT32 , NTFS , any version of ext , XFS and ISO
- Cross-platform type of installation will make it possible to install GRUB2 from a different architecture
- The introduction of a safe mode in case of problem situations.
- Bugs from the old GRUB Legacy were fixed, which initially could not be fixed due to backward compatibility requirements .
Please note that hereafter, under the name GRUB, for convenience, it will be meant the version of GRUB 2, which we will analyze in full for each inexperienced user.
Has everyone heard of LILO?
Of course, the choice of users among OS loaders is not limited to GRUB alone. A similar analogue is LILO - the Linux boot loader (LInux LOader), which still has not completely lost its relevance. However, in favor of GRUB, one should take into account several distinctive features that a direct competitor so far definitely cannot boast of:
- LILO only supports 16 boot configurations when GRUB has support for an unlimited number of such configs.
- GRUB can boot over a local network, which cannot be said about LILO.
- Finally, LILO does not have the same interactive command interface that users of the latest version of GRUB have long been accustomed to using.
The only common feature of both bootloaders is the need to compile all the changes made to the menu every time. The auto-save feature has long been missing from the Linux bootloader. GRUB 2 also cannot boast of such a convenient feature. But even taking into account this nuance, inconvenient for everyday use, LILO loses to its competitor on several points, due to which it becomes more and more widespread among users' home computers.
Installing GRUB: all the nuances and details of the process
From the very beginning, make sure that you have either Ubuntu installed or its boot disk (LiveCD). Having launched the system, you need to call the terminal by pressing Ctrl + Alt + F2, and then register the following commands in it:
- sudo add-apt-repository ppa: cjwatson / grub,
- sudo add-get update && sudo add-get install grub2,
- sudo update-grub2.
And even if you do not have Ubuntu installed, but there is a LiveCD, then the procedure remains the same with only one tiny difference. After booting from this boot disk, select the "Try Ubuntu" option - this will start the system without any changes on your computer. After that, continue to install the GRUB bootloader in the same way from the terminal call stage.
You can check the installed version of the bootloader with the grub-install -v command, as well as directly during the boot of Ubuntu.
GRUB Launch Algorithm
As GRUB Install completes, the bootloader firstly changes the MBR code to its own. MBR is a sector containing the main boot record (from the English Master Boot Record), containing in itself:
- main bootloader code (446 bytes);
- partition table with a description of both the primary and secondary partitions of the hard disk (64 bytes).
Due to the small size of the MBR sector, the launch of GRUB falls into two conditional stages:
- The MBR contains a link to the configuration file (which can be located on any hard drive, at the discretion of the user). It is through it that the entire boot phase, starting in the second stage, will be determined.
- Their configuration file takes into account all the settings and data necessary for the operation of GRUB. If at the second stage the configuration file was not found, the download process will be stopped and the user will have to manually select the boot configuration from the command line.
Such a loading structure allows GRUB to be more widely configurable and flexible than many other analogs in which this process is simplified to maximum compactness.
Most commonly used console commands
A considerable scope of working capabilities in the console mode of the latest version of GNU GRUB, as well as customization and configuration capabilities, will also impress users. In order to get into it, just press the “C” key while the boot menu is displayed, after which it remains only to correctly enter the commands you need:
| Teams | Description | Console Input Example |
| ls | A universal team for working with lists of hard drives and partitions. It can be used to display the contents of a folder. | ls / boot / grub |
| Its use will give complete information on absolutely any section. This will indicate the type of file system on it, its label, UUID, as well as the date of the latest changes. | ls (hd *, *) *, * - disk number and partition number on it, respectively |
| cat | Display information about the contents of a specific file. | cat / path / filename |
| linux | An analogue of the GRUB kernel command from the good old version of Legacy, which allows you to load the specified Linux kernel. | linux kernel_file option1 = value option2 option3 |
| chainloader | Transferring boot control to another bootloader in a chain. The bootloader will be searched exclusively in the section that is set as root (of course, with a specific executable file). | chainloader / path / file_name |
| root | When using the command without any parameters, the user will receive information about the root partition, as well as the type of file system on it. | root |
| Less commonly (due to the likelihood of incorrect operation) it is used to transfer root to another partition. | root (hd *, *) *, * - disk number and partition number on it, respectively |
| set | Most often, due to its stability and performance, it is used to reassign the root partition on the disk. | set root = (hd *, *) *, * - disk number and partition number on it, respectively |
| search | The command to search for a UUID section, label, or a specific file. The following keys are used to set search parameters: - u (or --fs-uuid) - search for a partition by UUID;
- l (or --label) - search by section label;
- f (or --file) - search for a specific file;
- n (or --no-floppy) - pass when checking the floppy drive;
- s (or --set) - set the found section as the value of the given variable.
The command is useful if the numbering of disks and partitions "flies", because of which the set root command will either lead to nowhere or to the wrong partition of the wrong drive. | search -u uuid_necessary_partition search -l section label search -f / path / file name |
| lsfonts | Displays a list of currently downloaded fonts. | lsfonts |
| help | Used to display the entire list of available console commands. | help |
| Or to output commands starting with a certain combination of characters. | help s - displays help for all commands starting with s. help set - displays help for the set command. |
| terminal_output.console | Switch to black and white color gamut display. | terminal_output.console |
| background_image | Change the background image in real time. It only helps in choosing this type of font design so that they are distinguishable against a given background. Please note: the command does not change the design settings - the image remains in the background only in the current session until the next shutdown. | background_image / path / filename |
| boot | Download computer. | boot |
| reboot | To restart a computer. | reboot |
halt | Turn off computer. | halt |
Post-installation GRUB: setup and useful software
The main configuration file in GRUB2, unlike the previous version of Legacy, is not /boot/grub/menu.lst , but already /boot/grub/grub.cfg. However, editing it directly is pointless - it will be generated with each saved change in the settings file / etc / default / grub and in the script directory /etc/grub.d.
In / etc / default / grub, the configuration is mainly limited by changing the default boot item and / or menu display time:
- The parameter GRUB_DEFAULT is responsible for the first item of changes, the value of which indicates the item number in the boot menu. When choosing any other item, the user should know its order from the general list (for this you need to look at the contents of /boot/grub/grub.cfg and find the necessary record in the account). At the same time, do not forget the numbering rules: the first item is assigned the value 0, the second - 1, the third - 2, and so on.
- The GRUB_TIMEOUT parameter is responsible for the delay in displaying the boot menu, whose assigned value in quotation marks indicates the number of seconds during which this splash screen appears. There is one tricky feature in editing this parameter: setting it to “-1”, the splash screen will hang exactly until the user selects an item.
A set of scripts in /etc/grub.d finds all installed systems and kernels on the computer, forming a boot menu in grub.cfg. For the search for cores and other OSs, two main ones are respectively responsible: 10_linux and 30_os-prober. The 40_custom file allows you to change GRUB by adding your own boot points, which is useful for working with special types of system startup (note that with any changes it should end with an empty line, otherwise the last boot point of all the proposed ones will not be displayed corny).
However, an even easier way to edit GRUB on an Ubuntu system is through the Grub-Customizer utility. Due to its simplicity and intuitive interface, this is the best option for configuring the bootloader, most suitable for inexperienced beginners. To install, run the terminal (Ctrl + Alt + T), then alternately enter the following commands in it:
- sudo add-apt-repository ppa: danielrichter2007 / grub-customizer,
- sudo add-get update,
- sudo add-get install grub-customizer.
And although the translation of the Grub-Customizer program leaves much to be desired, it is very easy to understand it:
- List configuration - menu settings at system startup. Here a change in the order of its points is carried out.
- The main settings are the choice of the system loaded by default, as well as the determination of the timeout.
- Appearance - editing the external design of the boot menu.
In addition to the whole variety of settings, the user should definitely pay attention to the well-proven software for working with GRUB, the configuration and diagnostics of which will become much more comfortable:
- Super Grub Disk is a simple and convenient tool for quick bootloader recovery. At the same time, he knows how to work not only with GRUB and LILO, but even with Windows itself. Runs from a CD, flash drive or floppy disk.
- GParted is a disk partition editor that runs directly from a CD. With its help it is possible to carry out such operations with partitions and file systems on them as: create, delete, resize, check, move and copy.
- SystemRescueCD is a Linux distribution specifically designed for disaster recovery.
- TestDisk is a utility that allows you to diagnose and restore both individual partitions and entire boot disks.
How does the bootloader work with Windows?
Unfortunately, GRUB cannot directly boot Windows x86 in any way (the 64-bit version is no exception), which makes it necessary to create the corresponding chain-triggering mechanism. To do this, add several lines of certain commands in the grub.cfg configuration file:
- title Windows
- rootnoverify (hd *, *),
- makeactive,
- chainloader +1,
- boot.
An example and a detailed description of the latter was just given in the table of console commands. Now the same practical case has come when it will come in handy in work. However, before it there are a couple more lines equally important for loading Windows:
- rootnoverify (hd *, *) is the same analogue of set root . It informs GRUB about the location of the partition on which the next part of the boot code is located, but does not mount it (for the clear reason that this is not possible for GRUB). Please note again that the (hd *, *) part is the disk number and partition number, respectively, on which Windows is installed.
- makeactive - the command gives the specified root partition boot status.
Now the same chainloader +1 command , which transfers all further boot control directly to the Windows boot loader.
Finally, the final boot command implements the start of the boot, after which you can safely work in the selected operating system.
It also happens that not one, but two or more versions of Windows are installed on the hard drive. And then to carry out a stable launch without additional commands to hide / show ( hide / unhide ) sections is simply unrealistic. The bottom line is that if the GRUB configuration file contains a hiding section of a drive, then Windows will not be able to read it. And if the section is visible, then it will be possible to boot from it accordingly.
If you have several operating systems, first determine which instance you want to download, then check its exact location - you need to know which partition of the hard drive it is installed on. For example, there are two different versions of Windows located respectively on the first and second partitions of one drive, and the user needs to download the second one. To do this, make the following changes in the menu.lst file:
- title Windows
- hide (hd0,0),
- unhide (hd0,1),
- rootnoverify (hd0,1),
- makeactive,
- chainloader +1,
- boot.
In comparison with the previous code sample, the hide and unhide commands were added, thanks to which the user will be able to load the necessary operating system from the specified partition on the hard disk.
Reinstall GRUB in case of critical issues
Even in the event of technical problems, restoring GRUB is an easy task. To get started, download the installation LiveCD, open the terminal by pressing CTRL + ALT + T.
After this, we enter the commands one by one:
- sudo grub-install / dev / sda - install GRUB directly in the MBR (sda - boot disk);
- sudo update-grub - search for other boot entries on the hard drive (for example, Windows).
Now all that remains is to restart the computer and verify that the reinstalled bootloader is fully operational.
Question about reload loop protection
The need for such a protection system integrated into the GRUB loader appears when the sizes of the logs located in the / var / log directory, due to uncontrolled recording of information in them, grow to unacceptable volumes. A normally working system provides special services that archive and clean these logs in automatic mode. Thus, in most cases, the user absolutely does not need to spend time controlling their volume.
However, these same services are launched only after loading the operating system. Prior to this, the size of the log files is absolutely not monitored by anything, because of which, in the event of an unforeseen system crash and further reboots, the logs will only grow in volume. And this uncontrolled growth will continue as long as the reboots last due to a failure in the system. Subsequently, all this can lead to the full filling of the partition on which the / var / log directory is located, which is fraught with the system freezing tightly and the inability to start even the recovery mode.
It is from this catastrophic situation that the GRUB integrated system of protection against cyclic reboots saves, displaying the GRUB hung menu that expects explicit user intervention. The protection itself is guided by the value of the recordfail variable prescribed in the script /boot/grub/grub.cfg. During each boot, it is set as recordfail = 1 , and at the final boot stage it is reset to recordfail = 0 . And if just such a reset did not happen, then automatic loading is completely prevented and the very GRUB protection is activated.
To do this, find the variable GRUB_RECORDFAIL_TIMEOUT in / etc / defaul / grub and assign it the value for the number of seconds during which the GRUB menu will wait for user intervention if there is no reset recordfail from 1 to 0. Then we save the changes with the sudo update-grub command, thereby disabling protection against a looped reboot.
Who can benefit from this? Only for stations and servers that do not have a keyboard for input-output information. Without it, in case of such problems, booting the system is generally impossible. Cases of looping downloads are not so common and arise mainly due to power problems or software problems.
Uninstalling GRUB and returning to Windows: fast, easy, and painless
If the question “How to remove GRUB and leave the bootloader of another operating system?” Arises, then first of all the user will need its installation disk / flash drive. Let’s take a look at a specific simple example: a user removes Linux from his computer, leaving Windows as a result, but cannot load it due to a Grub error . To fully resolve the problem, you must restore the Windows x86 / 64 bit bootloader:
- We boot from the installation drive, after setting it to the first priority when loading into the BIOS
- After booting from the installation media, select the system recovery section.
- From the list of tools that appears, select the command line, in which we write down the following commands in turn:
- BOOTREC.EXE / FixBoot.
- BOOTREC.EXE / FixMbr.
Since GRUB can be removed within a few steps, after all successfully completed operations we restart the computer and work without any problems in the Windows system.