Every girl wants to be beautiful and attractive. And, judging by the many reviews of men, the most attractive thing in a woman is ... her hair. It has long been no secret that the stronger sex adores girls' long hair. But we all know that having a luxurious head of hair is actually not so simple. In this article we will not talk about the scrupulous care of hair, their constant healing and all the rest ...
Let's talk about what hairstyles you can create with your own hands. Walking day after day with long flowing hair is quite difficult, and I constantly want at least some kind of variety. The article is devoted to the topic of do-it-yourself hairstyles at home. Believe me, if you learn to do such hairstyles yourself, then your life will become a thousand times more magical. Not only will you learn to make beautiful hairstyles with your own hands, all your friends and even hairdressers will envy you.
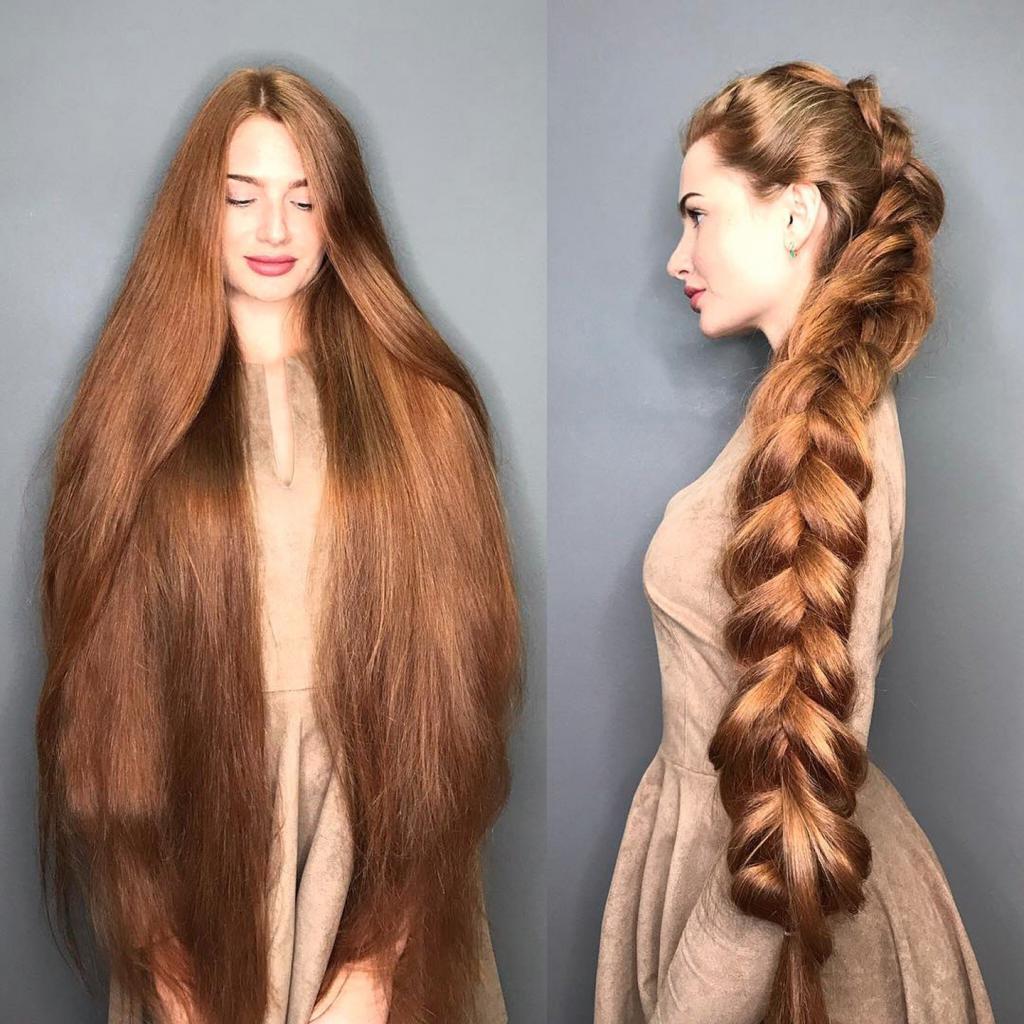
Evening hairstyle called "Wedding"
We will analyze the technique of weaving this hairstyle with our own hands step by step. First of all, by itself, comb your hair well. From the temporal zones of the head on its right and left sides, we take along strands of medium volume, connecting them in a ponytail in the middle behind the head. "Wrap" the resulting tail into the inside of a kind of "pocket" of strands. Take a new strand of loose hair and also "wrap" it inside the same pocket. Take the adjacent lock and do the same trick with it. Now a little “pull” the hair from the pocket, giving the hairstyle volume. Thus, wrap all the strands in a pocket on one side of the head and on the other, pulling out a little and, thereby, making the strands more voluminous.
Try to make one side of the hairstyle as symmetrical as possible to its other "reflective" side. Now, just like at the beginning, we take the side strands and connect them into a ponytail, “wrapping” this ponytail inward. As you might have guessed, now we will do exactly the same thing as at first, namely, “wrap” each lock in the resulting pocket. When all the hair has already been woven into the hairstyle and only a small ponytail remains, then make a hole at the beginning of this ponytail (the length that will be located above the elastic) and "wrap" the ponytail into this hole, thus hiding it, still add volume by pulling and fluffing the locks a little. That's all, our evening hairstyle is ready!
Casual hairstyle with elastic
This is not to say that there is any mistake in the name, but still it can be used not only as an option for everyday hairstyles, but also as an evening one. She became “everyday” due to the fact that she belongs to the number of simple hairstyles with her own hands. So, we start weaving.
Select a small part of the hair on the left near the temporal zone and exactly the same part on the temporal zone on the right. Connect them behind the head and secure with an elastic band. Get a little tail. Take another strand on the left, just below the previous one. And exactly the same part of the hair on the right. Connect together behind the head, making a tail, and tie an elastic band. Raise the lower tail over the upper and put it into it, in such a peculiar "pocket". Holding the lower ponytail, we stretch the locks of braided hair left and right, giving the weave volume, as we did in the previous version of the weave. We select a small part of the hair on the left and on the right another tier below the previous strands. Again, connect them in the tail, securing with a small rubber band, as they did before. After that, create another one on a tier below to hide one of them in the "pocket" of the other, as we did before. Repeating the previous steps, we give volume to our weaving, by pulling a lock from the hairstyle. Now we repeat all the same actions until all the hair is woven into the hairstyle. When all the hair is in the hairstyle and only one ponytail remains, we tie it with an elastic band and, bending under the hairstyle, we pin it with invisibility.
Hairstyle in five minutes

After several trainings, believe me, the creation of this hairstyle will not take you even five minutes. Due to the ease of its implementation, it can be attributed to the discharge of hairstyles for girls with their own hands. It is reliable and will not interfere with the child during his active life. If you have a daughter with long braids, then this hairstyle can become one of her favorite. So, let's start creating. To start, comb the hair. After that, take the “diagonal” strands on the left side of the head and twist the hair in the inside (to the head) with a spiral. We fix the strand with invisibility. Now we take the strands on the right side of the head and do the same thing, twisting the hair with a spiral in the inner side of the hairstyle. We fix the lock with invisibility. After that, we tie them in one tail, after removing all the invisibility. We make a hole above the rubber band and twist our tail there, on the inside. Tighten it, making it stiffer, and twist the remaining hair into a spiral, making a bump, fixing it with invisibility.
"Sailor Moon"
Not everyone will understand, not everyone will remember this wonderful cartoon. Remember that interesting hairstyle of the main character? Now we will try to portray something like this. So, let's do another beautiful hairstyle with our own hands! Comb and do a straight parting. Gather hair in two tails on each side of the head. Now take two bagels for hair. Poke one tail into the bagel, fixing it to the invisible at the base. We do the same on the other hand. Now evenly distribute the strands from the tail over the whole bagel. Put a rubber band on top of the bagel. Then the hair from the ponytail will snuggle tightly against the bagel. Now we twist the remaining strands into a flagellum and distribute around the resulting bundle-donut, fix the hair with invisible hair.
Two french braids with silicone rubber bands
Comb the hair and make a straight parting, dividing them into two equal parts. Fasten one of these parts with an elastic band so that the hair does not tangled with each other and does not interfere with you. Separate the first lock near the parting from the forehead and fix with a rubber band, making a ponytail. Now parallel to the first tail, separate the next strand. Fix the hair again, creating a ponytail. Separate the next strand in the same way. Behind her is another, and so on until you tie all your hair in ponytails to the very bottom. On the other side of the head we make exactly the same ponytails so that they are parallel to each other. Both sides should have the same number of beams. Now we divide the first tail into two equal parts, take the next one right behind it, and throw it forward between these two strands.
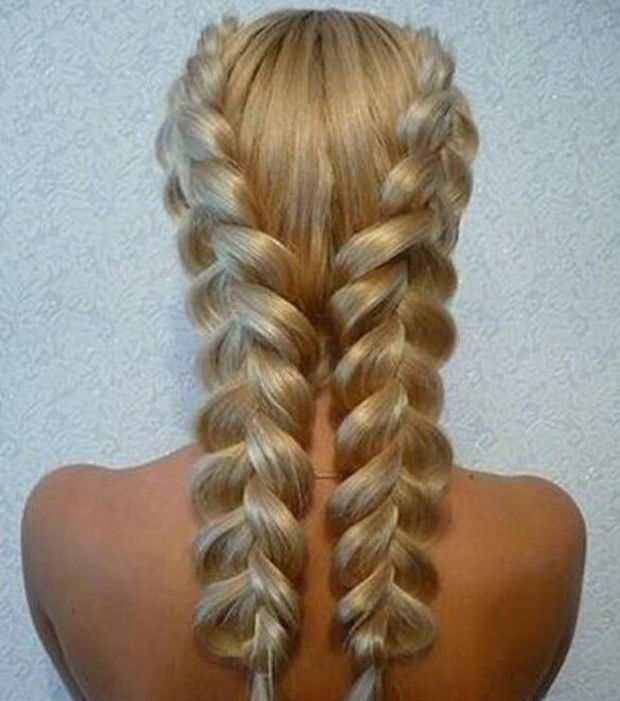
Add the next ponytail to the two strands and tie them with silicone rubber. We hold the resulting tail by the base, slightly extend the strands to the sides, giving volume to our future braid. Now we take the "second" tail in this row. We divide it into two parts and throw the third among these two parts. To the two strands of the second, add the fourth tail and fix with rubber bands at the base. Pull the locks again to create volume. We do the same with all the ponytails. Same thing on the other side of the head. In the end, you should get two ponytails on each side. We weave an ordinary pigtail out of each, and then again we stretch the strands.
Fish tail
Fish tail, or "spikelet" - this is a classic weaving. First, we still comb our hair. Then we take the extreme lock on the right side of the head and the extreme on the left side of the head. The strands should be small. The right one is moved to the "middle" behind the head, and on top of it we put the left lock. After that, again take a new strand on the right side, and then again on the left. We continue to weave in this spirit until all hair is braided in a fish tail. You can make a fishtail and short hair. Do-it-yourself hairstyle is ready.
Materials for convenience in braiding
As you have already noticed, with each weaving technique, we may need various auxiliary materials that will greatly facilitate the process of creating hairstyles. These include: gum (small, medium and large sizes), tweezers for fixing hair, invisibility, bagels, silicone gum. At first, this will be enough. You can use hairpins or some other hair ornaments, means for fixing and giving hair shine.
Some tips
- Never try to make a new hairstyle immediately before you are going to go to some important event. Better rehearse the process of creating hairstyles several times.
- Fixing agents should be used in moderation! Remember that "too much and good is also not good."
Stock up on patience and time.
It’s hard to learn from scratch to create even the simplest hairstyles. So do not despair if you do not succeed. Try again and again. Only in this way you will learn how to make beautiful hairstyles with your own hands at home.
Good luck in weaving and health to your hair!