Now SSDs, or SSDs, are actively taking over the market and are replacing the good old HDDs. They are gradually falling in price, and their volume is constantly increasing. But not so simple. These drives have their drawbacks. The fact is that the service life of memory cells is limited, and the number of overwrites greatly affects it. That is why the correct configuration of the SSD-drive under Windows 7 directly affects the life of this device. Let's analyze all this in more detail.
Solid State Drive Life
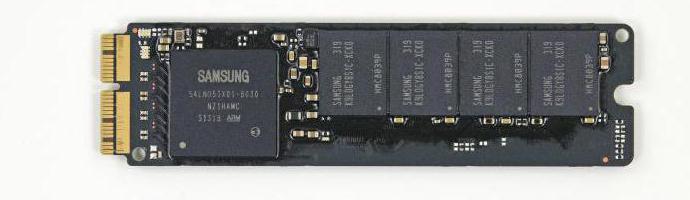
This disk is a regular flash memory, i.e., microcircuit. There are no mechanical moving parts. This flash memory consists of cells, and they tend to wear out. The more information you write to disk, the more they wear out. Therefore, setting up an SSD drive for the Windows 7 operating system is very important. If you are reading from a disk, then this does not affect its wear.
There are various utilities with which you can get information about the operation and status of the drive. One of them is CrystalDiskInfo. With it, you can learn many characteristics and performance indicators of the disk. For example, firmware, serial number, total hours of operation, number of starts, rotation speed (if we are talking about HDD), etc. We will be interested in a field showing the number of host records. The disk controller counts the total number of data recorded in memory for the entire time it is running. This is due to the peculiarity of the work of flash memory. Therefore, the figure indicated here in gigabytes will exceed the size of your disk.
Configuring SSD under Windows 7
Modern flash memory (MLC) is designed for a sufficiently large number of rewriting cycles, for example 1000, 2000, etc. This means that you can completely rewrite a disk, for example, a thousand times. If you have 128 GB, then you multiply this value by a thousand and get the final result - the total amount of data that you can write to the drive for the entire duration of its service. This indicator also appears in the column "Total host records." It indicates the amount of data written to the disk since its inception. For comparison, I must say that 128 GB SSD-drives are designed to record 40-70 TB of information. With very active use of the disk, about 10 TB of information averages on average over the year. Thus, its service life will be about 4–7 years.
With moderate use of the SSD-drive, the amount of data written to the disk will be two, or even three times less, and its service life, respectively, longer. That is why they are recommended for installing the operating system. But first you need to achieve the correct SSD settings. Installing and configuring SSDs under Windows 7 will not take much time. But that is not all. In order to achieve the best results, another process is performed. This is a Windows 7 setup for optimal performance with your SSD.
How is the system setup
Above, we learned how flash memory works and what resource it has. Now we’ll look at how to configure and optimize Windows 7 for the correct operation of the SSD-drive. Its implementation does not require deep knowledge in computer science or deep knowledge of the system. It is affordable even for a novice user. You will need to complete eight steps, after which Windows will optimize for using the SSD. Myths and reality are closely related to each other, and someone can get a little confused. We will step by step tell you where to click and which commands to ask.
Disabling System Restore
We need to disable system recovery. You need to open the "Control Panel", then - "System and Security", then - "System". Then you need to open the "Advanced system settings." In the tab "System Protection" click on "Configure". There are several points: "Enable protection" and "Disable protection." We can also configure the number of gigabytes that we give under the protection of the system.
This refers to the automatic creation of a copy of the system, the so-called recovery point, and how much disk space is allocated for this. By default, 2.5 GB to 10 GB is used. Accordingly, if we disable system recovery, then the specified number of gigabytes will be freed on the disk. This setting makes sense to increase the free space of the SSD-drive and at the same time reduces the amount of data written to the SSD. However, system protection is a very useful feature, and whether or not to disable it is up to you. If your SSD is large enough, you can leave it as it is. If not, or you do not use protection, you can disable it.
Turn off data indexing
This item has more practical value, which directly affects the speed of your SSD-drive and its durability. In the tab "My Computer" we find "System Disk" and go to "Properties".
Below, by default, the option to enable indexing files on disk is enabled. This feature was designed to optimize the performance of HDDs. This was due to the specifics of their magnetic plates and heads. For SSD-drives, this is not necessary, so uncheck this function. This will eliminate unnecessary write operations to the SSD. If an error occurs, it will be associated with the page file. It will be necessary to disconnect it, reboot the system and repeat the disconnection of the above option again.
Turn off the page file
By default, Windows creates a special file on the system drive - this is a swap file. It is used to write some information from RAM to the area on the system disk. This is used in costly applications such as Photoshop. Part of the information is downloaded from RAM to the hard drive, and when necessary, it is downloaded back. If you have enough RAM (8 GB or more), then this swap file can safely be turned off. This will reduce the number of writes to the system disk. If the RAM is small, and the applications you use are quite powerful, then disabling this file may cause instability of the system. Here you need to look individually.
To disable the file, go along the following path: "Control Panel", then "System and Security", then "System", then "Advanced Settings", then "Advanced", then "System Speed", "Settings", then "Advanced" , "Change." By default, it is turned on, you need to uncheck, and then click "No swap file."
Hibernation off
Hibernation is a special sleep mode, complemented by a new feature. It was developed for Windows Vista. In this mode, the data from the RAM are overwritten in the system partition, and we can turn off the computer from the network. After switching on, all information is restored, automatically read from the system media in RAM. Thus, all open programs are again on the desktop. In normal sleep mode, data will not be restored. If you do not use hibernation, you can turn it off. Thus, you will reduce the number of records on the SSD-media and free up additional space.
We go to the command line: the "Start" menu, enter "cmd" in the search, run it as administrator. Enter the following phrase there: "powercfg-hoff", and then press Enter. After that we reboot the computer. If in the future you want to return everything back, then on the command line you will need to enter "powercfg-hon", and then restart the computer.
Disabling Prefetch (Files in RAM)
This function loads some data into RAM if you access it frequently. The operating system itself monitors these files and foresees this possibility. For example, you often use the Word text editor. Some files are already loaded into RAM, and this program starts faster.
For an SSD-drive, you will not get any tangible increase in speed, because it works faster than an ordinary HDD, so you can turn off this function. Most often, the operating system itself disables this feature when installing Windows on an SSD drive.
How to check if this option is enabled and how to disable it? This is done using the registry. You must open the registry editor. We go: the "Start" menu, enter "Run" in the search bar and open the "Run" window in the results. Enter the word regedit there and click OK. The registry editor window opens. Here we go to the HKEY_LOCAL_MACHINE directory, then to the SYSTEM tab, then CurrentControlSet, then Control, then SessionManager, MemoryManagement and PrefetchParameters. Click EnablePrefetcher, select "Change" and set 0 instead of 3. Click OK, reboot, and the function will be turned off.
Turning off SuperFetch (turned off by default) and Windows Search
This function can be turned off more easily, without a registry. We go: "Control Panel", then "System and Security", then "Administration", then "Services" and look for Superfetch in them. Click with the mouse and select "Properties". Then click "Launch Type" and then "Disabled". Next, click "Apply", OK. After the reboot, the changes take effect.
If desired, you can turn off the Windows Search service. It helps to search for files on a computer. Accordingly, its disconnection will be at your discretion. If you still decide to do this, then in the above "Services" you need to find Windows Search, then "Properties", then "Startup Type", then "Disabled", OK. In principle, this is not necessary.
Turn off Windows Cache Clearing
This step will not positively affect performance for all drives. For example, on SSDs from Intel, the company itself does not recommend disabling this option.
We select: "My computer", "System disk", "Properties", "Hardware", the desired SSD, "Properties", "General", "Change settings", "Policy". Check the box "Disable clearing cache buffer ...". If after these actions the performance of your disk has fallen, it is recommended to remove this checkmark.
Disabling ClearPageFileAtShutdown and LargeSystemCache (disabled by default)
The ClearPageFileAtShutdown option allows you to clear the page file when the computer boots, and the LargeSystemCache option is the size of the file system cache memory. By default, when installing the operating system on an SSD, these options should be turned off. Windows 7 itself disables them. In order to verify this, you must go to the system registry.
We also go to the registry editor (how to do this, see above). In the branch, go to the following folder: "HKEY_LOCAL_MACHINE / SYSTEM / CurrentControlSet / Control / SessionManager / MemoryManagement". In the right field we find the file LargeSystemCache. Click on "Change." If the field is 0, then it is off. Here we find and also check the ClearPageFileAtShutdown file. If the field is 3, then you need to change it to 0, then click OK and restart the computer. How to configure an SSD for Windows, you will learn further.
conclusions
That's basically it. The basic settings were affected here. It is precisely necessary to disable the ClearPageFileAtShutdown and LargeSystemCache, SuperFetch and Prefetch option, indexing data. If desired, if RAM allows, you can turn off the page file. System Restore and Windows Search are also disabled as desired. To clear the cache, you need to look at the performance of your drive.
Configure SSD for Windows 7
Now let's talk about how to configure the SSD-drive so that it optimally uses the resource embedded in it. What steps and points need to be observed in order for the disk to work as quickly as possible and its memory cells to remain operational for a sufficient amount of time? Configuring SSDs under Windows 7 does not require much time and is quite simple.
There are two modes of operation of the SATA controller. The first is the IDE, and it is usually enabled by default in the BIOS. The second mode is AHCI. It is he who will allow us to use NCQ and TRIM technologies, which will increase the speed of random writing and reading from an SSD drive. The TRIM command is sent by the system and allows disk cells to free themselves from physically deleted data, thereby increasing its performance.
Enabling AHCI Controller Mode
If you have not installed Windows, then you can change the mode from IDE to AHCI in the BIOS without any problems. After that, the installation and configuration of Windows 7 on the SSD-drive takes place, and everything works. If you have already installed the system, then the procedure will be described below.
We need to go into the registry editor, finding the file regedit.exe. How to do this, understood above. In the registry editor you need to open a branch as follows. Setting up SSDs under Windows 7 takes place in the directory HKEY_LOCAL_MACHINE \ SYSTEM \ CurrentControlSet \ services \ msahci. Here we need to find the ErrorControl parameter. Click and select "Change." The default value will be 3. You must replace it with 0, then OK. A little lower we find the Start parameter. Also change the value from 3 to 0 and click OK. Next, restart the computer and go into the BIOS. Now we change the controller mode from SATA to AHCI, save the BIOS and load the operating system.
Now we need to check if there have been changes in the system. To do this, go to "My Computer", then "Properties", then "Device Manager" and find the IDEATA item here. It must be opened, and if you have the line "Standard PCIIDE controller", then nothing has changed. If you have AHCI in this place, then everything is fine, the SSD setup under Windows 7 was successful. These actions can be carried out before the beginning of changes in the registry and BIOS. You may already have AHCI mode enabled.
Now we have the TRIM team working, which will allow the disk to function faster when data is littering, and NCQ technology is available, which allows to increase the speed of random reading and writing of information.
Thus, the optimization of SSD operation under Windows 7 was successfully completed. The tips given above should also help you in setting up the system for SSD. All this will make your computer work as efficient as possible.