The market today presents a variety of materials for the decoration of the ceiling. Someone prefers the traditional solution - painting with water-based paint, someone glues wallpaper, someone constructs drywall constructions. However, one of the options that are gaining popularity today is considered to be the ceiling panels. Polyfoam is often used in decoration. Plates made from it have many advantages. When choosing materials for the decoration of the ceiling, consumers primarily pay attention to the appearance of the coating. An important criterion is the cost. Ceiling panels, the price of which starts from 30-40 rubles / pc., Perfectly combine high quality and affordability. Next, we consider in more detail what constitutes a coating. The article will also explain how to lay ceiling panels. Photos of some finished works will also be presented later.
Performance characteristics
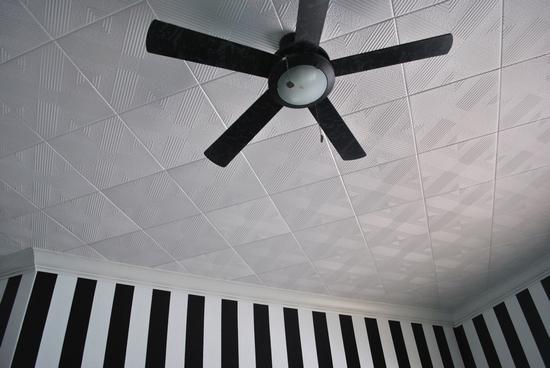
Styrofoam ceiling panels have a high level of sound and heat insulation. The coating is resistant to various external influences. It is attractive in appearance, in harmony with almost any interior. Thanks to modern production technologies, foam ceiling panels can have a surface imitating wood, stone, etc. It is also important that the installation of the coating is not particularly difficult even for those who have little experience in finishing.
Learn more about the benefits.
Advantages of the material can be evaluated not only by buyers, but also by specialists involved in the professional installation of coatings. As it was said, the plates have high heat and sound insulation properties. This, in turn, greatly enhances overall indoor comfort. The ceiling foam tile is not afraid of moisture. Due to this, the coating is used in bathrooms, showers and bathrooms, in kitchens and in other rooms with high humidity. Due to the low weight of the panel, it can be mounted on almost any ceiling. This is especially true for those rooms in which the floors are not designed for heavy loads. Among other things, foam panels are easy to process - they are simply cut and adjusted to the required parameters. The range of options for coloring, drawing allows you to choose a coating for any interior. Consumers can choose both smooth elements that create the effect of a seamless ceiling, and slabs with ornaments in accordance with the style of the room.
Disadvantages of coverage
The disadvantages of the material can hardly be called critical, but it is necessary to mention them. Despite their resistance to ignition, plates are subject to deformation and melting under the influence of high temperatures. In this regard, it is not recommended to use them in close proximity to bright lamps or chimneys. Also, the products of a number of manufacturers are unstable to direct sunlight. Under the influence of ultraviolet light, the surface may either turn yellow, or the material will become brittle, having lost strength.
Production Features
Styrofoam ceiling panels are made in the following ways:
- Pressing - sealing plates in a special industrial press. Such panels have a thickness of about 7-8 mm.
- Injection - casting molten raw materials into a special mold with further hardening under the influence of high temperatures. These plates have a larger (up to 14 mm) thickness.
- By extrusion. This technology is usually used for polystyrene foam boards. But in the market you can also find ceiling panels made of extruded polystyrene. Such a coating can be covered with a decorative film.
It should be noted that high-quality foam polystyrene panels do not ignite and do not support combustion. Typically, fire safety information for the coating is indicated on the packaging.
Dimensions
What are the ceiling panels? The sizes of the plates, as well as their shape, are different. The most popular are square elements. Their dimensions are 50 x 50 cm. Rectangular elements are considered less common. They are usually used in the decoration of ceilings in office buildings.
Preparation for installation
Fixing the ceiling panels (photo of finished surfaces can be found in the article) is relatively simple. However, before starting work, you should prepare the base and make markup. You can, of course, stick the plates and so, but the coating will not last as well and for a long time as if you do everything according to the rules. First of all, it is necessary to remove the previous finish: paint, wallpaper, tile, whitewash and more. If there are large defects on the base - cracks, bumps, etc., they must be eliminated. For this, putty is used. Small protrusions and sinks can be left untouched - the tile will hide them. Before gluing, you need to unpack the panels in about two hours, so that they accept the humidity and temperature of the room. In the future, this will avoid deformation of the coating. Priming the ceiling is not necessary in this case, but it is desirable, as this will increase the adhesion of the adhesive and the base.
Markup
It will guarantee an even arrangement of panels over a large area. Opposite angles need to be connected with diagonals. From the midpoints of the opposite walls, you need to lay lines that intersect in the center of the ceiling. If the intersection points do not match, then the diagonals need to be shifted. At the same time, you should try to minimize the planned layout of the elements. If the chandelier is not installed at the intersection of the center lines, it is more advisable to move the center of the marking to the place of attachment. So the layout of the tile will visually look more symmetrical. After the marking is ready, you can proceed directly to gluing.
Mounting
Sticking should start from the center of the ceiling or from where the chandelier is attached. Work is carried out in a certain sequence. First, glue is applied to the overlap, and then to the protrusions on the back of the tile. Some formulations need to withstand previously (this is usually indicated on the packaging). In this case, glue is applied to several tiles and to a large area of the ceiling. Only then can the elements be glued. The inner corner of one of the tiles needs to be cut. This element will be mounted where the chandelier is installed. Tiles are applied to the ceiling and lightly pressed. After the central square is closed, the fixation of the tiles continues along one of the marking lines to the wall. Having fixed one row, proceed to parallel. The resulting seams are filled with white sealant.
Finally
As you can see, the work is quite simple. Having spent a minimum of effort and time, you can get a very attractive surface of the ceiling. Ceiling panels look great in the interior, refresh the room, give it a finished look. Surface care is quite simple. Periodically, it should be wiped with a damp cloth. The service life of such a ceiling, according to manufacturers, is at least 5-7 years, and with proper care, more. Despite the shortcomings, many consumers choose this particular coating. The main arguments in this case are the cost and ease of installation.