Rack ceilings in the Russian market appeared relatively recently, but nevertheless quickly gained popularity. Their availability, a variety of choices in color and shape, as well as ease of assembly allow the installation of rack ceilings not only for professionals, but also for amateurs. They got their name due to the shape in the form of slats of various sizes.
Advantages and disadvantages
Perhaps the indisputable and most important advantage of any slat ceilings is their wide application in the interior decoration of almost any room. The following advantages can also be highlighted:
- Resistance to various temperature conditions.
- Excellent moisture resistance, which allows the use of this system in rooms with high humidity, such as a kitchen, bathroom or swimming pools.
- Increased fire resistance. By production non-combustible materials are used.
- Resistant to mold and mildew.
- Easy to care. It is enough to wipe them with a damp cloth without the use of detergents.
- Lightweight design, which will avoid additional amplifications.
- Speed. The installation technology of the rack ceiling is not complicated, so the work is done in a short time.
- Long term of operation. The warranty period with proper installation is 15-20 years.
The disadvantages of these ceilings include the following:
- When installing, the height of the room decreases. But this can also be a plus, since in the gap between the slats and the ceiling, various communications can be hidden.
- The impossibility of a detailed replacement, that is, if one of the racks is damaged, partial dismantling will be necessary to replace it.
Types of Slatted Ceilings
According to the type of material, rack ceilings are of two types:
- Plastic - slats made of PVC. They are distinguished by low weight, low price, but also low strength.
- Metal - planks are made of galvanized, chrome steel or aluminum. They have the best aesthetic characteristics and environmental friendliness. A conditional disadvantage is the increased price and the formation of rust in case of damage to the top layer of the rail.
There are three types of joints:
- Open - during installation between the rails there is a gap of up to 15 millimeters (depending on the ceiling model), into which a decorative strip is subsequently inserted.
- Closed - rack panels are inserted into each other with the help of a tongue (similar to the connection of a wooden lining).
- Slitless - the panels are mounted close to each other without any inserts.
The appearance of the rails is also different:
- Solid or solid panel. It is a rail without any holes.
- Perforated panels. They are made by perforation and have equidistant holes on the surface of the rail.
They are mainly used in rooms where additional ventilation is required. Knowing what types of panels are there will help you better understand how to assemble a rack ceiling.
Equipment
Depending on the type of rack ceiling, the kit may vary slightly, but the basic details will be similar. Let's consider a complete set in more detail:
- The material depends on the choice. Products can have various sizes, but mainly on sale you can find slats with a length of 300 to 400 cm, a width of 5 to 30 cm and a thickness of 0.4 to 0.7 mm.
- Decorative inserts (for open type ceilings) that are inserted between the rails.
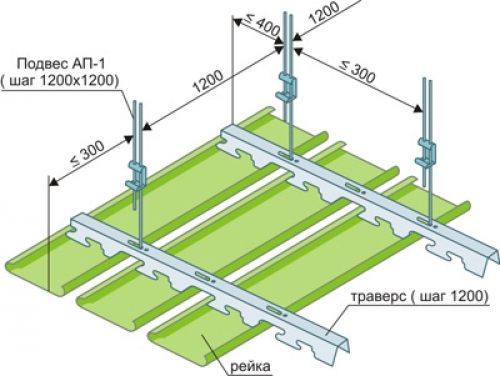
- Guide profile (angular or U-shaped). Mounted to the wall around the perimeter of the room. It is more a decorative detail and does not support it.
- Traverse (stringer, comb). The main bearing profile having latches or teeth on which the rails are mounted. It is on it that the main load of the ceiling should be.
- Direct or adjustable (spring) suspensions. Designed for mounting stringers to the ceiling.
- Fastening of a rack ceiling. It can be various dowel nails, anchors or ordinary self-tapping screws if the surfaces are wooden.
Competent calculation
In order that at the most inopportune moment you do not have to run to the store and buy component parts, you need to calculate the amount of material as accurately as possible. Also, the calculation of the rack ceiling will save you from unnecessary purchases, and this, in turn, will save both time and money.
First you need to determine the direction of the rails, that is, figure out how they will be mounted - the length or width of the room. This is important as it will avoid unnecessary expenses. Example: a room measuring 2.5 by 1.9 m. If you put a three-meter rail in length, the remainder will be 0.5 m from each panel (for a four-meter bar, the flow will be more). But if we change the direction in width and get a four-meter rail, we will get two parts from one whole, and the flow rate will be 0.2 m from each panel. And this is more than two times less.
- Reiki, like decorative inserts, are purchased based on the area of the room, with a small margin, which is measured in square meters.
- The guide profile is a decorative part in the installation of a rack ceiling, measured in linear meters. The amount is determined by adding the length of all the walls of the room (perimeter). Also purchased with a small margin.
- The stringer is bought taking into account some features: the first profile should not recede from the wall by more than 30 cm, and the step between them should not exceed 120 cm. For the example above, we need 3 stringers of 250 cm, or 7.5 linear meters . Depending on the length sold, to save residual stringers, you can combine.
- The number of suspensions is calculated taking into account the fact that the step from the wall should not exceed 40 cm, and the step between the suspensions should not be more than 120 cm. In our example, it turns out that 3 suspensions will take one stringer, in total 9 pieces will be needed.
- Dowel nails or other fasteners are purchased individually, depending on the type of wall in the room (brick, drywall, wood). When buying, it should be noted that the fastening of the guide profile is carried out in increments of 30-50 cm, and one dowel-nail will be required for one suspension.
Right choice
The final result in the installation of rack ceilings directly depends on how much quality material has been acquired. If you choose color and texture based on a design project and your personal preferences, then in choosing a really high-quality material follow slightly different principles:
- First of all, it is recommended to check the quality certificate for this product. It must meet all the requirements of GOST.
- Each rail should have a protective film that will reduce the possibility of damage or deformation during transportation and storage.
- Do not chase the low price. Really high-quality goods cannot be cheap.
- It is advisable to buy all components in one place and from one manufacturer, since it is likely that parts from different manufacturers are incompatible.
- If desired, you can buy panels with increased thickness, this will reduce the possibility of deformation and increase the service life.
Verified Manufacturers
When buying material, you can come across not only a variety of colors and textures, but also a variety of prices that differ from each other. Of course, sellers may refer to the fact that imports are always more expensive and so on, but this is not entirely true. Many foreign manufacturers have their representative offices and production in Russia, and it is not at all profitable for them to intentionally inflate the price. As a rule, an unscrupulous manufacturer makes panels with reduced thickness and uses low-quality material for this. Such panels will cost less, but their quality will be desired: their deformation is possible already in the process of delivery or installation. Therefore, choose only trusted manufacturers.
Among foreign companies, it may be noted:
- Ceiling Group USA Corporation is an American manufacturer with a huge assortment of products of any kind of slatted ceilings with a guarantee of up to 10 years.
- Geipel - German quality speaks for itself. Apply additional surface treatment of slats from dampness and moisture.
- Luxalon is a Dutch manufacturer with many representatives in Russia.
Domestic manufacturers also do not stand still, and some of them have recently made products no worse than foreign ones, moreover, they are cheaper. The following can be distinguished:
- "Bard" - uses the latest technology in the manufacture of products that are considered the most durable.
- "Albes" - specializes in the production of various systems of ceilings, including rack.
- "Lyumsvet" - in addition to ceiling production, is engaged in the manufacture of various metal products, as well as lamps and light sources.
Mounting tools
In addition to certain skills and knowledge, for the installation of rack ceilings you will also need a good tool that will greatly facilitate and speed up the work.
This list includes:
- Pencil or felt-tip pen (depending on the surface).
- Roulette and square.
- Marking cord.
- Normal and laser level (preferred).
- A hammer or drill (depending on the material of the walls to which the guide profile will be attached) will also need a screwdriver.
- Scissors or hacksaw for metal (depends on the thickness of the rails)
- Hammer, pliers, paint knife.
- Crowns for drilling holes for fixtures (if ceiling lighting is provided).
- Tile drills (if installed in the bathroom or toilet).
Before you start
One of the advantageous differences in the installation of a rack ceiling with your own hands (as, incidentally, of other systems of suspended ceilings) is that the ceiling itself remains untouched. Before starting the main work, it will be useful to do the following:
- Remove peeling elements from the ceiling.
- Dust the surface with a primer or plain water. If installation is carried out in rooms with high humidity, it is necessary to treat the surfaces to be closed with an antiseptic.
- The flat surface of the wall along its length is the key to the future visual beauty of our ceiling. If the walls have sufficiently noticeable defects (bumps or pits), then they should be aligned in advance (at least partially), since on such a surface the guide profile will also be curved and will look ugly.
- If for various reasons it is not possible to align the walls, do not despair, because at the finish stage you can partially hide the defects by pasting ceiling plinths or baguettes around the perimeter of the room.
- If the lighting will be placed on the panels, then before installing the rack ceiling, a cable should be laid to the selected points of placement of light sources. The same applies to forced draft (recommended), if it comes to the bathroom, and the hood (fan) will be located on the ceiling.
Work order
The installation scheme of a rack ceiling is not particularly difficult, therefore, the procedure will be simple:
- From the very beginning, you need to mark all the walls at the right height.
- Then, a guide profile should be mounted around the entire perimeter of the room.
- After that, the stringer is mounted on the suspensions.
- The slats are cut to the required length and are attached to stringers over the entire ceiling area.
- At the finish stage, fixtures are installed and connected.
Mark the walls
- First you need to determine the depth, that is, find out how much our ceiling lowers relative to the total height of the walls.
- In order to outline the entire perimeter, two marks on adjacent walls in the corner of the room will be enough.
- Using a tape measure, measure the desired height of the future ceiling and draw small lines.
- Set the laser level along the lines made (you can use a tripod or just hold it with your hand) and put marks in all corners of the room.
- Using a marking line, draw lines. At this step, you can not do without the help of a second person. This is done as follows: the cord is pulled along the marks (along the length of the wall), then it is slightly pulled and released. Due to the coloring element that is present on the cord, a straight line is obtained. We do the same with the rest of the walls.
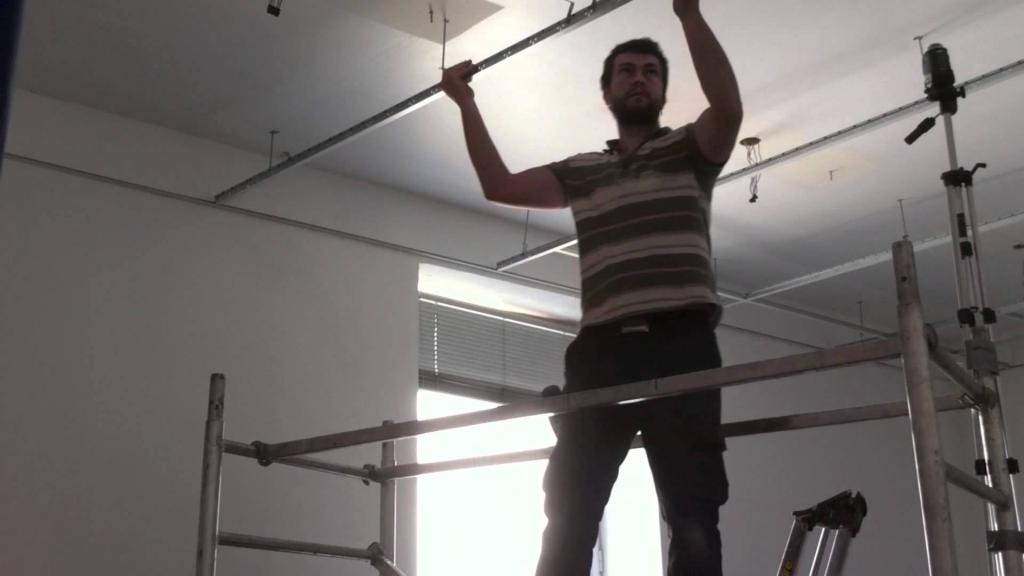
Mounting the frame and stringers
For proper installation of a rack ceiling with your own hands, it is enough to adhere to the following steps:
- First of all, the frame or guide profile is suspended. It is important to mount it as evenly as possible, adhering to the drawn line. The profile is fastened in increments of not more than 50 cm. It is recommended that you first drill holes in the profile and only then attach it to the wall. Although some manufacturers make the initial profile with holes to facilitate installation.
- Installation of stringers also begins with the markup. The first and last are placed at a distance of not more than 30-40 cm from the wall, the next ones - in increments of not more than a meter. Using these marks, we start the line on the ceiling with a laser and mark the locations of the suspensions. The distance is approximately the same as that of stringers: 20-30 cm from the wall, the step is 1-1.2 m. Do not forget that each tire has a beginning or a starting end, from where it should be measured (for trimming).
Stringers need to be suspended so that all the starting ends of all are on one side. You can cut with scissors for metal, and a hacksaw (in the case of a thickened structure). The stringer is cut about 5 mm less than the final length.
- In no case should you allow the stringer to lie on the frame, its suspensions should completely hold its weight. And the initial profile performs only a decorative function, the gap between it and the stringer should be 1-2 mm.
- Suspensions are attached to the ceiling using dowels, nails or screws.
- After all tires are mounted, they need to be leveled on level or on the plane.
Installation of panels and fixtures
Installation of rack ceilings is almost complete, it remains only to mount panels and light sources. To do this, you need:
- Cut the slats of the required length (5 mm less than the distance between the walls) and remove the protective film. If the walls and corners of the room are uneven, it will be useful to measure the distance for each rail. This will avoid incorrect cuts.
- Installation usually begins with the most visible part of the room. This is more an aesthetic moment and does not affect the overall process. Therefore, everything is individual for each room.
- The rail is inserted into the guides and latched onto the stringers or traverses. Everything is quite simple.
- It often happens that the last panel does not fit in width, so it needs to be trimmed. To do this, you need to draw a line on the back of the rail and draw a knife along it with effort. Then you need to make transverse incisions and, bending several times, break off unnecessary pieces. Instead of a knife, you can use scissors for metal.
- The last rail is inserted with the cut part into the corner profile. To simplify the installation of the finish panel, you need to insert it in the penultimate turn. That is, the finish rail is first inserted and only then the penultimate one.
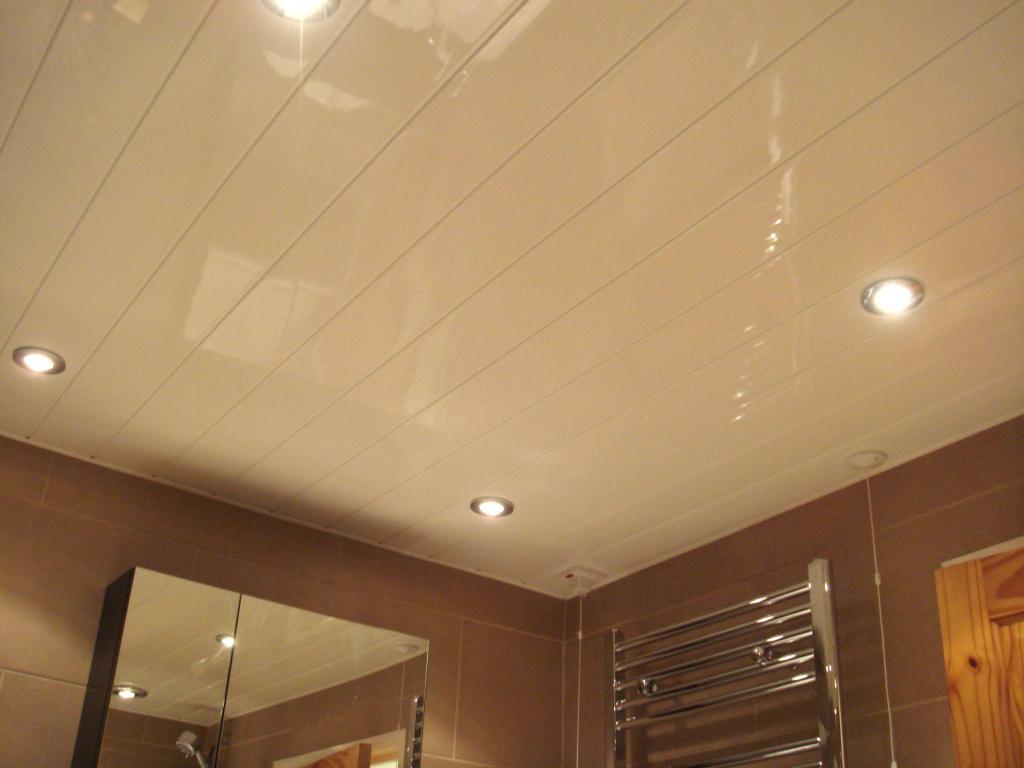
Installation of fixtures is very simple and does not differ from installation on other suspension systems:
- Holes are cut with scissors or crowns in the process of assembling the ceiling in certain early places.
- The diameter is determined by the size of the lamp.
- It will be more convenient to install the lamp housing on the rail before it is mounted on the ceiling.
- Connection is made when the power is off during or at the end of the ceiling assembly.
The rack ceiling is ready, it remains only to brush off the dust from the panels and enjoy the work done. As you can see, the installation is quite simple and does not require huge knowledge and experience, which means that any beginner can do it.