Laminate is a fairly cheap and durable coating, very often used for flooring in modern rooms. Its main advantages can be considered high resistance to mechanical damage and aesthetic appearance.
The history of the laminate began in 1977, when the first boards were sold. However, at that time this material did not receive sufficient distribution. The fact is that the laying of the laminate was very difficult, it required professional skills and the availability of special equipment. Moreover, he was very expensive. Therefore, for decoration, homeowners preferred parquet.
The situation changed when, in 1996, the Belgian company Unilin Decor NV invented a lock that allows you to connect individual panels in a glueless way. Laying a quick step laminate (the so-called advanced coating was called) was now nothing complicated. It became possible to do this even on your own. As a result, such panels became a hit of sales in 1996 and are very popular to this day.
In 2002, by the same company, the lock connecting the boards was significantly improved in terms of ease of snapping. As a result, laying the laminate has become even easier. Installation technology is not particularly complicated. The only thing to remember is that the base under the laminate floors must be perfectly even. It can be a
concrete screed or self leveling
floors . Installation on a wooden or tiled surface is allowed. In the case of a large degree of unevenness of the base, it is better to cover the
draft floor with sheets of plywood or OSB.
Laying the laminate should always be done so that the boards lie along the direction of the rays of light, that is, perpendicular to the window. If this condition is not met, the joints between the panels will be very noticeable, which can visually spoil the appearance of the coating. If the windows are located on two or more walls, as an option, diagonal installation is allowed.
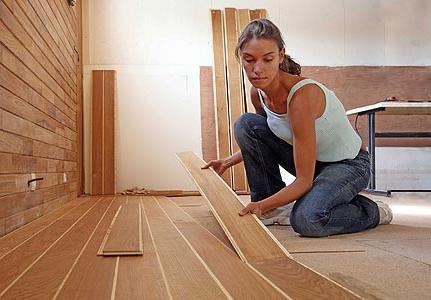
The boards are mounted in a staggered manner, that is, with the rows offset so that the panel of one row relative to the panel of the other is offset by a quarter or half. Layout options for the laminate are not very diverse. Installation can start from the corner or from the door. In this case, it is necessary to leave a gap - the space between the coating and the walls around the entire perimeter is at least 1 cm. The laminated board can change size depending on weather conditions, and therefore, if you make the joint end-to-end with the walls, it may “swell” in the future. Clearances are also necessary next to static objects on the floor - pipes, radiators, etc.
First, the first board is laid, then the second spike is inserted into the groove of its end face, and with a little effort is latched. In this way, the first row is mounted. The last board is cut to the required length. The remaining piece, if its length is at least 25 cm, is placed at the beginning of the second row. After several boards are connected, the first row is slightly raised, and a crest of plates of the second row is inserted into its lateral groove.
Despite the fact that laying the laminate is not difficult, you need to observe a certain amount of accuracy and not violate the technology. In this case, you are guaranteed to get a high-quality and beautiful coating that will last you more than one year.