Summer cottages for a very large number of people are not only places for summer vacations, but also a way to show their self-expression and creativity. Various crafts, which are quite feasible to do yourself, are perfect for decoration. In this article, you will be able to get acquainted with a variety of options for crafts for giving yourself.
Why are different crafts useful
In almost any private courtyard there are products that are made by the hands of the owner. They can be called original business cards to improve the site so that it is as suitable as possible for a good rest.
Do-it-yourself garden crafts and summer cottages have their indisputable advantages:
- You can spend time with households. If you attract the younger generation to work, you can begin to instill in children a love of work. In addition, there is nothing heavy here. At the same time, any adult can learn something interesting from the fantasies of a child.
- For summer crafts, you do not need to purchase any expensive materials, it is quite possible to do with improvised tools that are on the site, namely: wood, plastic, tires from vehicles, stones, laser disks, foam blocks and much more.
- The executed decor elements will make the summer cottage more original and interesting.
Interestingly, you do not need to have any supernatural skills to make an original craft. If we talk about tools, it will be enough of what is on the farm for any self-respecting owner.
What can be made of plastic
The simplest and most popular material is plastic. Bottles often accumulate in such a large amount that a person simply does not know where to put them, except for sending them to the trash. But, instead of taking the container into containers, you can take it to the cottage and give it a second life there.
Plastic crafts for summer cottages easily turn into real masterpieces, such as: original curtains on the door, fences for the garden, bird feeders. You can go even further and create a collection of artificial flowers, animals. Such material is also suitable for creating an unusual flowerpot in which the vegetation will look beautiful.
How to make a curtain
A similar option will be very convenient for a country house in order to slightly partition the space. It is worth saying that the idea is very original, due to the transparency of the bottles creates a unique decor directly in the room or on the veranda. And this, if not to talk about how beautiful everything will look in the sun.
Before starting work, you need to acquire the following materials at hand:
- plastic bottles, starting from a volume of 0.5 ml;
- scissors and a knife;
- a small amount of sand, pour it into an unnecessary pan;
- strong fishing line.
Procedure
Cut the lower parts from the bottles using scissors or a knife. The edges must be trimmed to achieve a smooth outline of the workpiece.
At this time, you need to put a pan with sand on the stove so that it warms up. This device will help get rid of the remaining sharp edges of the plastic. It will be enough to immerse the bottom of the bottle in the sand for 3-5 seconds.
Billets are made in the quantity in which it is necessary. Then, the resulting flowers need to be strung on a fishing line. The bottom is pierced with an awl; it can also be heated to facilitate operation. Plastic is strung on a fishing line like beads. As an original craft for a summer residence, you can make a curtain from a solid canvas. To do this, the bottoms of the bottles are pierced in different places, and fishing line is already being threaded through these holes.
How to make flamingos
Another interesting option for country decor. Here you will need the following tools to work:
- 5 liter plastic bottle;
- metal rods in the amount of 3 pieces;
- unnecessary rubber hose;
- acrylic paint and varnish.
Work order
For the manufacture of legs and neck you will need bars of metal. They are bent and then threaded through a plastic canister.
On top you need to wear pieces of hose, which are then painted pink. Holes are made in the large bottle, into which then you will need to insert the feathers of an unusual bird. These elements are made very simple by cutting longitudinally several bottles with a smaller volume.
The head is made of a wooden block or cement mortar. You can also use putty putty or other material at the discretion of the master, which is within walking distance.
At the very last stage, painting is underway. First, feathers and torso are covered with pink acrylic. To keep the paint for a long time, it must be fixed with varnish. So, another version of the crafts for the cottage is ready.
The next most popular place is wood decor. You can make an interesting craft from branches, an old stump or boxes that are not needed at all.
Different options for wooden structures
For work, you can use logs or, for example, logs. If the material has chaga (mushrooms), then do not rush to get rid of them. They will become an original addition to the idea that came to mind and may well serve as the basis. It remains only with the help of improvised means to make the hair sculpture, to think about how to make a face, as well as arms with legs. The result is a wonderful goblin. And if you make several figures, then they can make up the whole composition.
But not only fairy-tale characters can serve as an original decoration of the yard. As a crafts made of wood, different animals are suitable for summer cottages. The sculpture can be both miniature size and made in full growth.
A log will be a great decoration for a flower bed, especially if you give it a mushroom shape. The most popular among the old man is a little forest man, who can often be found in a particular Russian fairy tale. Some landowners specifically purchase logs to decorate their land, and some use stumps from trees cut as a result of necessity.
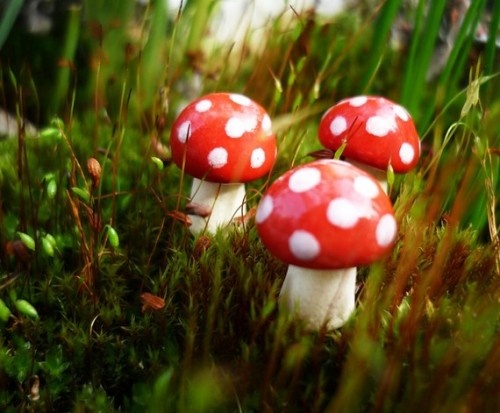
How to make mushroom
It is worth considering how to craft a wooden craft for a summer residence in the form of a fly agaric in more detail. To work, you must have the following materials:
- wooden log;
- gypsum building;
- an unnecessary bowl;
- plastic bag;
- water
- white and red oil paints;
- fine sandpaper;
- 2 brushes: one large and the second small.
Step-by-step instruction
- The log is selected as large as the mushroom is planned. If you want to create several sculptures, then you can pick up different pieces of wood. It is they who will act as the basis.
- At this stage, you need to mix gypsum to get a creamy consistency. It is worth considering the ability of the material to dry quickly, and therefore it is better to make a more liquid mixture.
- Gypsum is applied to the log in such a way as to produce a pear-shaped mushroom leg.
- If it turns out not quite evenly, then you need to wet your hands in water and make the necessary surface corrections. The most important thing here is creating the right shape.
- Now the leg remains to dry.
- Free time is worth creating a hat. Here you need a bowl that has a suitable size, which is closed with a plastic bag.
- Gypsum is mixed with which the bowl is filled and the workpiece remains to dry.
- Then you need to carefully remove the bag from the container, and smooth the existing grooves from the bag with a new portion of gypsum.
- With the help of sandpaper, but only after complete drying, the leg is skinned first, and then the fly agaric hat.
- At this stage, the painting of the constituent parts of the fungus.
- The last step is to plant the leg on liquid nails and attach it to the leg of the mushroom.
Here are such interesting ideas for crafts for home and garden will help to decorate any garden. You can also use car tires from which the original flowerbeds are created, cascading plants grow well in them.
It would seem that unnecessary stones, but they are perfect as a basis for a sculpture or creating a beautiful border.