Usually household sewing equipment is quite easy to operate. But for a simple layman who uses a sewing machine once a year to renew supplies of kitchen towels or pillowcases, it’s quite difficult to remember the basic rules for threading or winding a bobbin. However, a few minutes in the study of the instruction manual - and you can begin to work. But how to thread a sewing machine if this document is lost? Or how to deal with a three-thread or four-thread overlock if you completely forget the fueling scheme? Are there any basic rules? This is what will be discussed later. So how to thread a sewing machine?
It is worth noting that for sewing you will need to make upper and lower dressing, so it is advisable to consider both processes in more detail and understand the principle.
Basic rules for threading the upper thread in the sewing machine
Of course, all models have their own differences, but the principle of operation of these units is the same, so you can distinguish the basic rules:
- The thread must be on the spool, which is installed on a special pin. Depending on the model of the unit, this can be a pin on the top panel of the machine body or a specially equipped case for the coil located near the handle for carrying the machine.
- Next, the thread should pass through the holder, providing the desired tension and the zone of the tension regulator.
- The next element is the thread raising lever. If the thread is incorrectly threaded through it, it will get tangled on the fabric and break off.
- Threading the sewing machine involves its passage through special clamps and hooks that provide the necessary tension and prevent tangling. Therefore, the thread, going down to the needle from the feed lever, must pass through the hooks on the holder.
- When entering the needle hole, you need to make sure that the thread does not wrap around it, and there are no corners on the edge that impede passage. Some models of a higher class have a special device in order to insert the thread into the sewing machine. However, without it, it is quite simple to do.
Sewing Machine Bottom Threading Rules
The principle of laying a machine line is that two threads are involved in the work, which are intertwined at the puncture site. But all of her work depends on how to thread the thread into the machine. After all, a greater number of malfunctions are reduced precisely to improper operation. Therefore, for the correct operation of the unit, the correct upper and lower threading of the thread into the sewing machine is mandatory. The whole process of installing the lower thread can be divided into two stages:
- bobbin winding;
- setting the thread in the shuttle.
Almost all new models have special indicators on the case for winding the bobbin (a small bobbin with a bobbin thread), but if there are none for any reason, you should study the body of the unit. It should have a small pin with a switch and a winding limiter in the form of a disk on a pin.
Then it remains to figure out how to thread the bobbin. To do this, the coil is installed on the main pin (or in the box), passed through the device of the holder for tension, attached to the coil with several turns, switch to the winding mode and start the unit. Typically, this mode is activated by moving the bobbin pin to the side.
Next, insert the thread into the sewing machine. And here you should determine the type of shuttle, on which further actions depend.
Features of installing a bobbin in a vertical shuttle
Vertical shuttle is characterized primarily by its structure and location. In it, as a rule, there is a removable housing, where the bobbin is inserted. The free edge of the thread should be held in a special hole under the pressure plate. This is done quite simply, just lay the thread in the slot and pull. Next, the housing is inserted into the shuttle device until it clicks. At the same time, the so-called finger should look up, and the part should be held by the special clamping handle. When the lower thread is in place, the needle is lowered and both edges of the threads (upper and lower) are brought to the working surface. Perhaps this is all you need to know about how to thread a sewing machine.
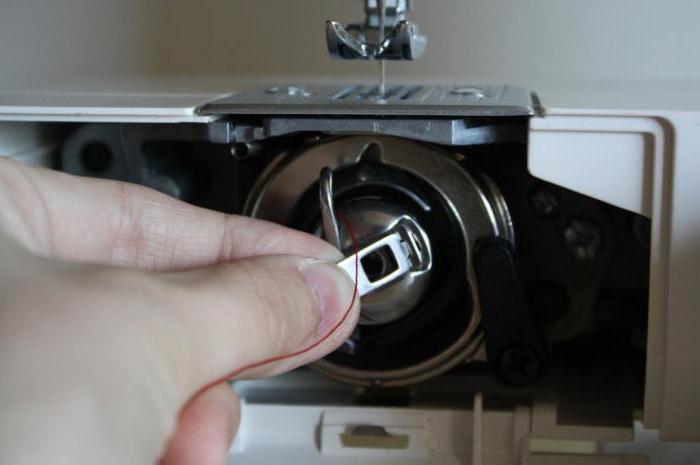
Features of installing a bobbin in a horizontal shuttle
The process of threading the lower thread of the machine always starts with winding it on a bobbin. Installing the thread in a horizontal shuttle is more primitive, as well as its device as a whole. Here the bobbin is placed in a special hole under the cover under the working needle. Then spend the free edge of the thread by pulling into special slots. Next, lower the needle and bring out both edges of the threads.
The quality of the stitch depends on how to thread the thread into the sewing machine. Ideally, the threads should be intertwined in the puncture of the fabric, but if loops form on one side, make sure that the tension is adjusted. If the problem persists, you need to check all the elements of the fueling path again.
Features of threading overlock
All the leading manufacturers of sewing equipment, caring for the user, directly put on the case markers for threading working threads and paint hooks. Each serial number has its own color: red, green, blue or yellow. But how to thread the overlock without pointers?
Here you also need to understand the basic principle of the unit. For example, in a four-thread overlock, the first two threads are for needles, the rest for the upper and lower loopers. So, how to thread the overlock with two needles?
Needle filling
All spools should be installed on special pins and pass the threads through the holes on a special lifting rack. Then, on the upper part of the housing, insert it into the holes in front of the clamping devices for tensioning, designed to prevent tangling of the threads during operation of the unit. Further, for each of them there is a separate path from the tension regulator to the exit to the needle or looper. In a two-needle overlock, both threads are connected in the area of the raising lever and pass through all the hooks together, being separated only at the entrance to the needle. The thread from the first spool on the pin goes to the first needle, the second to another. Next, you need to deal with the dressing of loopers, which, in fact, cover the edge of the products.
Looper dressing
The third pin is the upper looper. The thread descending from the clamping device in a special groove should be brought out to the panel with holders (hooks). Clinging to one of them, it is led out to the upper looper. After again, they are fixed in the holder and carried out into the hole of a large hook.
The fourth pin is the lower looper. The thread is also lowered to the panel with the holder, attached to it, after which the overlock flywheel is rotated so as to open the looper stand, the thread is hooked by two hooks and carried out into the looper hole. After they click on the foot of the unit to start work. You should make the first few stitches with the flywheel, and then you can add speed.
If you know the main points of operation of sewing devices, none of the models will cause difficulties with the question of how to thread the thread in the sewing machine and overlock. Everything is quite simple. The main thing is only to study all the elements of the unit and carefully consider the refueling process.