Every mother knows that in the summer heat, the baby's head should be reliably protected from sunlight. Kerchiefs, caps, panamas - these are the hats that must be present in the summer children's wardrobe.
A crocheted panama hat for children is an accessory that any mom can master with her own knitting skills. At first glance, this might seem like a tough job. But it is not in vain that experienced knitters call their tool a “simple hook”. The main thing is to master the technology of knitting the main loops, and then everything is very easy. Panama hats for children are those items of clothing that fit quickly and easily.
Basic Rules
If you know and adhere to the following recommendations for crocheting hats, then the panamochka will turn out to be beautiful, and reliable, and convenient. The first thing that you need to remember the skilled knitter: the children's panama is crocheted in the direction from top to bottom, that is, from the crown. At the beginning of knitting, a chain of several air loops is drawn onto the hook, which are closed in a circle. Next, knitting goes in circular rows with the addition of loops in each row to form the bottom of the panama. For summer hats, in most cases, openwork patterns are selected. Panama made by lace, light and beautiful. They pass air well, which allows the baby's head to breathe.
In order for the children's crochet panama to turn out beautiful, knitting should be carried out adhering to the rules of knitting a circle generally accepted by needlewomen. To make a circle with double crochets, make the following calculation: dial the air loops (6 pcs.) Into a chain, then make a ring with a connecting loop. In the 1st circular row, knit 2 double crochet columns in each lower loop. The result is 12 columns in this row. Next, conditionally divide the circle into 12 segments, in each circular row add evenly 12 columns with a crochet (1 in each segment). In the 2nd row there should be 24 columns, in the 3rd row - 36 columns.
If the children's panama hat is crocheted with crochets, then the calculation of the loops is performed somewhat differently. 3 air loops are typed. They are locked in a ring. In the first circular row, knit 2 single crochet columns in each lower loop. Get 6 columns. Divide the circle conditionally into 6 segments, add 6 columns evenly in each row. As a result, it should turn out like this: in the second row - 12 loops, in the third row - 18 loops, in the fourth row - 24 loops and so on. Knitting with crochets is denser. Therefore, if you take this type of knitting for the panama as the main one, then you need to select thin yarn.
When the circle reaches the desired diameter, knitting is performed without increases. With each row it becomes more noticeable how the canvas takes the shape of a hat. In this way, knit to the desired size. It is advisable to try on the product all the time on the head of the child so as not to make a mistake with the size.
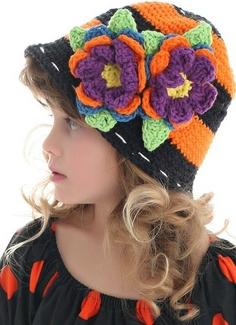
Decorative knitted baby panama
Having tied the headgear to the desired size, you should draw the bottom edge harness. Knitted panamas for girls are tied with a border of "shell" or "fan". For the design of caps and panamos, boys often use the harness “crib step” or “corners”, a visor can be made.
Crocheted children's panamas will look elegant and original if they are decorated with decorative elements: knitted flowers, bows, lacing or applique.
In the headdress, tied with the caring hands of the mother, the baby will be cozy and comfortable.