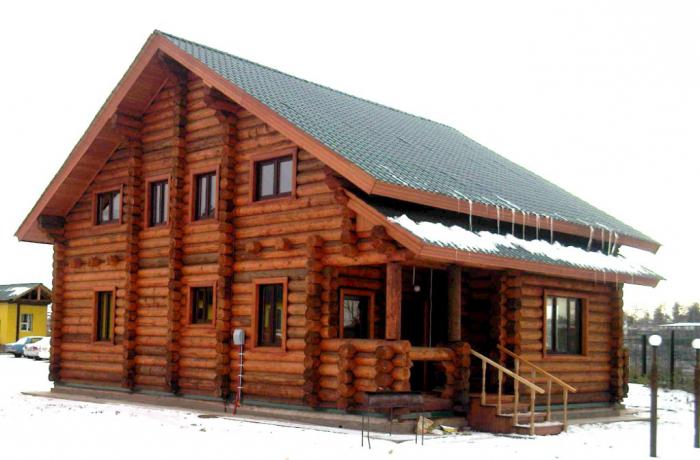
In the construction market, there is an abundance of materials for building a house, but ordinary log houses are again becoming popular. The possibilities of wood processing, environmental friendliness of the material, its thermal conductivity make it the best choice. While maintaining the technology of erecting a house and selecting material in a dwelling, there will always be comfortable humidity and temperature, and the natural secretions of a tree in the form of resin are only useful for humans.
Log houses fit perfectly into the natural landscape, look natural and peaceful, and options for finished projects will satisfy even the most sophisticated taste.
Tree selection
To begin with, it is worth determining what type of log the house will be built from. The construction of log houses in Russia is gaining momentum, and a rounded log is a popular material in our time. It undergoes mechanical processing, takes the perfect shape and is assembled like a designer. It takes a little time for construction, such a material hardly gives shrinkage, but the logs are removed during processing the most durable layer - sapwood, and the surface is impregnated with antiseptics and various strengthening solutions.
A hand-log, or “wild” log, will require a lot of processing time. Construction is best done in the winter months when humidity is constant. The construction will take up to 6 months, since each log must be individually adjusted, then another year the house will shrink. Only after this can you start inserting windows and finishing work.
Log houses are also made of glued beams. Such material is not available in all regions of Russia, but construction of houses of any shape is possible from it. The tree has already been processed, and no shrinkage is expected.
The tree itself is worth picking conifers: pines and spruce are more convenient to process and, thanks to a large amount of resin, are resistant to moisture and last longer. It is desirable that the tree was grown in the same area where the house is being built - so the natural humidity will not change and the tree will give less shrinkage.
It is also worth considering that the logs are uniform yellow or dark yellow in color, the cut is even without tar pockets and visible defects. Cracks from the butt should not penetrate more than a third of the diameter of the log.
Foundation preparation
A plot for the future house needs to be prepared and before that, determine the type of foundation. Log houses do not have a lot of weight and do not require a powerful foundation. Basically, they use a concrete strip foundation, deepened to the depth of freezing, there is also a variant of the foundation on concrete or on screw piles.
If you want to save time, nerves and money, consult a builder who understands what log houses are for advice. Ready to find projects are easy to find, they have already calculated the amount of material and costs - this will also save time.
First you need to remove the plant layer to a depth of 15-30 cm. Level the area. If you chose screw piles, then no more excavation work will be required, a trench will be needed for the strip foundation, and wells will be needed for the piles.
The foundation on screw piles is simpler and cheaper, but in reliability it is much inferior to its competitors, although with their use log houses are often erected. The photo clearly shows this option.
For concrete piles and strip foundations, crushed stone and sand are poured, a reinforcing cage is installed and concrete is poured. A vibrator is necessary to seal the mixture, and in general it is worth observing the technology of laying concrete for the long service of the foundation.
To protect the future home from groundwater, it is necessary to perform vertical waterproofing of the foundation, for example, plastering, and horizontal. On the upper edge of the foundation, rising 30-50 cm above ground level, roofing material or any analogue of it is laid.
Mounting options
The main task in the construction of the log house is the question of fixing the walls between each other, as well as lengthening the logs. There are several mounting options. And all of them are used when log houses are being built. The photo shows one of them.
To save material, the logs are fastened so that they do not protrude beyond the walls. However, this raises the problem of additional node protection, because the residues in the connections play the role of a protective buffer. Humidity changes they take over and protect corner nodes. To lengthen the logs overlap.
The most common options for connecting logs to each other are a simple bowl, comb and kurdyuk. In the construction of round logs , a simple bowl connection is used, it is the simplest in execution, but the comb and tailpiece reduce the likelihood of cold bridges.
To fasten the logs along the crown, use pins - this is a rod made of metal or wood. He holds two crowns together. It is better if the nagel is made from the same tree as the log houses. The projects provide for the exact location of the holes for the dowels and other types of fasteners.
Required Toolkit
If you decide to build a log house with your own hands, then you should prepare. A good tool is the key to quality work! To build a wooden house, some tools will be required. A small carpentry ax will be very convenient for cutting knots, fitting parts and joints. A hand saw is necessary by default: what else to saw a tree? With a large amount of work, it is better to acquire an electric or chainsaw. An electric drill is useful for drilling holes for pins. The tool for marking cuts in knots is a “dash”, or scriber. You also need a small hammer, and preferably a mallet to hammer pins. The chisel will also not be superfluous if the insulation when moving the logs moves and needs to be returned to its place. Sometimes they use a construction stapler to fix the insulation.
Do not forget about the level, since it is worth controlling the horizontalness of the crowns each time.
Walling
We already have a foundation, it’s time to raise the walls. It is impossible to lay logs right away, to distribute the load, a coniferous board is laid under the first crown, sometimes a beam 50-100 mm thick with a width of up to 150 mm is used. Next begins the assembly of the log house. The first logs are stacked from opposite walls, then the other two. The groove and recesses of the bowl are filled with insulation (moss, tow, jute, etc.). They try so that the insulation hangs on both sides by several centimeters. Then the crowns are laid out in the same order as the first. It is necessary to observe 90 degrees. between the logs and control the horizontal position of the whole structure.
The two crowns are fixed with each other with pins (the hole for them is drilled with a slightly smaller diameter than the pins themselves) and are hammered to a slightly smaller depth than the hole so that there is free movement during shrinkage. Nagels are clogged in a checkerboard pattern and always in corner joints.
Roof installation
The next stage of construction is the installation of the rafter system. Beams are mounted in the upper crown. If necessary, stack the Mauerlat. The rafters themselves are installed in increments of 600 mm. The metal ridge connects the ridge analog. For reliable fixation of the structure, sliding supports are used to the upper rim. The crate is placed depending on the roofing used.
After that, the walls are caulked, closing all the cracks. Log houses are left alone for one year for shrinkage, after which they are once again caulked. Only now door and window blocks are being inserted, since the tree shrinks up to 12%, then with early installation they could simply be broken down.
Log home decoration
After shrinking and connecting all the networks, it's time to start finishing work. Log houses, like any other, can be sheathed with siding, sewn with plaster or other material. There is only one limitation: it is not necessary to use airtight materials, films as a finish, since wood is very sensitive to changes in humidity and ventilation conditions.
Just take your time to completely sew up the walls. Properly processed, they look very colorful and do not lose color for many years.
Terms of Use
As with any other structures, you need to look after the tree. To organize a drain so that water gets less on the walls, at the first signs of the appearance of bark beetles, treat the tree with insecticides. It is recommended that after a year of operation, re-drill all the cracks. It is better to detect and eliminate small minor defects at the stage of origin than to remodel entire sections of the house.