There are many types of embroidery. It is mainly divided into two varieties - stitch embroidery and cross-stitch. Although there is still embroidery with ribbons for example. Counted cross - one of the types of embroidery in the cells.
Embroidery embroidery discord
The counting cross is the oldest of all types of embroidery, in which the main element is the crosshair of the threads. Today, needlewomen can also talk about printed cross-stitch or uncountable. This type of needlework was born as a result of a desire to help needlewomen - why suffer with a bill if you can just work on the canvas with the pattern applied to it. Change the thread in time to a different shade - and you do not need to constantly recount the elements in the diagram, and then compare them according to the work done. But a true counting cross is a real pride in the result. But it is expensive. Moreover, for those who are really passionate about embroidery, it is the counted cross that is real creativity, but embroidery according to the printed drawing on the canvas is simply pampering.
Where to begin? With theory
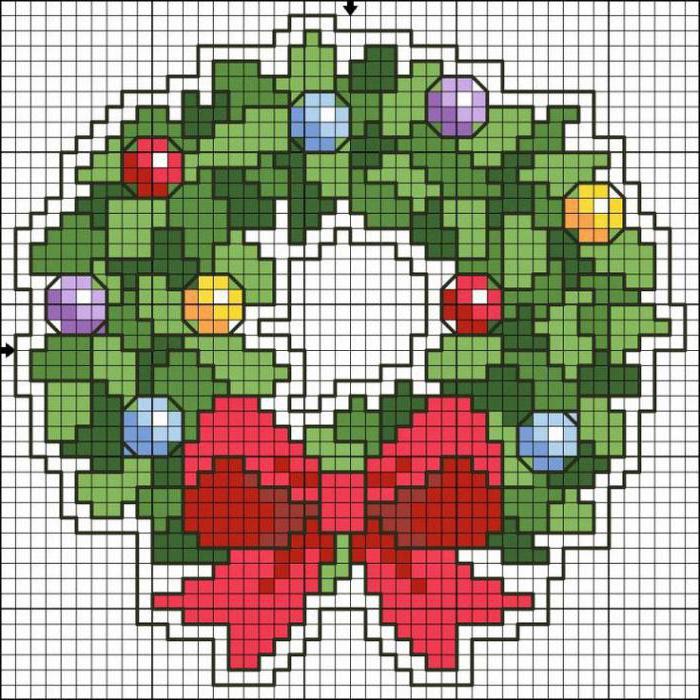
Embroidery counting cross is based on the absolute accuracy of the embroiderer: one incorrectly stitched cross - and the work can go awry further if the error is not found in time and corrected. This, of course, will cause large losses in time. Therefore, an important element of embroidery in counted cross stitch technique is patterns. The drawing, which causes a desire to work, is transferred to the scheme - multi-colored cells indicating piece crosses of a certain color. Such patterns were developed in abundance by embroiderers both independently and with the help of special computer programs.
Cross Stitch Technique
Counted cross stitch embroidery, the patterns of which can be the simplest, monochromatic, and can contain many color shades, involves working with only one technical element - a cross. A simple cross is most often used, although there are several techniques for performing such an element. A simple cross is the most convenient account to use. It is done like this:
- base is a square;
- the first stitch is laid from one corner of the square to the opposite diagonal angle;
- the second stitch captures the next pair of diagonal angles, returning the needle to the side of the start of work.
In order for the result to turn out to be of high quality and look as neat as possible, all crosses must be performed the same way. For example, first diagonals are flashed from the upper left corner to the lower right, and then diagonals from the upper right corner to the lower left. Each embroiderer for herself decides how it is more convenient for her to work - from right to left and from top to bottom or vice versa, it does not matter. It is important that all crosses look the same.
How to fill in the picture field?
Embroidery in the technique of counting cross allows you to fill the body of the picture with one color in the required areas without breaking the thread.
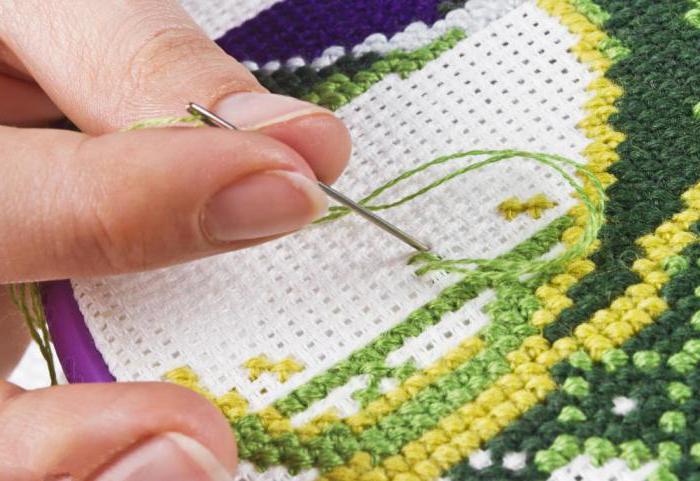
This is convenient for those who are very attentive to the count of stitches and are able to navigate in the color change on the empty field of the pattern. But it is much easier, according to many who have already mastered this type of needlework, to use the so-called inline method. What is its essence? Crosses of the same row are completely sewn with a thread of the same color, that is, in the forward and backward directions. The thread changes to the next color, and the same row in a row is stitched with the required number of crosses of a different color. If the distance between two separate sections of a row of one color is small, then the thread can not be cut off, and after counting the number of cells of another color, continue working with the color of the thread that started the row. So, stitching row after row, embroidery counting cross. The cross-stitch technique using the inline method is more convenient and simpler; it allows you to make fewer mistakes than if sections of one color in the entire field were filled first, then another, then the third and so on.
So that the thread does not slip
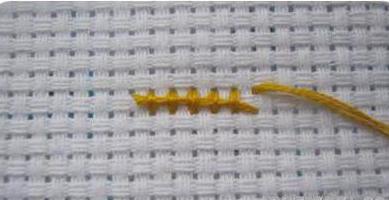
Any work with threads requires their fastening, so that the thread does not slip out during the operation or operation of the product. Nodules are made for this. But in this kind of needlework, like embroidery, knots are not made. Well, how to embroider a counted cross? The description of the beginning of work for those who are only getting acquainted with this type of needlework will begin with the rules for fastening the working thread. There are two of them:
These seem to be completely impossible requirements. But in fact, everything is very simple. The working thread is held precisely at the expense of its "tail", but it must be hidden. And you can hide the tail of the working thread either from the inside of the work, or from the front side. It is convenient to hide the thread’s tip on the “face” when the skein for embroidery is thick enough, then the tail is pulled out to the front side from the first stitch and during operation it is placed under several subsequent stitches until it completely disappears behind them. On the wrong side, things are exactly the same, but the tail of the thread is hidden under the transition stitches. The wrong side as a place for attaching the working thread is most suitable when the skein is not too thick in relation to the size of the canvas, on the front side it will be visible through the stitches. But a thick skein will give an excessive amount of stitches, so the wrong side for attaching the thread in this way is still more preferable than the front. Some embroiderers fasten the tip of the thread by tightening the loop on the canvas thread. Which method is more convenient and practical to fix the working "tail" - the embroideress decides.
Working material
Any work, including creative, requires material. In embroidery, the counted cross is:
- Canvas . It can serve as the basis of work, its canvas. Such a canvas has a dense texture, the weave is elastic, quite rigid, the threads do not diverge among themselves, but keep the shape of cells. But there is another canvas - as an aid. Such a canvas is applied to the base fabric for uniform crosses, and at the end of embroidery, it is pulled out of the picture.
- Threads for cross stitch. Use different threads - silk, floss, polyester. The most important thing is that they do not fade, are slippery, but do not twist into knots in work. Usually embroiderers give preference to a mouline thread, since it is precisely it that meets all the requirements of this type of needlework, as it is created for it.
- Needles . Yes, there may be several identical needles in the work, so as not to pull out the thread whenever a transition to a different color occurs. The needles should be of high quality - strong and straight, not too long, with a good, but not wide eye.
- The hoop is special hoops between which the fabric is stretched (stained). Depending on the size of the embroidery, the hoop selects the appropriate diameter. After work, the base is processed and used as intended. Although there are hoops that are suitable as a frame for an embroidered picture. They are textured, with a special lock with a patina - antique. In them medium-sized works look very impressive.
- Scissors - some with thin blades for thread, others ordinary dressmakers - for working with canvas.
Foundation basis
Just as an artist uses canvas or a sheet of paper, so the embroiderer uses fabric. And to make it convenient to work on, they put it on the hoop. How can this be done so that the counted cross stitch embroidery is organized correctly? The principle of cross-stitching is the uniformity of all elements, which is achieved with a canvas. Therefore, the base must be tensioned evenly:
- the smaller hoop ring must be placed on a flat surface;
- deploy fabric on top of the ring, straighten;
- cover with a second ring and fix the clamp so that the rings are held tight enough, but the fabric could be pulled;
- supporting the ends of the fabric, align its weave so that it has the correct geometric shape, and all cells are square;
- tighten the rings to the end so that the fabric does not bend or slip.
You can embroider.
Finishing touches
The counting cross involves working with only one basic element - the cross. But other elements help to give the job more grace. So, in simple pictures, you can use the embroidery stitch "back to the needle", which pass the contours of the depicted objects and their parts. Small details that you want to highlight, for example, buds of leaves or buds of flowers, embroider raisins on a cupcake using knots, giving the work some volume. Cross-stitching is not too democratic, it rarely allows you to complement the work with other techniques, so that the result is amazing. The most commonly used contour additions to give greater clarity.
How beautiful!
Anyone who evaluates the work done sees only the result. And it will consist not only of the plot, but also of painstaking accuracy. If the work is done carelessly, no matter how beautiful the scheme may be, no one will praise it. Therefore, accuracy in the technique of cross-stitching is the basis of a qualitative result. And for the work to bring satisfaction, you need to know how to embroider with a counted cross according to the pattern, observing several rules:
- Choose quality materials. If the threads in the process will shag, cling to knots, and then also shed, then all the work will go down the drain. Needles should also be good - straight so that it is convenient to work with them, with a narrow eye, so as not to disrupt the structure of the fabric.
- The fabric should be hooped into the hoop evenly, avoiding distortions.
- Nodules in the embroidery are not done! The tail of the thread is carefully hidden during operation.
- The most important thing is to accurately calculate the number of crosses in one section of the same color, the pattern depends on this.
- Absolutely all crosses should "look" in one direction. This is connected not only with the rules of the counting cross, but also with the play of light on the finished work.
- Finished embroidery needs to be moistened and allowed to dry. The embroidery on the wrong side is steamed with steam, without pressing the iron.
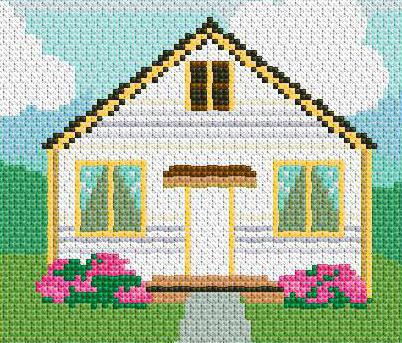
Counted cross stitching allows you to make small pictures, single objects or simple patterns, but it can also become the basis for a large-scale canvas - a whole plot picture. Schemes for such work, of course, are very different. If you use a ready-made scheme, then you should choose the threads in accordance with the specified line. If it is developed independently, then the colors are taken at will, a sense of harmony. For greater realism of the plot picture, one should not forget about the midtones, because it is precisely the shades that give vividness and naturalness to the finished work.
Counted cross stitch embroidery is a fascinating work accessible to people of all ages. She develops and maintains attentiveness, the ability to see the perspective of her work, fine motor skills of the hands, which is also useful for brain activity. Well, there’s no need to talk about the result of labor - a high-quality embroidery will be a matter of pride. Good luck