Crochet is a very interesting needlework technique, and in recent years it has only gained popularity. Not only handmade sweaters are in fashion, but also voluminous scarves, caps, interior items, toys, and bags are at the peak of popularity. Therefore, it is not surprising that many want to learn the basics of crocheting. First you need to choose the basic tools and learn the basic techniques.
Instruments
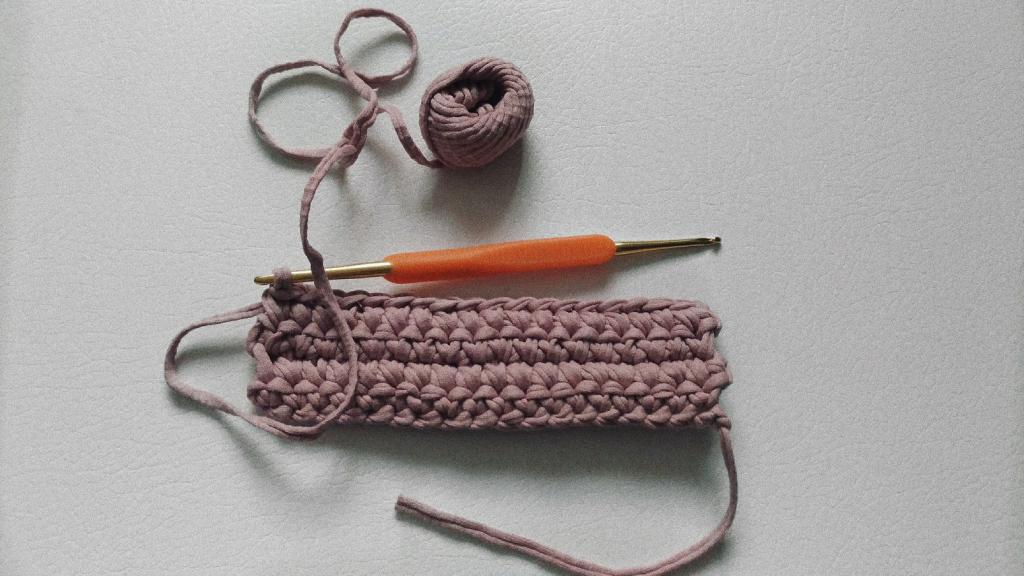
The first step to learning the basics of crocheting for beginners is choosing the right tool. Hooks come in different sizes, and which one to choose will depend on the yarn. Most often on skeins of yarn they write what size the hook is suitable for knitting. Its size, i.e. thickness, is indicated on the instrument itself and is measured in millimeters. If 3.0 is written on it, then this means that its thickness is 3 mm. In order not to make a mistake with the choice, it is best to try to hold different models in the store, tie a couple of rows with them, evaluate the slip of the hook, how it hooks the thread, and how dense the canvas turns out.
For beginners, just learning the basics of crocheting, it is sometimes difficult to navigate in the number of rows, to see increases. And in circular knitting, it may be difficult to determine the beginning of the next row. To avoid this, you can use markers. These are small mounts that are easy to remove, move and mark loops. Pins can also be used as markers.
To begin with, you should buy a needle with a wide eye for stitching different parts of the product or in order to hide the unnecessary ends of the threads. You will also need pins, a centimeter tape and scissors.
How to crochet?
After the tool is selected, you can proceed to the second step. It is impossible to learn the basics of crocheting without learning how to hold it correctly. One of the most common and convenient ways is like a pen. They usually keep it at a distance of 3-5 cm from the head.
Some hooks have special ergonomic handles with small recesses-planes that tell you how to knit them correctly, where to put your fingers. Also, the hook can be held like a table knife.
Working thread
There are many ways to keep a working thread. And, in fact, it cannot be said that only one is correct. The main thing is that it is convenient to knit and adjust the tension. The photo shows a very common way. It is suitable for those who are familiar with the basics of crocheting. The working thread is placed in the left hand. The piece that grabs the hook during knitting should be on the index finger, and the rest of the thread should slide through the palm of your hand. It's quite simple, you just need to practice a little. During knitting, the left hand holds the work and controls the tension of the thread. The latter may depend on what density the canvas will have.
Start knitting
In order to understand in practice how to crochet, you need to learn how to make initial loops. Each time, work begins with a set of air loops. To form the first of them, you need to retreat a few centimeters from the edge of the thread. The short edge is a non-working thread, which can then be hidden in the finished product. Further, only the second part is involved in the process, i.e. working. It is necessary to form the first loop, as shown in the photo. A small knot is tightened on the hook. A non-working thread can be released, it will no longer be needed. The start loop is ready. The working thread remains on the index finger. To tie the first air loop, the working thread hooks and hooks through the initial thread, as shown in the photo. The first air recruited. The rest are recruited by the same principle. It is important to ensure that the working thread is always equally tensioned, and the air loops are the same size.
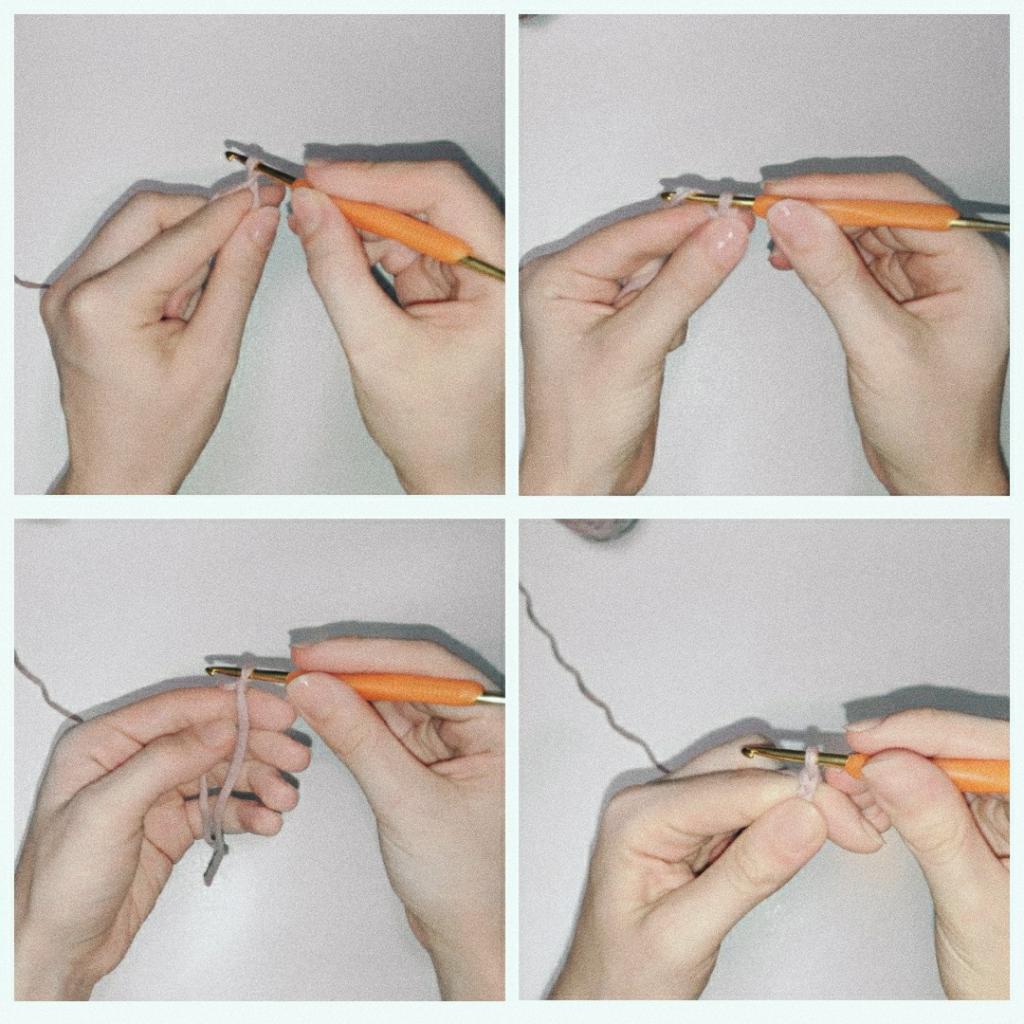
If everything was done correctly, then we get such a "pigtail".
Main loops
To learn the basics of crocheting, the main types of loops are the first things to learn:
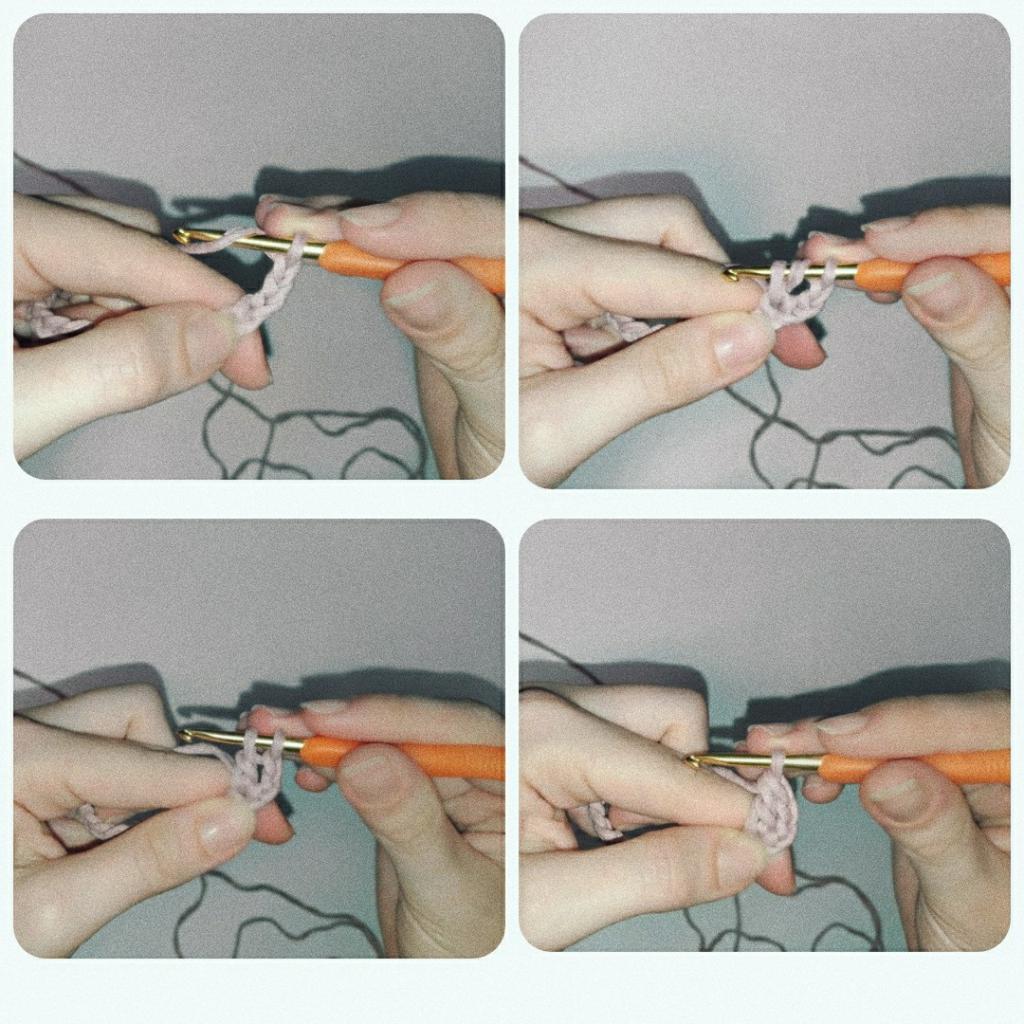
- Single crochet. This loop is one of the most common in knitting. To move from air to knitting single crochet, you need to add another air to the chain of loops for lifting. Lifting loops knit to form a neat edge of the web. Then you need to deploy the knitting horizontally, skip the air lift, pull the hook into the next one, hook the thread and pull it.
After this action, two loops will remain on the hook. Therefore, you need to again hook the thread and pull it through them. The first single crochet is crocheted.
Then they knit one at a time in all the air loops to the end of the row. To go to the next row, you need to again knit the air for lifting, expand the knitting and pass the hook under both segments of the first loop in the previous row, pull out the working thread. Two loops will remain on the instrument, so again you need to hook the working thread and finish the column, as was done in the previous row.
In the same way all the other columns of the second row are knitted. The following series are performed on the same principle.
Double crochet. Another common knit loop. To complete the first row, three more need to be added to the already connected air loops for lifting. Consequently, the first three are skipped, and the first column fits into the fourth. The working thread is thrown on the hook, and only after that it is introduced into the air loop and catches the working thread. There are 3 loops left on it. Once again, you need to hook the working thread and stretch it through the first two loops lying on the hook. And then repeat this action again with the remaining two. The first double crochet is completed. Then they fit one in each air loop. An example of a double crochet is shown in the photo. It is worth noting this knitting principle. The working thread is carried out through two loops each time, and this principle always works. Therefore, it is easy to assume that a double crochet column will also be knitted. Only the lifting loops will be more - four. And you can also make a column with three crochets (in which there are five more airs for lifting).
Connecting column. Its other name is a half-column. This is an auxiliary loop that is almost invisible in knitting. It is used for circular knitting, for closing rows, etc. For example, to start knitting in a circle, you need to connect a chain of air loops. To do this, the hook is threaded into the very first air loop, catches the working thread and pulls it through all the loops.
Allowances and decreases
Increases and decreases can be made at the beginning of the row, at the end, in the middle. These are the basic crochet techniques. They help to expand and narrow the canvas, change its shape. The photo shows the increase on the example of SC. In order to make an increase, you just need to connect 2 columns in the same loop together. It turns out that where there should be one column, there are two of them. The increase is ready.
To make a decrease, you need to combine two loops. The hook is threaded into the first and pulls the working thread through it. The same action is repeated from the second. Four loops of loose knots remain on the hook. To finish the decrease, you need to hook the working thread and pull it through all four loops lying on the hook. The decrease is connected. It turned out that the two columns merged into one.
All of the above techniques are the foundation. It is on them that patterns are based. Therefore, in order to proceed with further study, it is better to practice how to knit these types of loops. It is recommended to learn how to make loops of the same size. So the canvas will look neat and uniform. It is also important to feel the tension of the thread. This will help to make the same loops and monitor the elasticity of the canvas.