Probably, there are no such gardeners who are indifferent to orchids. These plants are characterized by rich, bright and long flowering, as well as the incredible beauty of the color of the flowers. The most common shades of petals are: pink, lilac, light yellow with a greenish tone, white, red, bright purple, chocolate. Flowers of natural species have an unobtrusive delicate aroma.
Phalaenopsis has no obvious resting period. Flowering at home usually occurs twice a year - in spring and autumn. If the most impeccable atmosphere is created for the orchid, then the plant can bloom three times a year. How the orchid reproduces at home, we will consider the photo below.
Orchid Features
Phalaenopsis is the most unpretentious orchid of all species, it is quite easy to grow it. But as far as orchid propagation is concerned, everything is not as simple as it seems. In order not to cause difficulties, it is necessary to take into account all the nuances.
In wild natural conditions, phalaenopsis settles on other plants and uses them as a support, but it is not considered a parasite. The roots are necessary in order to cling to the bark of trees. Moisture and vital trace elements orchid provides for itself, receiving them from the atmosphere through a system of aerial roots. The diameter of the roots is up to 8 mm, the top layer of which is coated with a special absorbent (velamen). Therefore, the roots have such a specific color - green with a grayish tint.
How Phalaenopsis orchids reproduce at home
Phalaenopsis belongs to the type of monopodial orchids. This means that the plant has only one growth point, which is located on the top of the sprout. It is more difficult to propagate them, because sympodial orchids that grow laterally have much more of these buds.
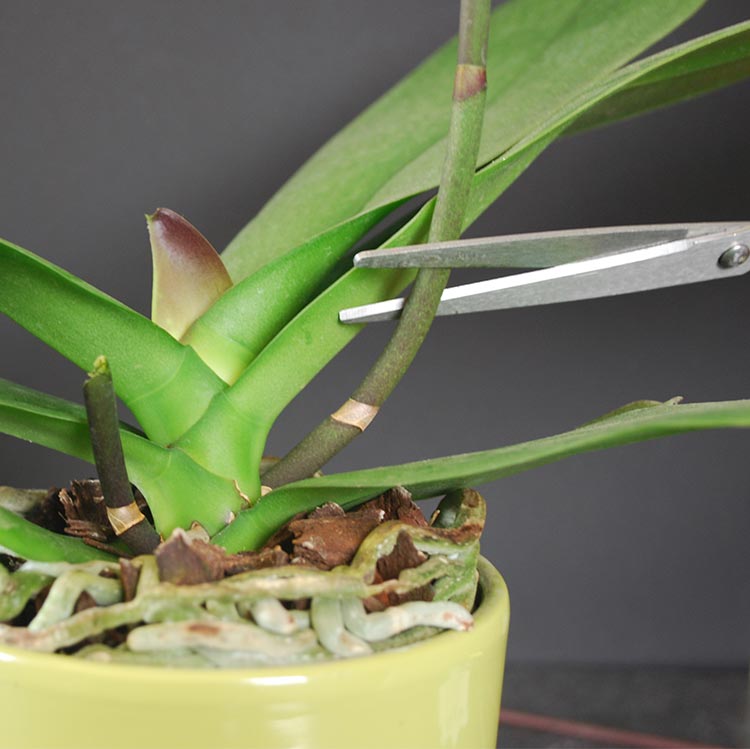
Before you start the procedure of propagation of a flower at home, you need to know the main nuances:
- All instruments must be sterile, knives and secateurs sharp, hands disinfected.
- All sections are immediately processed with chalk, activated carbon, or cinnamon. Iodine and brilliant green, used for other plants, are not suitable for orchids.
- The roots must be handled carefully. Although they are not thin, they are rather fragile.
- Orchids that have sprouted roots are transferred to a special soil, which is pre-saturated with water and slightly warmed up. After transplantation, the plant needs a warm indoor microclimate of about 28 degrees and diffused light. Over the course of a month, you cannot water abundantly (only spray) and leave the plant in direct sunlight.
Only healthy orchids, defect-free and not affected by fungus or parasites, are suitable for propagation. Lighting is very important, the minimum daylight hours should be 12-14 hours.
Soil for young orchids should be half composed of small parts of pine bark, and the second half of sphagnum moss, coconut fiber, peat and charcoal.
Reproduction by children
Consider how the home phalaenopsis orchid reproduces by children. This is the most popular method. The baby is taken from the orchid 2 months after flowering. The breeding procedure is most often carried out in the spring. Orchids, whose age is more than two years and has more than 4 leaves, growth buds are formed in the axils of the leaves or peduncles. In plants less than one and a half years old, buds may appear on faded peduncles.
Before you learn how orchids reproduce, consider a few methods to stimulate the formation of children.
How to stimulate the formation of children
- At night, transfer the plant to a cooler place, the difference should be about 10 degrees. But it is important to maintain high humidity in the room - 70% or more, as well as the duration of daylight hours more than 12 hours.
- In early spring, you can leave the orchid in the sun for several hours a day. If a reddish tint appears on the leaves, this is normal, but if the spots begin to darken, and there are no children, then you should complete the procedure.
- Deliberately arid. The orchid is not watered for two weeks, while protecting from the sun. As soon as the roots become a grayish tint, the soil must be moistened. In this way, the plant awakens and enhanced growth begins.
- Apply top dressing with nitrogen. The method is quite bold, since orchids do not tolerate this trace element, there is a chance that the plant will die. Even if the baby appears, flowering this year will not happen.
There is no exact answer when to separate the baby from the mother plant. Some gardeners advise cutting off the baby with the roots that appeared on them, others believe that it is not worth waiting for the roots, as they pull a lot of strength out of the plant, recommend separating after the leaves have grown.
How do orchids reproduce in children? Consider sequentially
Orchid propagation sequence by children
- After cutting the baby from the mother’s orchid, the plant’s wounds are treated with activated charcoal or cinnamon so that the infection does not spread. The baby is left to dry outdoors for one day.
- At the bottom of a plastic container that transmits light, make drainage holes and fill it with soil mixture intended for orchids.
- The soil is well shed with water.
- Children land in the ground, the containers are placed in a mini-greenhouse, which can be built independently. It is important to maintain a warm microclimate of about 25 degrees and good lighting.
- Periodically, the soil must be sprayed with a biostimulator of root formation (Kornevin, Heteroauxin, Zircon, Epin). Do not forget to arrange every day airing for 5 minutes.
- If the two lower leaves turn yellow, this is a variant of the norm. In no case do not remove, since from them nutrients come to the roots. After a while, the leaves will dry and fall off themselves.
- As soon as the roots grow to a length of about 5 cm, the orchid is moved to a special soil for adult plants. As a rule, this will take approximately one year.
Cherenkov method
Consider how orchids propagate by cuttings. This method is one of the easiest and less time consuming. For him, cuttings taken from a peduncle are used. Orchids that bloomed only three months ago are suitable for this. If more than a year has passed, then the flower stalks are not suitable for this.
How are orchids propagated by cuttings? Consider the sequence of steps.
Step-by-step instruction
- The peduncle should be cut off closest to the base. Treat slices with activated charcoal or cinnamon on the peduncle and maternal orchid.
- Cut the peduncle obliquely with a sharp sterile knife into pieces of 5-7 cm. On each segment, approximately in the center, there should be one sleeping kidney.
- Fill a low, spacious container with crumbled sphagnum moss. Moisturize it with a solution of root biostimulator and growth. Put orchid cuttings on top.
- Cover the container with polyethylene or glass. It is important to maintain a constant temperature of about 25–28 degrees, good lighting, humidity of at least 70%. Periodically carry out ventilation, constantly moisten the soil with a biostimulator of growth.
- After some time, roots are formed, the length of which is 3-5 cm, and two pairs of leaflets. It is perfectly normal, if part of the peduncle dries, it gives the necessary nutrients to the new sprout. On the eve of planting in a pot, it is necessary to carefully separate the dried parts from the formed sprout.
- Then it is transplanted into the soil for adult orchids.

Division propagation
Consider how orchids reproduce at home by the division method. This method is rarely used by gardeners. The risk of decay is very high, because of this the plant can even die. Phalaenopsis, which will be used for reproduction, must be large and absolutely healthy. By age, the plant must be at least 4 or 5 years old, be sure to have 3 or 4 pairs of leaves.
How phalaenopsis orchids reproduce by the division method, we will consider further.
Work sequence
- Cut the upper part of the orchid with a sharp disinfected knife, dividing it into approximately two equal parts. On both halves, be sure to be leaflets and roots. All slices need to be processed.
- The cut-off part is planted in the soil from one part of the crushed sphagnum moss and two parts of the pine bark. The soil should be slightly dried. The microclimate and lighting must be appropriate for the proper development of phalaenopsis. The substrate must be constantly moistened with a growth biostimulator.
- After a while, two pairs of new leaves will appear and then the plant is transplanted into the ground for adult orchids.
- The donor plant needs to provide maximum light, heat and periodically feed with fertilizers. After 2 or 3 months, children or new sprouts form at the site of the cut. The orchid will look normal for 1.5-2 years.
Propagating orchids with seeds
Orchid propagates by seed. Growing it at home in this way is a rather laborious process. The flower grower requires maximum patience, caution and attention, and it is also important to follow all the instructions for action. More recently, it was believed that growing an orchid from a seed is completely unrealistic.
The difficulty lies in the structure of the seeds, since they are very small, like pollen, and it is very difficult to collect them. Orchid seeds do not have tissue surrounding the embryo where all the nutrients required for ripening are stored. Future phalaenopsis cannot receive nutrition from the soil. Among other things, the seeds are very sensitive to the surrounding microclimate, fungal diseases and other bacteria, which simply will die.
So, we examined how orchids reproduce at home. Phalaenopsis is relatively unpretentious in care, and this is very advantageous for other orchids, not inferior to them in the beauty of flowering. In general, there is no difficulty in propagating a flower at home. You only need to first familiarize yourself with all the features of the procedure and follow the instructions exactly.
Photos of how orchids propagate are attached to the article.